
TL;DR

Get cleaning gear delivered free — and shop member deals
- Fast, free delivery on millions of items
- Access to Prime Big Deal Days deals on October 6–7
- Prime Video, Amazon Music and more included
Cleaning outdoor patio tile involves identifying the material, using gentle cleaning methods, and matching treatments to stains. Pressure washing and harsh chemicals can cause damage. Regular maintenance keeps your patio looking fresh without risking surface harm.
Your outdoor patio is a place to relax, entertain, and enjoy the outdoors. But dirt, algae, and stains can quickly turn it dull and uninviting. Knowing how to clean outdoor patio tile safely keeps it looking new longer, without risking damage or costly repairs.
Whether you have sleek porcelain, natural stone, or porous terracotta, each surface demands a tailored approach. This guide walks you through smart, practical steps to restore your patio’s beauty—step by step, with clear tips you can trust.
Identify your tile type before cleaning to avoid damage. Porcelain and ceramic are tough; natural stone needs gentler care.
Start with mild, water-based cleaning methods—hot water and a neutral soap—before trying stronger treatments.
Match your stain treatment to the substance: algae needs biological cleaners, grease responds to degreasers, and rust requires specific removers.
Use pressure washing sparingly and carefully—low pressure, wide nozzle, and testing first are key to avoiding costly damage.
Regular maintenance, including grout repair and sealing porous surfaces, keeps your patio looking fresh and prevents stains.
How to Clean Outdoor Patio Tile — Effectively & Safely
Dirt, algae, and stains can quickly turn your patio dull. Identifying your tile material, starting with gentle methods, and matching treatments to stains keeps your surface looking new — without damage or costly repairs.
Identify Your Tile Before You Clean
Porcelain feels smooth and dense; natural stone has a textured, porous surface. Test a hidden spot with water and mild cleaner — if it absorbs or etches, your tile is porous or chemically sensitive. Acidic cleaners like vinegar can permanently etch stone and weaken grout.
Porcelain & Ceramic
Durable and nonporous. Tolerates neutral or mildly alkaline cleaners. Textured finishes can still trap grime, so sweep regularly.
Damage risk: LowNatural Stone
Travertine, limestone, marble, slate, sandstone — porous or chemically sensitive. Use only pH-neutral, stone-safe cleaners. Never acids.
Damage risk: HighQuarry Tile & Terracotta
Porous and stain-absorbent. Avoid prolonged soaking and harsh chemicals; blot spills promptly and seal appropriately.
Damage risk: HighConcrete Pavers
Durable but absorbent. Aggressive pressure washing or acidic products can etch and degrade the surface over time.
Damage risk: MediumComposite & Specialty
Always follow the manufacturer’s specific cleaning instructions — generic products may void warranties or damage finishes.
Damage risk: MediumThe Hidden-Spot Check
Apply water and mild cleaner to an inconspicuous area. White patches after cleaning limestone? Switch to pH-neutral — that’s acid etching.
Always test firstThe Simplest, Safest Method — In Order
Work in small sections and avoid strong sunlight, which makes cleaning solutions dry too quickly and streak. Rinse thoroughly — soap residue attracts new dirt.
Clear & Sweep
Remove furniture, planters, and debris. Sweep thoroughly.
Rinse with Water
Plain water washes away loose particles first.
Mild Cleaner
Warm water + pH-neutral soap or outdoor-safe cleaner.
Soft Scrub
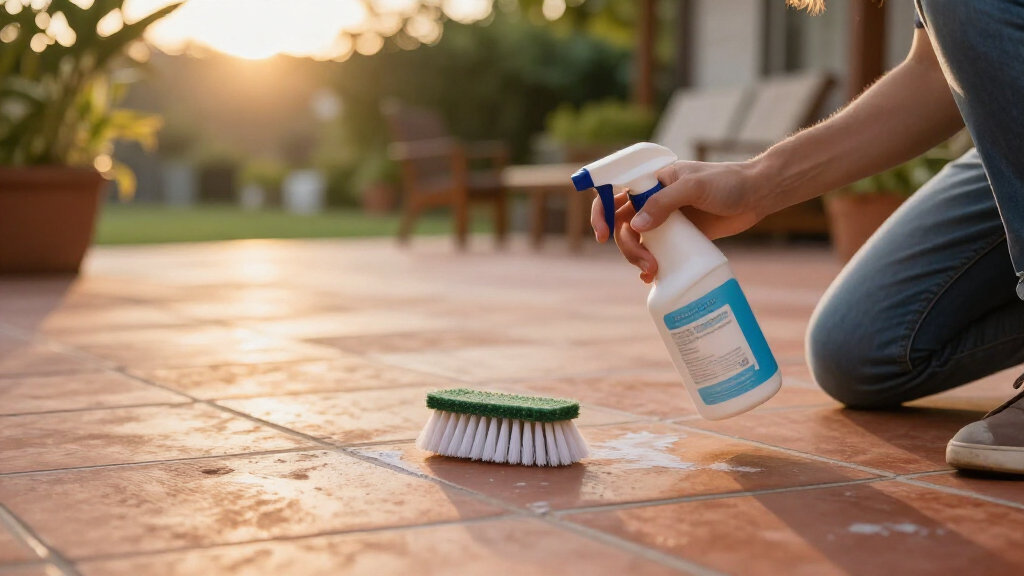
Soft nylon brush or sponge; work small sections.
Rinse & Dry
Rinse fully so residue doesn’t dry on the tile. Let dry before use.
Match Your Cleaner to the Stain
Different stains demand different treatments. One terracotta patio developed rust stains from metal furniture — a surface-safe rust remover restored it without harming the porous tile.
| Stain Type | Recommended Treatment | Why It Matters |
|---|---|---|
| Algae, Mildew, Mold | Biological outdoor cleaner labeled safe for your tile material. | Improving drainage and sunlight exposure inhibits regrowth and prevents recurrence. |
| Grease & Food Spills | Tile-safe degreaser; blot fresh spills promptly. | Grease seeps into porous materials — repeat treatment or use a poultice to draw out oils. |
| Leaf & Organic Stains | Alkaline or oxygen-based cleaner; scrub with a soft brush. | Organic buildup fosters mold if left untreated — thorough cleaning prevents surface and health issues. |
| Rust | Material-compatible rust remover only. | Improvised acids can etch stone and grout; untreated rust can cause structural weakening over time. |
| Efflorescence / Mineral Deposits | Identify mineral salts vs. grout haze; specialty products only if surface-approved. | Trapped moisture drives ongoing efflorescence and surface deterioration if ignored. |
| Paint, Adhesive, Sealant | Identify water-, oil-, or solvent-based before selecting a remover. | The wrong remover can dissolve finishes or force the substance deeper into porous tile. |
When & How to Pressure Wash Carefully
One homeowner pressure-washed textured concrete tiles and chipped the grout. A garden hose with a soft brush cleaned just as well — with zero risk. If you must pressure wash, test a small area first and keep the nozzle at least 12 inches away on the lowest setting.
What Excess Pressure Damages
- Erodes grout and jointing material
- Forces water beneath tiles
- Strips sealers and surface finishes
- Etches softer stone and concrete
- Dislodges polymeric sand
- Creates visible wand marks
The Safe Setup
- Lowest effective pressure setting
- Wide fan nozzle — never a pinpoint jet
- 45° angle; keep the wand moving
- Never aim at grout lines, joints, or cracks
- Minimum 12-inch standoff distance
- Test on a small, hidden area first
Grout, Joints & Sealing Decisions
Grout and joints fail before the tile itself. Inspect for cracks, missing sand, or hollow tiles — cleaning reveals problems but can’t fix them. Well-maintained joints are your first line of defense against moisture, freeze-thaw damage, and biological growth.
Repair After Cleaning
Replace damaged grout and use polymeric sand for stability — following manufacturer curing times. Never sweep sand into wet joints; it causes future failures.
Only When Needed
Seal porous stone, terracotta, concrete, and grout. Dense porcelain and glazed surfaces usually don’t need it. Over-sealing causes haze or discoloration.
Test Before You Apply
Clean thoroughly and wait until fully dry. Use a breathable, exterior-rated sealer and test a small spot for color or sheen changes first.
Key Takeaways
Identify your tile type first — porcelain and ceramic are tough; natural stone needs gentle, pH-neutral care.
Start with mild, water-based cleaning — hot water and neutral soap — before trying stronger treatments.
Match the treatment to the stain: algae needs biological cleaners, grease needs degreasers, rust needs specific removers.
Pressure wash sparingly: low pressure, wide nozzle, 45° angle, and a small test area first.
How to Identify Your Outdoor Tile Before Cleaning
Knowing what kind of tile you have is the first step. Different materials react differently to cleaning methods. For example, glazed porcelain is tough and nonporous, tolerating most cleaners. Natural stone like marble or travertine is softer and reacts badly to acids or abrasives.
To identify your tile, check the manufacturer’s label or look for clues in texture and color. Porcelain feels smooth and dense; natural stone often has a textured, porous surface. For a hands-on test, try a small, hidden spot with water and a mild cleaner. If it absorbs or etches, it’s porous or chemically sensitive.
In a real-world scenario, someone with a limestone patio notices white patches after cleaning. That’s a sign to switch to a pH-neutral cleaner and avoid acids. Knowing your material saves money, preserves your surface, and makes cleaning more effective.
As an affiliate, we earn on qualifying purchases.
Use the Simplest, Safest Method First
The most effective way to keep your patio tile clean is to start gentle. Remove furniture, planters, and loose debris first. Sweep thoroughly to lift dirt, leaves, and dust. Follow with a rinse of plain water to wash away loose particles.
Next, mix warm water with a mild, pH-neutral cleaner—think dish soap or a cleaner labeled for outdoor use. Use a soft nylon brush or sponge to scrub gently. Rinse well, ensuring no soap residue remains, which could attract more dirt or cause streaks.
For example, a homeowner with a brick-patterned tile found that a simple warm water rinse and a soft scrub kept her surface spotless for months. The key is working in small sections, avoiding sunlight that can cause quick drying and streaks.
natural stone patio cleaning products
As an affiliate, we earn on qualifying purchases.
As an affiliate, we earn on qualifying purchases.
Match Your Cleaner to the Stain — Here’s How
Different stains demand different treatments. Here’s a quick breakdown:
| Stain Type | Recommended Treatment |
|---|---|
| Algae, Mildew, Mold | Use a biological outdoor cleaner safe for your tile. Improving drainage and sunlight exposure can significantly reduce regrowth, as these conditions inhibit the growth of biological stains and prevent recurrence. |
| Grease or Food Spills | Apply a tile-safe degreaser. For porous surfaces, repeat treatment or use a poultice to draw out oils. This approach is crucial because grease can seep into porous materials, making it harder to remove and increasing the risk of staining or long-term damage if not properly treated. |
| Leaf Stains & Organic Debris | Start with alkaline or oxygen-based cleaners. Scrub with a soft brush and rinse thoroughly. These stains often indicate organic buildup that can foster mold if left untreated, so thorough cleaning prevents future health and surface issues. |
| Rust | Use a rust remover compatible with your surface. Avoid improvised acids that can damage stone or grout. Proper treatment not only removes the stain but also prevents the rust from etching into the material, which could cause structural weakening over time. |
| Mineral Deposits (Efflorescence) | Identify whether it’s mineral salts or grout haze. Use specialty products only if approved for the surface. Addressing mineral deposits is essential because they can trap moisture, leading to ongoing efflorescence and potential surface deterioration if ignored. |
For example, a terracotta patio developed rust stains from nearby metal furniture. Applying a rust remover specific to metal stains restored its appearance without harming the porous surface. Proper stain treatment not only removes the visible blemish but also preserves the integrity of the material for future use.
As an affiliate, we earn on qualifying purchases.
When and How to Use Pressure Washing Carefully
Pressure washing can be tempting for tough grime, but it’s risky on delicate tiles. The key is low pressure, wide spray nozzles, and keeping the wand moving. Aim at a 45-degree angle, never directly at grout lines or cracks.
For example, a homeowner used a pressure washer on textured concrete tiles but damaged the grout and caused chips. Instead, she switched to a garden hose with a soft brush, which cleaned just as well without risking damage. This approach minimizes the force applied to the surface, reducing the likelihood of damage.
If you do choose to pressure wash, test on a small area first. Keep the nozzle at least 12 inches away and use the lowest pressure setting. Remember: gentler is better for preserving your surface’s integrity, especially for textured or porous materials that can be harmed by high-pressure streams.
mildew and algae remover for patio
As an affiliate, we earn on qualifying purchases.
As an affiliate, we earn on qualifying purchases.
Protect and Maintain Grout and Joints
Joints and grout often wear out first. Inspect for cracks, missing material, or loose sections. Cleaning can’t fix structural issues but can reveal problems needing repair.
After cleaning, replace or repair damaged grout. Use a polymeric sand for better stability, but follow manufacturer instructions and curing times carefully. Avoid sweeping wet sand into the joints, which can cause future problems. Proper maintenance of joints prevents water infiltration that can lead to staining, freeze-thaw damage, or loosening of tiles, which compromises the overall integrity of your patio.
For example, a homeowner noticed loose grout after washing her slate tiles. She resealed the joints and replaced missing mortar to prevent water infiltration and future stains. Well-maintained joints are crucial because they act as the first line of defense against moisture entry and biological growth that can stain or damage your surface over time.
Should You Seal Your Outdoor Tile? When and How
Sealing porous tile and grout can help prevent stains and moisture absorption. But not every tile needs sealing, especially dense porcelain or glazed surfaces. The decision depends on the tile’s porosity, location, and exposure to the elements.
Before sealing, clean the surface thoroughly and wait until it’s completely dry. Use a breathable, exterior-rated sealer designed for outdoor use. Test it on a small spot for color or sheen changes before applying widely. Proper sealing enhances stain resistance and extends the life of your surface, but over-sealing or using inappropriate products can cause discoloration or a hazy appearance, so understanding your tile’s needs is key.
For instance, a homeowner sealed her terracotta pavers to reduce moss growth and staining, which improved longevity and appearance. Conversely, sealing polished marble might dull its shine and cause discoloration if not done correctly. The right approach balances protection with maintaining the natural beauty of your tiles.
Ensure Good Drainage and Slip Safety First
Persistent stains or algae often point to poor drainage or excess moisture. Check the slope of your patio, clear clogged drains, and trim overhanging vegetation that traps water. Addressing drainage issues is critical because standing water promotes biological growth and can lead to surface deterioration over time.
Choose cleaning products that won’t leave a slippery residue. After cleaning, wait until the surface is dry before allowing foot traffic. Adding slip-resistant treatments can help prevent accidents, especially in wet weather. Improving drainage and slip safety not only preserves the surface but also reduces the risk of slips, trips, and falls, making your outdoor space safer and more durable in the long run.
For example, a family with a mossy, algae-prone patio improved drainage and added a textured sealer, making it safer and easier to clean in rainy seasons. These measures are vital for safety and longevity, ensuring your patio remains a secure gathering spot and resistant to biological growth that can cause damage.
Frequently Asked Questions
Can I use vinegar on outdoor patio tile?
Vinegar is generally unsafe for natural stone like marble or travertine because the acid can etch the surface. For glazed porcelain or ceramic, it’s usually fine—just test first. Always check manufacturer instructions before using vinegar or any acidic cleaner.
Can I use bleach?
Use bleach only if the manufacturer approves. It can discolor surfaces, damage sealers, and harm nearby plants. For organic stains or mildew, oxygen-based cleaners are safer and equally effective.
What is the best homemade patio-tile cleaner?
Warm water with a few drops of mild, pH-neutral dish soap is safest. Avoid homemade acids or strong alkaline mixes, which can damage sensitive materials. For stubborn grime, consider specialized outdoor cleaners instead.
How often should patio tile be cleaned?
Sweep regularly—at least once a week—and clean spills promptly. Deep cleaning with water and a mild cleaner once or twice a year keeps grime and biological growth under control, especially in shaded or damp areas.
How do I remove green algae from patio tiles?
Remove loose debris, apply an algae-specific outdoor cleaner, and let it sit for the recommended time. Use a soft brush to scrub, then rinse thoroughly. Improving drainage and sunlight exposure will help prevent regrowth.
Conclusion
Cleaning outdoor patio tile isn’t about harsh chemicals or brute force. It’s about understanding your surface, choosing gentle methods, and maintaining regularly. A little effort goes a long way in keeping your outdoor space inviting and safe.
Remember: patience and proper technique protect your investment. When in doubt, test first and always follow manufacturer guidance. Your patio will thank you with years of beauty and function.
Fall Picks
fall essentials
As an affiliate, we earn on qualifying purchases.