TL;DR

Get cleaning gear delivered free with Prime
- Fast, free delivery on millions of items
- Prime Video, Amazon Music and more included
- Member-only deals all year
Put on gloves, remove visible debris, and clean from the less soiled parts of the bathroom toward the toilet base, which you leave until last. Use a cleaner approved for your flooring, reserve disinfectant for a specific need, follow its label, and dry the area without pushing liquid into floor gaps. Wash reusable tools and your hands when you finish.
A bathroom floor can look spotless while a damp ring of grime hides behind the toilet. Splashes, drips, shoes, and cleaning tools can all bring soil to the narrow strip around the base, where grout lines and gaps tend to hold onto moisture.
You can clean that awkward area hygienically with a simple routine: start with the cleaner parts of the floor, save the toilet base for last, and use tools reserved for that spot. The right method also depends on your flooring. A tile floor may tolerate more moisture than wood, laminate, or vinyl, so your floor-care instructions matter as much as your choice of cleaner.
This guide explains how to choose a cleaner, reach behind the bowl, use disinfectant when it makes sense, and finish without leaving damp patches or spreading soil elsewhere. Think of the process like sweeping crumbs toward a dustpan: the order helps keep the mess contained.
Put on disposable or washable gloves, remove visible debris, and clean from the open floor toward the toilet base.
Use a cleaner allowed by both the flooring instructions and the product label; test a hidden area before using a new product.
Reserve disinfectant for a specific hygiene concern and follow the label’s surface, ventilation, rinsing, and wet contact-time directions.
Use a dedicated cloth or small brush around the base and behind the bowl, and avoid soaking grout, seams, or moisture-sensitive floors.
Wash reusable tools, discard single-use materials, remove gloves, and wash your hands with soap and water.
Clean the floor around your toilet with care
Keep soil contained by cleaning from the open floor toward the toilet base, then finish with clean tools and hands.
Follow a one-way cleaning path
Leave the toilet base and the floor around it until last to limit spreading soil.
Put on gloves and pick up visible debris.
Work from the open floor toward the toilet, using a dedicated cloth or brush around the base and behind the bowl.
Dry as the floor instructions allow, wash reusable tools, remove gloves, and wash your hands.
Choose products for your floor
Check both the flooring care instructions and cleaner label before use; test a new product in a hidden spot.
| Floor | Practical approach |
|---|---|
| Tile | Check grout compatibility; wipe rather than flood and dry standing water. |
| Laminate | Use a lightly damp cloth only if allowed; dry promptly. |
| Hardwood | Follow finish-specific care and avoid soaking. |
| Vinyl or LVP | Use an approved cleaner and check restrictions on heat or steam. |
Clean first, disinfect when needed
Routine cleaning removes dirt; disinfecting is for a specific hygiene concern, such as illness or visible body-fluid contamination.
- Use a compatible cleaner for ordinary soil.
- Wipe the toilet area last with a dedicated tool.
- Check the label for surface compatibility, ventilation, and rinsing.
- Keep the surface wet for the stated contact time.
Clean from the open floor toward the toilet base
Clean floors around a toilet hygienically by moving from the cleaner parts of the bathroom toward the toilet base, which you leave until last. Put on disposable or washable gloves, remove visible debris, and work in small sections so your cloth does not carry soil back across the floor. This order helps limit the spread of contamination by your own hands and tools.
- Put on gloves before touching the floor or used cleaning tools.
- Pick up visible debris with a disposable cloth or other suitable tool.
- Clean the open floor first, working toward the toilet.
- Wipe around the base and behind the bowl last with a dedicated cloth or small brush.
- Dry the area as the flooring instructions and cleaner label direct.
For example, if toothpaste has dried near the vanity and you find a drip beside the toilet, start at the vanity side and finish at the toilet drip. That keeps a cloth used near the base from traveling over the cleaner floor. Treat the toilet area like the last stop on a one-way path.
Disposable gloves work well for a quick cleanup. Reusable washable gloves are another option if you clean them after use and keep them separate from kitchen or general household gloves. Neither kind replaces handwashing: remove them carefully when you finish, then wash your hands with soap and water.
Products Worth Considering

Samsung 43-Inch M70H Series 4K Mini LED Smart TV (2026)

Dyson Ball Animal 3 Upright Vacuum
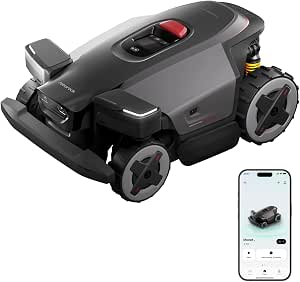
Roborock RockMow X130H Wire-Free 4WD Robot Lawn Mower
As an affiliate, we earn on qualifying purchases.
Choose a cleaner your flooring can handle
The safest cleaner for the floor around a toilet is one that the flooring manufacturer allows and whose label lists your surface as compatible. A general-purpose bathroom cleaner can suit routine cleaning, but the same product may not suit every finish, grout, or floor covering. Check the instructions on both the floor and the cleaner before you apply it.
| Floor or material | What to check | Practical approach |
|---|---|---|
| Tile | Cleaner and grout compatibility | Wipe rather than flood grout lines; dry standing water. |
| Laminate | Limits on moisture and approved products | Use a lightly damp cloth only if the maker allows it, and dry promptly. |
| Hardwood | Finish-specific care and water restrictions | Avoid soaking; follow the wood-floor instructions closely. |
| Vinyl or LVP | Approved cleaner and any restrictions on heat or steam | Use the floor maker’s method and avoid unapproved products or equipment. |
Imagine a bead of cleaner pooling in a seam beside a toilet. Tile grout may tolerate an occasional damp wipe, while a moisture-sensitive floor or exposed edge can be vulnerable to water intrusion. Apply the product to a cloth when the label permits, rather than spraying a wide puddle around the base.
Before using a new cleaner, test it on a hidden area and let that spot dry. Look for changes in color, sheen, or texture. If you use a steam mop, first confirm that both the flooring manufacturer and appliance instructions allow steam on that surface; heat and moisture can harm some finishes, seams, and floor types.
Use disinfectant for a specific hygiene concern
Routine cleaning removes dirt and residue; disinfecting uses a labeled product as directed to reduce germs on a surface. You usually do not need to disinfect the toilet floor every time you clean it. Targeted disinfection can make sense after illness, visible body-fluid contamination, or another specific hygiene concern, provided the product and floor are compatible.
A clean-looking floor is not proof that a surface has been disinfected. The label may require the surface to stay visibly wet for a stated contact time, and you may need to rinse afterward. If you wipe the product off early, it may not work as the directions describe.
Suppose someone in your home is sick and a spill lands near the toilet. First remove soil as the product label instructs, then apply a suitable disinfectant for the listed surface and keep it wet for the required time. Ventilate the bathroom and follow all instructions on dilution, rinsing, and protective gear. If the label does not mention your flooring, choose a compatible option or ask the floor manufacturer for guidance.
Never mix bleach with ammonia, vinegar, acids, or another cleaner. Use one product at a time, follow its label, and keep the room ventilated.
Stronger does not automatically mean safer or more effective. Compatibility, correct use, ventilation, and contact time matter more than a product’s scent or strength. Avoid claims that one routine prevents every infection; cleaning reduces soil, and a properly used disinfectant serves a more specific purpose.
Reach behind the bowl without soaking the floor
Reach behind the toilet and around its base with a small brush, disposable cloth, or dedicated mop attachment that fits the space. Use only the amount of cleaner the label calls for, and wipe carefully so liquid does not run beneath the fixture or into flooring gaps. Then dry the area with a clean cloth if the floor-care instructions allow.
Start where you can see: the front edge of the base, the narrow sides, and the strip behind the bowl. A cloth wrapped around a small, nonabrasive tool can reach a tight gap without forcing your hand into it. For example, if the wall sits close behind the toilet, a slim brush may pick up dust and hair that a wide mop head skips.
Keep pressure gentle. Scrubbing hard can scratch some finishes, damage grout, or push debris into a seam. On sealed tile, a compatible damp wipe can lift a dried splash; on wood or laminate, avoid leaving a wet ring while you work. Never pour cleaner around the base and hope it will flow into the hidden spots.
Pay attention to persistent moisture. A recurring damp patch, musty smell, or discoloration may point to a leak or another plumbing issue rather than ordinary cleaning soil. Wipe up the water you can safely reach, keep people from slipping, and arrange appropriate plumbing help if the moisture returns. Cleaning can remove residue, but it cannot fix the source of a leak.
Keep toilet-area tools from spreading soil
Use a dedicated cloth or brush for the toilet area, and wash or disinfect reusable tools before they return to general cleaning supplies. A tool that wipes the base can pick up residue invisible to the eye, then carry it to another room if you reuse it without cleaning. A separate, clearly marked cloth makes that mistake less likely.
For instance, keep toilet-floor cloths in a small washable bag or a separate section of your cleaning caddy. Do not put a used cloth back with clean ones, and do not use the same brush for the kitchen floor. Disposable materials should go in the rubbish after use, following local guidance if the cleanup involved a substance that needs special disposal.
Wash reusable cloths and mop heads according to their care labels. If you disinfect a tool, use a product suitable for that tool and follow its instructions rather than assuming a quick rinse is enough. Let brushes and mop heads dry fully before storing them; a damp bundle in a closed cupboard can develop an unpleasant smell.
These habits save effort later. When every tool has a clear job, you do not have to guess whether the cloth in your hand has already touched the toilet base. The method is much like keeping a paintbrush for one color: a little separation prevents a messy transfer.
Finish with a dry floor and clean hands
Finish by removing used materials, washing reusable tools, taking off your gloves, and washing your hands with soap and water. Drying matters because moisture can linger in grout, around floor edges, and near the toilet base. A dry surface also lowers the chance that someone will slip when they step into the bathroom.
After wiping a tiled floor, check the grout lines and the floor around the base for beads of water. On wood, laminate, vinyl, or LVP, follow the manufacturer’s drying and care instructions and avoid leaving dampness at seams. For example, a small towel used to blot the floor can be more practical than running a damp mop repeatedly through a narrow gap.
Then put away cleaners where children cannot reach them, with caps closed and labels intact. Do not decant a cleaner into an unlabeled bottle, and do not store incompatible products together if leakage could bring them into contact. Ventilate the room as the product label recommends, especially if you used a strong-smelling cleaner.
Finish your own cleanup by removing gloves without touching the outside with bare skin, then wash your hands thoroughly. Launder washable gloves or cloths as their labels direct. The toilet-floor routine is complete when the surface is clean and dry, used tools are dealt with, and the cleaner is stored safely.
Set a cleaning rhythm that fits your household
There is no single schedule for every toilet floor: wipe visible spills promptly and include the area in your regular bathroom cleaning. Clean more often when the bathroom sees heavy use, when someone is sick, or when spills and splashes are common. The right rhythm follows the amount of mess you actually see.
A guest bathroom used once a week may need a different routine from a busy family bathroom where children splash water and people step in with wet shoes. In the second home, a quick check of the floor during regular bathroom cleaning can catch drips before they dry into grout or collect at the base. If a household member has mobility needs, clear and dry flooring can also make the room easier to use safely.
Make the task easier by keeping a dedicated cloth and suitable cleaner together, with products stored safely. If you notice the same damp patch every few days, check for a persistent source instead of simply wiping it away each time. Moisture around the toilet can come from splashes, but a repeated wet spot may need attention beyond routine cleaning.
Use your judgment rather than disinfecting by default. A normal weekly wipe may be enough for one household; illness or visible contamination calls for a more targeted response. In either case, the same habits still help: protect the floor, work from cleaner areas toward the base, and leave the space dry.
Frequently Asked Questions
How often should I clean the floor around the toilet?
Include the floor around the toilet in regular bathroom cleaning and wipe visible spills promptly. Clean more often if the bathroom gets heavy use, someone is sick, or splashes and drips are common.
Should I disinfect the floor every time I clean it?
Usually, no. Routine cleaning removes soil, while disinfectant is useful for a specific concern such as illness or visible contamination. Check that the product is safe for your floor and follow its contact-time instructions.
What cleaner is safe for my floor?
Check the flooring manufacturer’s care instructions and the cleaner label for surface compatibility. Be especially cautious with hardwood, laminate, natural stone, and unsealed grout, and test a hidden area before using an unfamiliar product.
How do I clean behind the toilet and around the base?
Use a small brush, disposable cloth, or dedicated mop attachment with a suitable cleaner. Wipe the area and dry it as the floor instructions allow; do not pour liquid around the base or force it into floor gaps.
Can I use bleach on the toilet floor?
Use bleach only if its label permits the intended use and your flooring manufacturer allows it. Never mix bleach with ammonia, vinegar, acids, or another cleaner, and follow the label’s ventilation and protective-gear instructions.
Do I need separate tools for the toilet area?
A dedicated cloth or brush helps keep soil from the toilet area from spreading to other rooms or surfaces. Wash or disinfect reusable tools as directed, or discard single-use materials after cleaning.
What should I do after cleaning?
Wash reusable cloths and mop heads according to their care labels, discard disposable materials, and remove your gloves. Wash your hands with soap and water, then store cleaners safely out of children’s reach.
Conclusion
For a hygienic toilet-floor clean, keep the order simple: gloves on, visible debris removed, cleaner floor first, toilet base last. Choose products for your actual flooring, use disinfectant only for a specific reason, and follow the label from application through drying.
Then wash the tools and your hands. A small, dry patch of floor beside the toilet is easy to overlook, but careful cleaning leaves it ready for the next bare foot or pair of socks.