TL;DR

Get cleaning gear delivered free — and shop member deals
- Fast, free delivery on millions of items
- Access to Prime Big Deal Days deals on October 6–7
- Prime Video, Amazon Music and more included
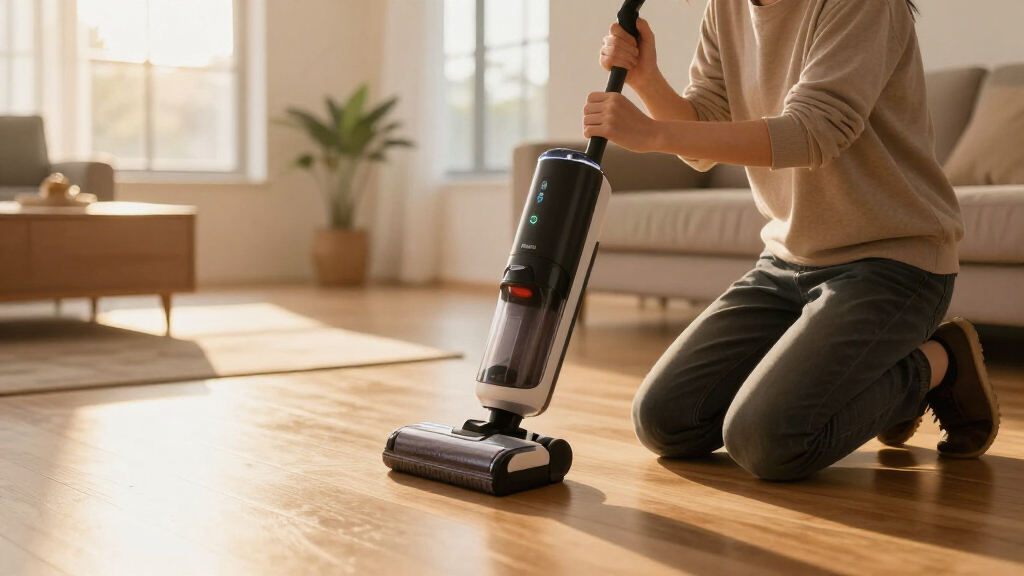
If your Tineco floor washer won’t charge, start by checking the power source, inspecting the charging port, and ensuring the battery is properly seated. Often, cleaning contacts or replacing an aging battery solves the issue. Regular maintenance can prevent future problems.
Your Tineco floor washer sitting dead on the charger can feel like a sudden breakdown in your cleaning routine. But often, the fix is simpler than expecting a new machine. Whether it’s a stubborn battery or a faulty charger, understanding the common causes means you can get back to sparkling floors faster.
In this guide, you’ll learn the key things to check when your Tineco won’t charge. From environmental factors to hardware issues, these practical tips will help you troubleshoot confidently—saving money and avoiding unnecessary replacements.
Always verify the power outlet and avoid extension cords or damaged cables.
Regularly clean charging contacts and ensure the battery is seated correctly.
Replace batteries that are over 2-3 years old or show signs of swelling or no charge.
Charging in room temperature conditions prevents issues caused by extreme cold or heat.
Firmware updates and resets can fix software glitches interfering with charging.
Troubleshooting field guide
Tineco Floor Washer Won’t Charge? What to Check
A dead washer does not always mean a dead machine. Start with the outlet, charger, contacts and battery fit. Most charging faults can be narrowed down systematically before you buy a replacement.
Typical battery life
Lithium-ion capacity naturally declines with age, use and temperature exposure.
Best charge climate
Room temperature supports stable charging and healthier battery chemistry.
First principle
Verify electricity reaches the washer before diagnosing an internal failure.
Outlet test
Use a lamp or phone charger to prove the socket works.
Charger output
Typical for many models; confirm against your charger label.
Safe cleaning
Use a soft brush or cloth—never liquid on contacts.
Escalation point
Complete the diagnostic chain before contacting support.
At a glance
Six essential checks, in practical order
Work from the simplest external cause toward the battery and internal electronics. Stop immediately if you find heat, swelling, leaking or burned components.
Power
Test the outlet
Plug in another device. Reset a tripped GFCI and try a socket on a different circuit. Connect the charger directly instead of using an extension cord.
Prove power firstHardware
Inspect the charger
Look for frays, cracks, bent pins, burn marks or a missing indicator light. Use the original compatible charger whenever possible.
Do not use damaged cablesConnection
Clean the contacts
Dust and oxidation interrupt current. Gently wipe the dock, port and battery terminals with a dry cloth or soft brush.
Keep all contacts dryFit
Reseat the battery
Remove and reinstall the battery if your model permits. Confirm the latch engages and the washer sits securely against the charging points.
Listen for the clickEnvironment
Normalize temperature
Move the washer indoors and let it reach room temperature. Extreme cold slows battery chemistry; heat can trigger protective shutdowns.
Target 20–25°CSoftware
Update or reset
For supported models, check the Tineco app for firmware updates. Follow the model-specific manual for the correct reset procedure.
Check error indicatorsDiagnostic flow
Follow the energy from wall to battery
Each successful checkpoint rules out an entire category of faults. Do not jump straight to battery replacement without verifying the earlier links.
Live outlet
Test with a known working device.
Sound cable
No frays, heat, cuts or loose plug.
Clean contact
Dry, aligned and free of debris.
Locked battery
Fully seated in the washer or dock.
Charge response
Indicator, app status or battery gain.
The fastest diagnosis is a controlled sequence: change one variable at a time, observe the indicator behavior, and record any error code or blinking pattern before resetting the device.
Battery health
Age and environment change the odds
Lithium-ion batteries lose useful capacity through normal chemical aging. Poor storage, frequent heat exposure and deep discharge can accelerate the decline.
Illustrative health trend
Remaining useful capacity by age
Conceptual comparison only. Actual capacity varies with model, charge cycles, storage habits and operating temperature.
Replacement signals
What battery failure looks like
No charge despite verified power
The outlet, charger and contacts all work, but the battery level never rises.
Swelling, leaking or unusual heat
Stop using and charging the device. Isolate it safely and seek professional support.
Rapid drain or erratic percentage
A full indication followed by a very short runtime suggests reduced capacity or cell imbalance.
Repeated error lights
Persistent codes after an approved reset can indicate battery-management or internal hardware faults.
Charging temperature spectrum
Preferred zone: 20–25°C / 68–77°FAfter exposure to a cold car, winter porch or hot garage, allow the battery to return naturally to room temperature before connecting the charger.
Symptom decoder
Match the symptom to the next move
Indicator behavior varies by model, so confirm exact light patterns in your manual. This matrix helps prioritize the most likely checks.
| Observed symptom | Power / charger | Contacts / fit | Battery | Best next action |
|---|---|---|---|---|
| No light or response | ✗ High likelihood | ~ Possible | ~ Possible | Test the outlet, remove extension cords and inspect the charger. |
| Light appears, no battery gain | ✓ Likely present | ✗ Check closely | ~ Suspect | Clean contacts, reseat the battery and monitor the level. |
| Charges only when repositioned | ~ Cable possible | ✗ High likelihood | ✓ Less likely | Inspect alignment, dock pins, cable strain and the battery latch. |
| Full charge drains rapidly | ✓ Usually fine | ✓ Usually fine | ✗ High likelihood | Check battery age and consider an approved replacement. |
| Error code or blinking pattern | ~ Model-dependent | ~ Model-dependent | ~ Model-dependent | Record the code, consult the manual, update firmware or contact support. |
✓ lower suspicion ✗ priority check ~ possible or model-dependent
Decision point
Clean, replace or escalate?
Choose the least invasive safe action supported by the evidence. Internal disassembly is not part of routine troubleshooting.
Maintain
Clean and retry
Best when the washer charges intermittently, sits loosely on the dock or shows visible dust on otherwise undamaged contacts.
Replace
Consider the battery
Appropriate when the battery is roughly 2–3 years old, loses runtime rapidly or fails after every external check succeeds.
Escalate
Contact support
Use professional help for persistent errors, damaged charging hardware, warranty questions or a suspected internal electronics fault.
Safety overrides troubleshooting
Do not charge or continue using a swollen, leaking, punctured, scorched or unusually hot battery. Disconnect power if it is safe to do so, keep the unit away from combustible materials, and obtain qualified guidance.
Quick answers
Frequently asked questions
Model-specific procedures and indicator meanings can differ. Treat the product manual and charger label as the final authority.
Question 01
Why will it not charge even when plugged in?
The outlet may be dead, the charger may be damaged, the contacts may be dirty or misaligned, or the battery may have reached the end of its useful life.
Question 02
How can I distinguish a dead battery from a glitch?
First verify the power chain. Then use the documented reset or firmware update. A battery that still gains no charge—or drains immediately—is more likely degraded.
Question 03
Can I test the charger with a multimeter?
A knowledgeable user can compare measured output with the charger label, often around 20V on many models. Avoid probing if you are unfamiliar with electrical testing.
Question 04
Can the battery be replaced at home?
Some models use a user-removable battery; others do not. Check your exact model documentation and use only an approved compatible replacement.
Is the Power Source the Real Problem?
First, confirm the outlet works. Plug in another device—like a lamp or phone charger. If it doesn’t turn on, the issue isn’t your Tineco but the outlet itself. Try a different socket, preferably one on a different circuit.
Sometimes, the problem lies with a GFCI outlet that trips or a loose connection. If you’re using an extension cord, swap it out for a direct connection. The key here: a steady power source is the foundation for charging.
Tineco floor washer replacement battery
As an affiliate, we earn on qualifying purchases.
As an affiliate, we earn on qualifying purchases.
Check the Charger and Cables for Damage
Your charger and its cables are the lifelines for your battery. Look closely at the cord for cracks, frays, or burn marks. Even a tiny nick can cause charging failures.
Try plugging the charger into a different outlet and see if the indicator light (if it has one) turns on. If no lights appear, the charger might be dead. Using a multimeter, if you have one, can confirm if the charger delivers the correct voltage—typically around 20V for Tineco models.
As an affiliate, we earn on qualifying purchases.
Clean and Secure the Charging Contacts
Dust, dirt, and lint often hide in the charging ports or on the battery contacts. This gunk acts like a barrier, stopping the flow of electricity. If the contacts are dirty or oxidized, the electrical connection becomes unreliable, leading to charging failures or incomplete charging cycles.
Use a soft brush or a dry cloth to gently clean the contacts on both the charger and the battery. Avoid using liquids, which can cause further damage. Make sure the battery clicks into place securely after cleaning—sometimes a loose connection is all it takes to stop charging. Ensuring good contact not only restores charging but also prevents intermittent issues that can degrade battery health over time.
Tineco floor washer lithium-ion battery
As an affiliate, we earn on qualifying purchases.
As an affiliate, we earn on qualifying purchases.
Evaluate the Battery’s Condition and Age
Batteries have a lifespan of about 2-3 years, depending on use and environment. If your device is older or the battery no longer holds a charge, it might be time for a replacement. Over time, lithium-ion batteries undergo chemical changes that reduce their capacity, leading to shorter run times and charging issues. This natural aging process can cause the battery to become unreliable or even unsafe if it swells or leaks.
Signs include the device not charging at all despite a good connection, rapid battery drain, or physical damage like swelling or leaks. These indicators mean the battery’s internal chemistry has deteriorated beyond simple repair. Replacing an aging battery restores device performance and safety, but ignoring these signs can risk further damage or safety hazards. Regularly monitoring battery health helps prevent sudden failures and ensures your device remains dependable.
Tineco floor cleaner troubleshooting kit
As an affiliate, we earn on qualifying purchases.
As an affiliate, we earn on qualifying purchases.
Is Temperature or Environment Affecting Charging?
Batteries love moderate temperatures—around 20-25°C (68-77°F). Charging in extreme cold or heat can prevent your Tineco from charging properly. Cold temperatures slow down the chemical reactions inside the battery, making it resistant to charging or causing the charger to shut down to protect the cells. Conversely, excessive heat can accelerate battery aging or cause overheating, which may trigger safety features or damage the internal components.
Imagine plugging in your cleaner after a winter day outside—cold batteries resist charging because the internal chemistry slows down. Conversely, in a hot garage, the battery might overheat, shutting down to prevent damage. Keeping your device in a cool, dry place and avoiding charging near direct sunlight or in damp areas helps maintain optimal battery health and prolongs its effective lifespan. Proper environmental conditions reduce the risk of damage and ensure consistent charging performance.
Update Firmware and Reset if Possible
Some newer Tineco models can update firmware via their app, which can fix bugs affecting charging. Firmware updates often include bug fixes, performance improvements, and compatibility enhancements that directly impact charging stability. Keeping your device’s software current ensures it functions optimally and can resolve issues caused by software glitches that interfere with hardware operations.
If your device supports resets, perform one according to the manual. Usually, holding down certain buttons for a few seconds can reset internal software glitches that interfere with charging. This process can clear temporary errors, refresh system settings, and restore normal operation. Firmware updates and resets are especially helpful if your device shows error codes, blinking lights, or inconsistent charging behavior, as they address underlying software issues that may not be visible but impact hardware performance.
When Should You Replace the Battery or Contact Support?
If you’ve tried all these checks—cleaning contacts, testing the charger, confirming power sources—and your Tineco still refuses to charge, it might be a dead battery or internal fault. Persistent charging issues despite proper maintenance often indicate an internal failure that cannot be fixed through simple troubleshooting.
Deeply understanding battery failure is crucial because a failing battery not only hampers device performance but can also pose safety risks, such as overheating or leaks. Continuing to use a compromised battery increases the danger of fire or chemical hazards, especially if swelling or leaks are present. Recognizing these signs early allows for timely replacement or professional repair, preventing more costly damage and ensuring your safety. The tradeoff between replacing a battery versus risking safety hazards should always favor caution and professional intervention when needed.
In that case, contact Tineco support. If your device is under warranty, a replacement or repair might be covered. Don’t ignore persistent issues, as continuing to use a faulty battery can cause further damage or safety risks, such as overheating or fire hazards. Recognizing the signs of a failing battery early helps prevent costly repairs and ensures your safety.
Remember, replacing a battery is often straightforward and cost-effective compared to buying a whole new device. When in doubt, professional help ensures safety, proper functioning, and peace of mind, especially if internal components are involved.
Frequently Asked Questions
Why won’t my Tineco floor washer charge even when plugged in?
This could be due to a faulty charger, damaged contacts, or an aging battery. Start by testing the outlet, inspecting the cable, and cleaning the contact points. If those don’t work, the battery might need replacing.
How long does a typical Tineco battery take to fully charge?
Most Tineco models take around 3 to 4 hours to reach a full charge. Check your user manual for specific times, and avoid unplugging early to prevent incomplete charging cycles.
Can I replace the battery myself?
Yes, many Tineco models allow for easy battery replacement. However, always consult your manual and use genuine parts. If unsure, professional support ensures safety and proper installation.
What environmental factors affect charging and battery life?
Charging in temperatures below 15°C or above 30°C can impair battery function. Keep your device in a cool, dry place and avoid exposure to direct sunlight or moisture for best results.
When should I contact Tineco support?
If you’ve tried basic troubleshooting—checking the outlet, cleaning contacts, testing the charger—and still face issues, support can assist with warranty claims or repairs. Persistent blinking lights or error codes are also signs to seek professional help.
Conclusion
Most charging issues with your Tineco floor washer boil down to simple checks—power, contacts, environment, and battery age. Taking a few minutes to inspect these areas can save you a headache and extend your device’s life.
Remember, a well-maintained battery and proper charging habits turn your cleaning tool into a reliable partner, not a paperweight. Next time your Tineco stalls, think of this checklist—your quick road to restoring power.
Fall Picks
fall essentials
As an affiliate, we earn on qualifying purchases.