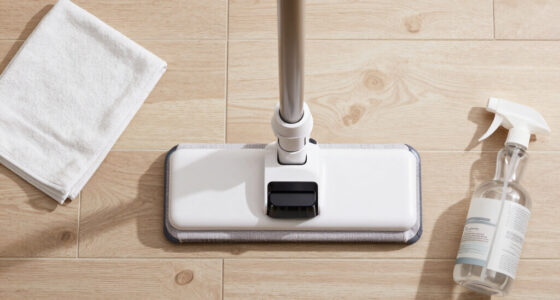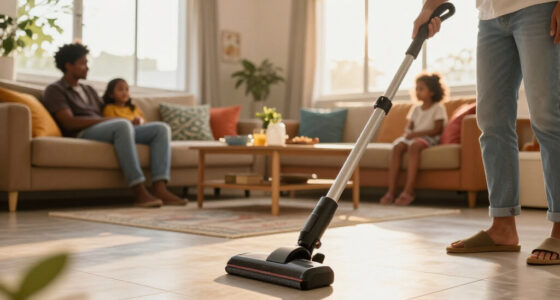
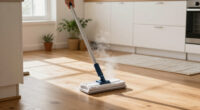
Use this guide to clean sealed hard floors with a steam mop and check that the finish tolerates steam before you begin. It is for beginners who can identify their flooring type and follow the mop manufacturer’s instructions. Allow about 20-45 minutes for a typical room, plus time for the floor to dry.

Get cleaning gear delivered free with Prime
- Fast, free delivery on millions of items
- Prime Video, Amazon Music and more included
- Member-only deals all year

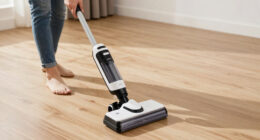
Shark Steam Mop for Sealed Hard Floors with 2 Dirt Grip Pads, White, S1000
- ✔ Weight: 4.6 lb
- ✔ Heat-up time: 30 seconds
- ✔ Tank capacity: 12.68 fl oz
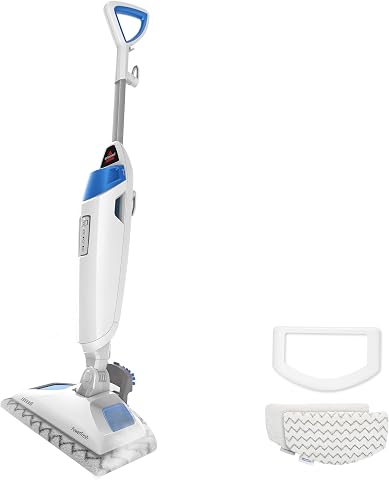
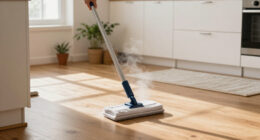
BISSELL Steam Mop 1940A PowerFresh Floor Steam Cleaner for Hard Wood & Tile with Natural Sanitization, Easy Scrubber, Variable St…
- ✔ Weight: 6.2 lb
- ✔ Heat-up time: 30 seconds
- ✔ Tank capacity: 16 fl oz
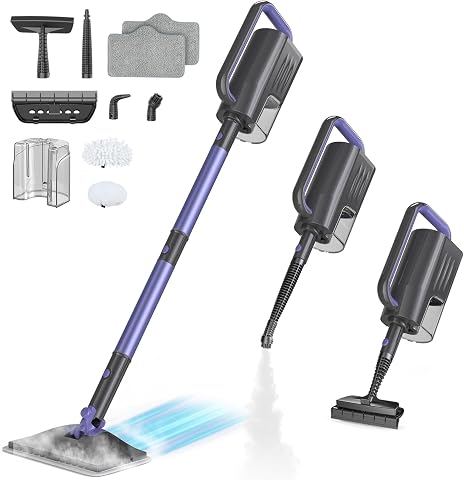
Steam Mops for Floor Cleaning, 6-in-1 Multi Accessories, 23FT Power Cable, Lightweight,Detachable Steam Mops for sealed Hard Floo…
- ✔ Heat-up time: 15 seconds, per product description
- ✔ Tank capacity: 400 ml
- ✔ Cord length: 23 ft
Difficulty: Beginner | Time: 20-45 minutes, depending on floor size
What You’ll Need
Tools & Materials:
- Steam mop with a clean, compatible microfiber pad
- Vacuum or soft-bristle broom
- Clean water specified by the mop manufacturer
- A small, inconspicuous test area
Knowledge:
- How to identify the flooring material or find its care instructions
- How to operate the steam mop and adjust its steam setting
Check both the flooring manufacturer’s care instructions and the steam mop manual. A floor can be sealed and still be unsuitable for steam. Do not steam mop unsealed wood, waxed floors, damaged or peeling finishes, or any surface whose care instructions prohibit steam. If you cannot confirm that the floor is compatible, use a cleaning method approved for it instead.
Shark Steam Mop for Sealed Hard Floors with 2 Dirt Grip Pads, White, S1000
The Shark S1000 takes the top position because its design stays focused on the job in this guide: steaming sealed hard floors without adding a collection of attachments to manage. At 4.6 pounds, it is the lightest model here by the supplied weights, which can make it easier to carry between rooms or put away after a quick clean. Its swivel steering is useful for working around furniture, and the removable tank makes refilling more convenient than a fixed reservoir.Compared with the BISSELL, the Shark is simpler: it heats in the same stated 30 seconds but does not offer multiple steam settings or a dedicated scrubber for dried-on grime. Against the SQKMYSU, it has fewer tools and a shorter listed cord, but its floor-cleaning purpose and key specifications are more straightforward in the provided information. Two machine-washable Dirt Grip pads help make repeat use practical. The main compromise is capacity: the 12.68-fluid-ounce tank is smaller than the BISSELL’s 16-ounce tank and the SQKMYSU’s 400 ml tank.Shark describes the mop for sealed surfaces including hardwood, marble, tile, stone, laminate, and vinyl. That breadth is useful, but we would still follow the floor maker’s instructions before applying steam to wood or laminate. This pick makes the most sense for routine cleaning and buyers who value easy handling. Choose the BISSELL instead if stuck-on messes call for adjustable steam and a scrubber, or the SQKMYSU if extra attachments are a priority.
Pros:
- Lightest listed model at 4.6 pounds.
- Removable tank and two machine-washable Dirt Grip pads.
- Swivel steering helps navigate around furniture.
- Designed for a stated range of sealed hard floors.
Cons:
- One listed steam setup, without the BISSELL’s three settings.
- Smaller stated tank than the other two picks.
- No accessory set for above-floor cleaning.
Best for: Buyers who mainly clean sealed hard floors and want a lightweight, easy-to-store mop with washable pads.
Not ideal for: People who regularly tackle dried-on spills and want a built-in scrubber, or those who need a larger tank or accessories for other surfaces.
Bottom line: For straightforward upkeep on sealed floors, the Shark balances easy handling and practical washable pads better than the more specialized BISSELL or attachment-heavy SQKMYSU.
“For straightforward upkeep on sealed floors, the Shark balances easy handling and practical washable pads better than the more specialized BISSELL or attachment-heavy SQKMYSU.”
BISSELL Steam Mop 1940A PowerFresh Floor Steam Cleaner for Hard Wood & Tile with Natural Sanitization, Easy Scrubber, Variable St…
The BISSELL PowerFresh 1940A earns its place for buyers whose sealed floors see dried spills, grout buildup, or a mix of light and tougher cleaning. Its three steam settings let us match output to the task, while the flip-down Easy Scrubber puts a brush at the floor head when a microfiber pad alone is not the right tool. That combination gives it a more hands-on cleaning approach than the Shark, which is lighter and simpler but lacks a scrubber and adjustable settings.The BISSELL also has the largest stated tank in this lineup at 16 fluid ounces, plus a removable design for sink refills. Its 23-foot cord matches the SQKMYSU’s listed reach and is five feet longer than the Shark’s, which can reduce outlet changes in larger rooms. In exchange, the supplied product information lists it at 6.2 pounds, making it heavier to carry than the Shark. It takes 30 seconds to heat, so it does not match the SQKMYSU’s stated 15-second start.For sealed hardwood, tile, ceramic, granite, and marble, BISSELL describes this model as suitable. Its steam sanitization claim is conditional on use as directed; scent discs are an optional extra for fragrance rather than a cleaning requirement. Compared with the SQKMYSU, BISSELL offers clearer floor-specific controls and a dedicated scrubber, but fewer tools for windows or other above-floor surfaces. We would pick it for varied floor messes, and skip it if low weight or an expansive accessory kit matters more.
Pros:
- Three steam settings accommodate different cleaning needs.
- Flip-down scrubber targets dried-on grime and grout buildup.
- Removable 16-ounce tank is the largest stated capacity here.
- 23-foot cord offers more reach than the Shark’s.
Cons:
- At 6.2 pounds, it is heavier than the Shark.
- 30-second heat-up is slower than the SQKMYSU’s stated time.
- Extra fragrance discs are optional accessories, not included floor-cleaning essentials.
Best for: Households with sealed tile or other approved hard floors that face both routine dirt and occasional dried-on messes.
Not ideal for: Buyers who want the lightest mop, very fast stated heat-up, or a set of attachments for windows and other surfaces.
Bottom line: Choose the BISSELL over the simpler Shark when adjustable steam and a built-in scrubber are worth the added weight.
“Choose the BISSELL over the simpler Shark when adjustable steam and a built-in scrubber are worth the added weight.”
Steam Mops for Floor Cleaning, 6-in-1 Multi Accessories, 23FT Power Cable, Lightweight,Detachable Steam Mops for sealed Hard Floo…
The SQKMYSU 6-in-1 is the broadest-use pick of the three. Its supplied kit includes two mop heads, cloths, an angled nozzle, a long nozzle, a small nylon brush, a window scraper, and a wiper tool. For someone who wants one steam appliance for floors plus selected window or surface-cleaning tasks, that range sets it apart from the Shark and BISSELL, which are much more floor-centered. It also lists a 23-foot power cord and a 400 ml removable tank, giving it useful reach and capacity on paper.The stated 15-second heat-up is the quickest among these options, and the description claims up to 30 minutes of runtime per fill. Those details may appeal to buyers trying to cover a larger area with fewer pauses. Yet the product information is less consistent than the other entries: it calls the unit a 1200W mop in one section and lists 1500W in the specifications. The description mentions dual cleaning modes but does not explain their settings in detail. We would treat its broad claims as points to confirm in the current product documentation.Compared with the BISSELL, the SQKMYSU trades a dedicated floor scrubber and clearly stated three-level steam control for a larger accessory collection. Compared with the Shark, it offers a longer cord and more tasks, but the Shark has a clearer stated weight and a more focused floor-mop profile. The SQKMYSU is best for buyers who will actually use its attachments and have space to store them. If sealed-floor cleaning is the only goal, the Shark is a simpler choice; for tough floor spots, the BISSELL’s scrubber is more directly useful.
Pros:
- 15-second stated heat-up is the fastest of the three.
- 400 ml removable tank and claimed runtime of up to 30 minutes per fill.
- 23-foot cord matches the BISSELL for listed reach.
- Includes several tools for tasks beyond floor mopping.
Cons:
- Supplied information gives conflicting 1200W and 1500W figures.
- Dual steam modes are mentioned but not detailed in the description.
- Lacks the BISSELL’s clearly specified three settings and flip-down scrubber.
Best for: Buyers who want a steam mop for sealed floors and expect to use included attachments for occasional window or other surface cleaning.
Not ideal for: People seeking a floor-only tool with especially clear specifications, or those who want a dedicated scrubber for stuck-on floor grime.
Bottom line: The SQKMYSU is the most versatile kit on paper, but for floor cleaning alone the Shark is simpler and the BISSELL gives clearer help with stuck-on dirt.
“The SQKMYSU is the most versatile kit on paper, but for floor cleaning alone the Shark is simpler and the BISSELL gives clearer help with stuck-on dirt.”
As an Amazon Associate we earn from qualifying purchases.
Before You Start
Move furniture and loose items out of the area, and keep children and pets away while the mop is hot. Steam can burn skin, and trapped grit can scratch the finish. Do not add detergent, fragrance, disinfectant, or other cleaning products to the water tank unless the mop manual specifically allows them. Never leave a hot mop standing still on the floor.
Use the lowest steam setting that the mop and flooring instructions allow. Plan a small test in a hidden spot, such as behind a door or beneath movable furniture. Let the test area dry fully before checking it for changes.
Step-by-Step Instructions
Step 1: Confirm the floor can be steam cleaned
Read the flooring care instructions and the steam mop manual before filling the tank. Confirm that the flooring material and finish are approved for steam. Look for warnings about heat, moisture, seams, or specific cleaning methods. If the instructions conflict or are unclear, do not use steam on that floor.
Tip: The word “sealed” alone does not confirm that a floor is steam-safe. Laminate, engineered wood, and some resilient floors can be harmed by steam or moisture entering seams.
Check: You have matching instructions that permit steam cleaning on this floor.
Step 2: Clear and dry-clean the floor
Pick up rugs, toys, and debris, then move furniture you can safely shift. Vacuum or sweep the entire area, including edges and corners, to remove grit, hair, and dust. Use a soft brush or hard-floor vacuum setting so the cleaning tool does not scratch the finish.
Tip: Do not use the steam mop to collect crumbs or hair. Debris can stick to a damp pad and drag across the floor.
Check: The floor is free of loose debris, and the path is clear for steady mop strokes.
Step 3: Inspect the finish and seams
Check the floor for cracks, lifted edges, open seams, peeling finish, or areas that are already damp. Do not steam over damaged or unsealed areas. Dry any wet spots with a suitable cloth and resolve the source of moisture before cleaning.
Tip: Pay close attention to plank joints, tile grout, and edges near sinks or exterior doors. Steam and water can enter openings and affect the material underneath.
Check: The area you intend to clean has an intact finish, with no standing water or exposed material.
Attach a clean pad and fill the tank as directed in the mop manual. Select the lowest approved steam setting. Test a small, hidden section using a brief pass; keep the mop moving and do not leave it parked in place. Switch off and unplug the mop as the manual directs, then let the spot dry completely before inspecting it.
Tip: Stop if the test area changes color, becomes dull, feels tacky, swells, or shows moisture at a seam. Do not continue until you have confirmed an approved cleaning method.
Check: After drying, the test spot looks and feels unchanged, with no lifted finish or moisture visible in the seams.
Step 5: Prepare the mop
Fit a clean, undamaged pad securely. Fill the tank with the type and amount of water specified by the mop maker; do not overfill it. Keep the mop upright while it heats, and wait for the ready indicator or the time given in the manual.
Tip: Use distilled or tap water only as the manual specifies. Water recommendations vary by model, and additives can clog the unit or leave residue.
Check: The pad is secure, the tank is within its fill limit, and the mop indicates that it is ready.
Step 6: Mop in short, steady passes
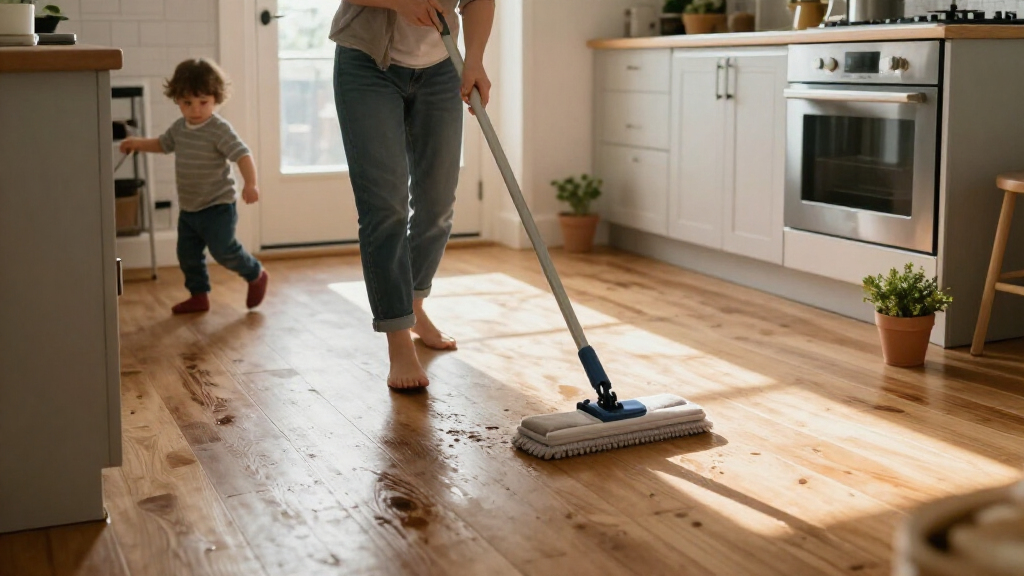
Start at the far side of the room and work toward the exit so you do not step on the freshly cleaned floor. Move the mop continuously in overlapping passes. Use the lowest approved steam output, and avoid lingering over one spot, seams, edges, or areas with visible damage. Follow any limits on pass length or steam level in the flooring and mop instructions.
Tip: If the floor looks wet rather than lightly damp, stop. Reduce the steam setting if the manual permits, change to a dry pad, and allow the area to dry before deciding whether it is safe to continue.
Check: The cleaned path has no puddles or lingering beads of water, and the mop has not been held still on the surface.
Step 7: Check and change the pad as needed
Pause at the mop maker’s recommended intervals to check the pad. Switch off and unplug the mop before removing or replacing it, and handle a hot pad carefully. Fit a clean pad when the current one is dirty or saturated so you do not spread soil or excess moisture.
Tip: Keep spare compatible pads nearby for larger rooms. Do not remove a pad from a hot mop unless the manual says how to do so safely.
Check: The pad is attached correctly, and its surface is clean enough to pick up soil rather than smear it.
Step 8: Let the floor dry and inspect it
Switch off and unplug the mop, then let the floor air-dry before replacing furniture or rugs. Keep people and pets off the surface while it is damp. Check the cleaned area in good light for missed spots, residue, streaks, or changes to the finish.
Tip: Drying time depends on room airflow and how much moisture the mop leaves. Do not cover a damp floor with a rug.
Check: The floor is fully dry, free of pooled water, and looks consistent with its original finish.
Step 9: Clean and store the mop
Follow the manual to empty or store water in the tank, remove the pad, and clean the mop head. Wash reusable pads according to their care label, without fabric softener if the manufacturer advises against it. Let the pad and mop parts dry before storing the unit.
Tip: A clean pad and clear steam outlets help the mop work properly next time. Do not wrap or store the unit while it is hot.
Check: The mop is switched off, cool, and stored with its pad and parts clean and dry.
Common Mistakes to Avoid
- Assuming every sealed floor tolerates steam. — Check the flooring and mop instructions for the exact material and finish; skip steam if approval is unclear.
- Using a high steam setting or holding the mop over one spot. — Choose the lowest approved setting and keep the mop moving in short, steady passes.
- Mopping over grit or using a dirty, saturated pad. — Vacuum or sweep first, then replace the pad when it becomes dirty or wet.
- Adding cleaner to the water tank without approval. — Use only what the mop manual allows; many models call for water alone.
Troubleshooting
Problem: The floor stays visibly wet after a pass.
Solution: Stop steaming and let the area dry. Check that the pad is properly attached and not saturated; use a clean, dry pad and a lower approved setting if the instructions allow. Stop using steam if wetness gathers at seams.
Problem: The mop leaves streaks or a cloudy film.
Solution: Check whether the pad is clean and rinse it as its care instructions direct. Confirm that no unapproved cleaner or excess water is present. Let the floor dry, then follow the flooring maker’s approved method for removing residue.
Problem: Steam output is weak or stops.
Solution: Switch off and unplug the mop. Check the water level and follow the manual’s steps for cooling, refilling, and clearing the unit. Do not poke into steam outlets or open a pressurized tank.
Problem: The finish looks dull, warped, or lifted after the test or cleaning.
Solution: Stop using the mop immediately. Keep the area dry, follow the flooring maker’s care guidance, and contact a flooring professional if damage persists. Do not apply polish or another treatment unless the floor instructions approve it.
What Success Looks Like
The floor is dry, visibly clean, and consistent in color and sheen with its appearance before cleaning. There are no puddles, sticky or cloudy residue, raised edges, or moisture at seams. The hidden test area also remained unchanged after drying.
Next Steps
Wash and dry the pad before storing it, and let the mop cool fully. For routine upkeep, remove grit with a vacuum or soft broom before damp cleaning. Repeat steam cleaning only as often as the flooring maker permits, and stop if the finish or seams show any change.
Frequently Asked Questions
Can I use a steam mop on any sealed floor?
No. A sealed finish does not guarantee steam compatibility. Check the flooring care instructions for the exact material and finish, and follow the mop manual. If either source advises against steam or gives no clear approval, use another approved method.
Should I use distilled water in my steam mop?
Use the water type named in your mop manual. Some models call for distilled water, while others permit tap water or provide different guidance. Avoid adding other substances unless the manufacturer specifically approves them.
Do I need to vacuum before steam mopping?
Yes. Vacuuming or sweeping removes grit and loose debris that can scratch the finish or smear across the floor on a damp pad.
How wet should the floor look after a pass?
The mop should leave little moisture, and the surface should not have puddles or water collecting at seams. If it looks wet, stop, let it dry, and check the setting, pad, and floor instructions.
Can I add floor cleaner to the tank?
Only if the mop manual explicitly permits a particular product and explains how to use it. Otherwise, fill the tank as directed without adding cleaner, fragrance, or disinfectant.
Evergreen bestsellers Picks

Dyson W1 PencilWash Cordless Wet and Dry Floor Cleaner with Dock

Dyson Airwrap i.d. Multi-Styler for Straight and Wavy Hair

KitchenAid Artisan 5-Qt Tilt-Head Stand Mixer – Dried Rose (KSM150PS)
As an affiliate, we earn on qualifying purchases.