TL;DR

Get cleaning gear delivered free with Prime
- Fast, free delivery on millions of items
- Prime Video, Amazon Music and more included
- Member-only deals all year
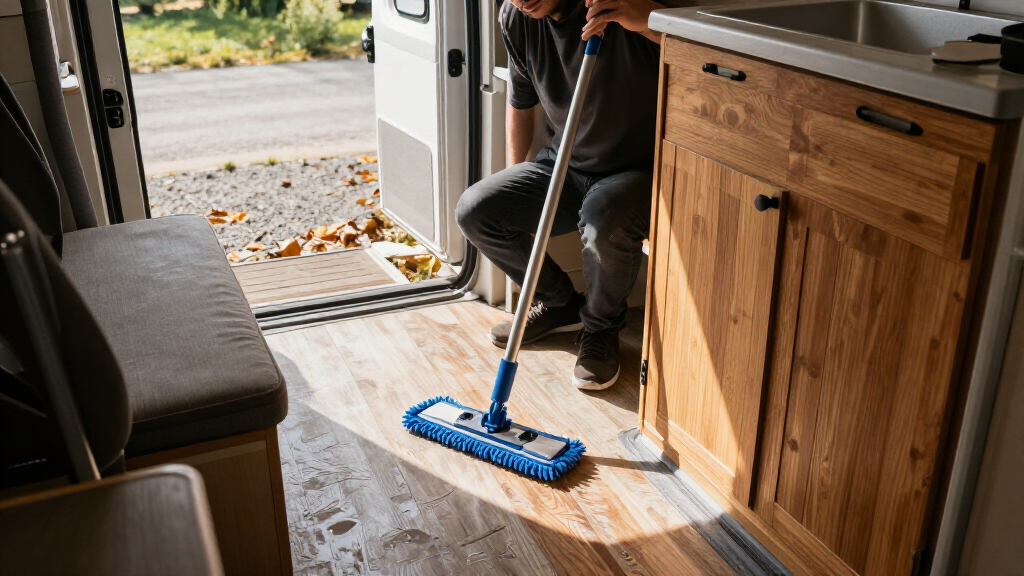
Sweep or vacuum RV floors to lift campsite grit, then damp-mop hard flooring with a cleaner approved for its material and dry wet spots promptly. Use as little water as practical, check the flooring maker’s instructions before trying steam or a new product, and secure entry rugs so they cannot slide during travel.
A few sandy footsteps can make a tidy camper floor sound like fine sandpaper under your shoes. RV floors collect more than ordinary household dust: campsite grit gets tracked in, while spills and pet messes can linger in a small space. The good news is that regular care usually takes only a few compact tools and a few minutes.
This guide shows you how to build an easy routine, choose a method for vinyl, laminate, and other common RV flooring, and handle muddy prints or sticky spills without soaking the floor. Your flooring manufacturer’s instructions come first, especially before you use steam, vinegar, bleach, or any cleaner you have not tried before. When the floor type is uncertain, check the RV documents and test an approved method in a hidden area.
Put a secured mat near the entrance to catch grit, and check beneath rugs for trapped moisture.
Sweep or vacuum before damp-mopping so grit does not drag across the floor.
Identify the flooring and follow its manufacturer’s current cleaning guidance.
Use as little water as practical, blot spills, and dry cleaned areas promptly.
Do not assume steam, vinegar, bleach, or dish soap is safe for your RV floor.
Cleaning RV and Camper Floors the Easy Way
A compact routine lifts campsite grit, cleans hard floors with minimal moisture, and helps prevent scratches and lingering dampness.
A simple three-step routine
Catch dirt at the entrance, remove loose grit, then damp-clean only where needed.
Use a secured entry mat and check beneath rugs for trapped moisture.
Clear grit, hair, and crumbs before they can scratch the floor or smear when wet.
Use an approved cleaner with little water, then dry wet areas promptly.
Match the method to the floor
Identify the material and follow its manufacturer’s care instructions.
| Floor surface | Safer starting method | Watch out for |
|---|---|---|
| Vinyl or LVP | Remove grit; damp-mop with an approved cleaner | Pooling liquid, abrasive pads, unapproved heat |
| Laminate | Use minimal moisture; wipe dry promptly | Water at joints or damaged edges |
| Tile | Follow tile and grout care instructions | Assuming grout tolerates every cleaner |
| Carpet | Vacuum and spot-clean with compatible guidance | Leaving damp areas to sit |
Keep the toolkit compact
Broom or vacuum
Choose a compact tool that fits your storage and floor-care needs.
Microfiber mop
Keep a dry pad for dust and a separate damp pad for wiping.
Secured rugs
Catch dirt near the entrance, and lift rugs now and then to check underneath.
Keep RV floors cleaner with a simple three-step routine
The easiest way to clean RV floors is to catch dirt at the door, remove loose grit, and damp-clean only where needed. That order matters: an entry mat reduces how much soil comes inside, dry sweeping lifts particles before they can scratch the surface, and targeted damp cleaning uses less water than washing the whole floor. In a narrow camper aisle, a quick pass is often easier than waiting for dirt to spread from the entry to the sleeping area.
Start with a mat outside the door, if your campsite and setup allow one, and a washable mat just inside. The outside mat catches larger debris, while the indoor mat traps finer grit and moisture that shoes carry in. Secure indoor rugs so they stay put during travel, and lift them now and then to check for dampness underneath. A mat can protect the floor from traffic, but if it stays wet or traps sand, it can hide the very moisture and abrasion you are trying to prevent. On a rainy afternoon, those mats can catch wet leaves and mud before they reach the kitchen floor.
Next, sweep or vacuum the floor before you wipe it. Grit left behind can scratch or dull hard flooring when you push a mop across it; the pressure of the pad turns loose particles into something like fine abrasive. Finish with a lightly damp microfiber mop and a cleaner approved for the floor. A damp pad can lift residue, while a saturated one may leave water around joints and edges, so dry any wet patches rather than letting water sit.
For example, after a morning walk on a gravel site, sweep around the doorway and under the dinette before cleaning the rest. That small habit tackles the busiest area first and avoids spending time on cleaner parts of the RV. The next step is figuring out what surface you are cleaning, because the same wet method does not suit every floor.
Products Worth Considering

Dyson Ball Animal 3 Upright Vacuum
Roborock RockMow X130H Wire-Free 4WD Robot Lawn Mower

Sonos Arc Ultra Soundbar with Dolby Atmos, Black
As an affiliate, we earn on qualifying purchases.
Identify your flooring before choosing a cleaner
Check your RV’s flooring type and care instructions before choosing a cleaner or mop. Vinyl and luxury vinyl plank are common, but a camper may also have laminate, tile, carpet, or several surfaces in one small interior. A product that suits one material can harm another material’s finish, seams, or adhesive, so identifying the floor first can prevent a quick cleanup from becoming a repair problem.
Look in your owner’s documents or ask the RV or flooring manufacturer if the surface is unclear. Do not rely on appearance alone: vinyl plank and laminate can look remarkably similar, yet they may have different limits for moisture and heat. Those differences matter at seams and edges, where water or heat can affect the layers that hold a floor together. A labeled bottle that says “all purpose” does not automatically mean it is approved for your particular floor; the label describes broad uses, not necessarily the finish or installation in your RV.
Use this quick guide as a starting point, then follow the instructions for your exact floor:
| Floor surface | Safer starting method | Watch out for |
|---|---|---|
| Vinyl or LVP | Remove grit, then damp-mop with an approved cleaner | Pooling liquid, abrasive pads, and unapproved heat |
| Laminate | Use minimal moisture and wipe dry promptly | Water entering joints or damaged edges |
| Tile | Follow the tile and grout care instructions | Assuming grout tolerates every cleaner |
| Carpet | Vacuum and spot-clean using compatible guidance | Leaving damp areas to sit |
The table is a cautious starting point, not a substitute for the flooring maker’s directions. If you have mixed flooring, use separate methods for each surface. At a threshold where carpet meets vinyl, a damp mop can reach the vinyl without wetting the carpet edge. Once you know the material, you can choose a cleaning method with less guesswork and avoid treating the whole RV as if it had one uniform floor.
Remove campsite grit before it scratches the floor
Sweep or vacuum before damp-mopping to lift grit that could scratch or dull a hard floor. In an RV, dirt tends to collect at the door, beneath the dinette, and around the narrow path between the kitchen and bed. These are high-traffic spots, so cleaning them first can remove much of the abrasive material without requiring a detailed pass over every corner. Removing dry particles first also keeps them from turning into muddy streaks.
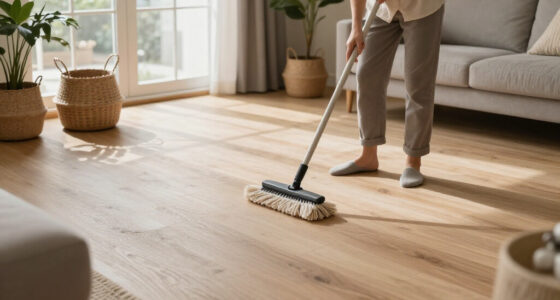
A compact broom, cordless vacuum, or handheld vacuum can fit into a storage bay more easily than bulky house-cleaning gear. Each option has a tradeoff: a broom is simple and needs no charging, while a vacuum can capture fine dust and hair but needs storage and a suitable attachment. Choose an attachment that suits the floor and follow the flooring maker’s care advice. Reusable microfiber pads are also handy: keep one dry for picking up dust and another for a damp wipe, so grit collected during the dry pass does not get dragged back across the surface.
Imagine returning from a trail with fine sand clinging to your shoes. If you mop right away, the wet pad can drag those grains in arcs across the floor. A quick dry pass around the entrance first removes much of that grit before you bring in moisture, reducing both the chance of scuffs and the amount of dirt that ends up on the mop.
During longer trips, sweep as often as campsite conditions call for it; a sandy or muddy site may need attention every day, while a quiet paved stop may need less. Hair and crumbs count, too. Collect pet hair before damp cleaning so it does not bunch into wet clumps along the mop head. With the grit gone, you can clean spots and traffic lanes with a small amount of moisture, which limits drying time in a compact interior.
Damp-clean hard floors without soaking the seams
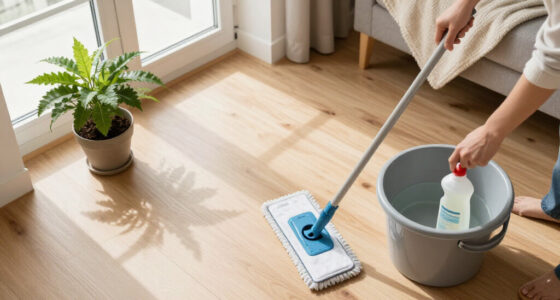
Use a lightly damp mop on hard RV floors and dry wet areas promptly. Less water is especially helpful around laminate joints, flooring edges, and transitions where liquid can work into seams. In an RV, small floor areas and limited airflow can also mean a wet patch lingers under a mat or beside a cabinet. A clean floor should feel wiped, not wet enough to leave puddles or a shiny trail behind your mop.
Follow the floor maker’s guidance for cleaner and dilution, if dilution is allowed. Avoid abrasive pads and harsh or highly concentrated products unless the manufacturer approves them; they can wear a finish or leave residue. Residue may attract dirt or make the surface look streaky, leading to more cleaning than the original mess required. Do not mix cleaning products. If you are trying a new cleaner, test it in a hidden area first and check for a change in color, sheen, or texture. A spot test can reveal a visible reaction, though it cannot guarantee that every seam or edge will tolerate prolonged moisture.
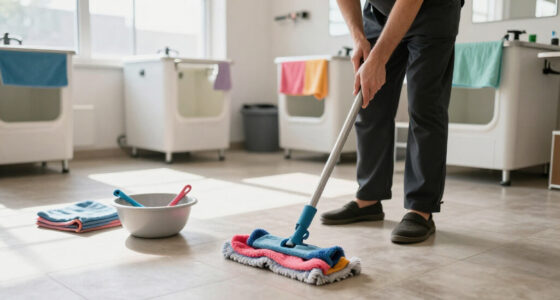
For example, if you find a muddy footprint beside the sink, dampen a microfiber cloth rather than washing the whole aisle. Wipe the mark, rinse or replace the cloth as needed, and dry the patch with a clean towel. This focused approach uses less water and keeps the rest of the floor dry, while changing the cloth prevents loosened dirt from being spread over a larger area.
A small bottle of floor-approved cleaner can be easier to store than several large household bottles. Keep its label and instructions with it, and do not pour it into an unmarked container; knowing the product and dilution matters if you need to clean a specific spill later. If the floor has been wet from a spill or cleaning, ventilate the RV when practical and make sure the area dries fully. Drying is part of the cleanup because moisture left behind can affect vulnerable edges even after the visible soil is gone.
Handle spills, pet hair, and sticky marks without spreading them
Blot spills promptly, remove loose hair and grit before wiping, and use a floor-safe cleaner suited to your material. Fast, focused cleanup usually makes less mess than scrubbing a stain across a small floor. It also limits how long liquid stays near seams, cabinet edges, or the base of a wall, where it may be harder to see and dry.
If juice splashes by the table, press a clean cloth onto the liquid to absorb it instead of sweeping the spill outward. Wipe the remaining mark with an approved cleaner and dry the spot. For a muddy paw print, let loose mud dry enough to lift cleanly, then sweep or vacuum the particles before spot-cleaning; wiping wet mud immediately can spread a broad brown smear and force you to clean a larger area.
Sticky residue deserves patience. Begin with a damp cloth and a cleaner approved for your floor, then test in an inconspicuous spot first. Avoid metal blades or rough scrubbers that can gouge the surface. A small dried patch beside the fridge is easier to address with repeated gentle wipes than with hard scraping, which may remove some finish along with the residue.
For pet hair, vacuum or sweep first so the damp cloth does not roll it into ropes. Keep a few washable cloths in a small bin for spills, and wash them after use. That simple kit makes it easier to respond right away, even when the RV sink and counter are already busy, and clean cloths help prevent yesterday’s soil from being transferred to today’s spill.
Check the floor maker’s instructions before using a steam mop
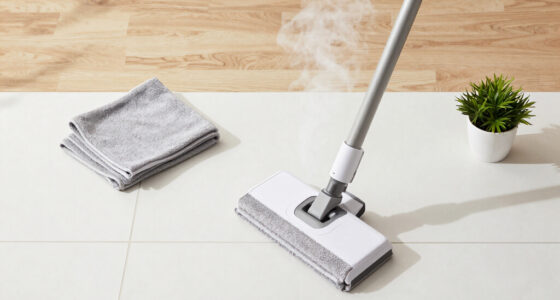
Use a steam mop on RV flooring only if the flooring manufacturer specifically permits it. Steam and heat can damage some vinyl, laminate, adhesive, or seam systems, so a floor that looks sturdy may still be unsuitable. Heat can affect materials beneath the visible surface, and moisture pushed toward a joint may be difficult to remove. A steam mop’s convenience does not override the care instructions or warranty terms for the installed material.
Before you try one, identify the exact floor and consult its current care guidance. If the instructions do not clearly allow steam, choose a lightly damp method instead. That method may take a little longer, but it gives you more control over how much moisture reaches the floor. A hidden-area test can reveal a visible reaction to a permitted cleaner, but it does not prove that heat or moisture is safe across the whole floor.
Think of a camper with vinyl planks and a small lifted edge near the entry. Directing hot steam at that seam could introduce heat and moisture where the flooring is already vulnerable. In that case, remove dry grit and clean the surface gently with a method the manufacturer approves; have a damaged area assessed if the flooring guidance calls for it. The lifted edge is a reason to be more cautious because liquid may travel underneath it, where a surface wipe cannot dry it.
The same caution applies to vinegar, bleach, and dish soap: use them only if the floor maker allows them and the product label supports the intended use. Products can have different effects on finishes, and mixing them can create hazardous fumes or reactions. If the documentation is missing or unclear, contact the manufacturer or use only a cleaning method it confirms as compatible. Taking a moment to check is usually less costly than replacing a damaged section of floor.
Prevent musty smells by finding moisture early
Dry the floor after cleaning and investigate recurring dampness or musty smells instead of covering them with fragrance. A persistent odor can point to moisture under a rug, around a door, near plumbing, or at a floor edge. Routine mopping will not solve a leak or damp subfloor, and adding fragrance can make the source harder to notice without changing the moisture that sustains it.
After a rainy travel day, lift the entry mat and check both sides and the floor beneath it. If you find moisture, dry the area and let air circulate when conditions allow. Also check removable rugs occasionally; a mat can hide dampness long after its top feels dry. This matters because moisture trapped against the floor has less opportunity to evaporate, particularly in a small space with limited airflow.
If a musty smell keeps returning near the bathroom cabinet, look for visible dampness around nearby plumbing and flooring edges. Note when and where it appears, and check the RV’s maintenance guidance. A recurring pattern may help identify whether the source is a splash, condensation, or a plumbing issue. Persistent wetness or suspected hidden damage may need service beyond routine cleaning.
Ventilation helps cleaned areas dry, but it does not replace fixing the cause of a leak. If the floor feels soft, looks swollen, or shows damage, stop treating it as an ordinary cleaning problem and follow the RV maker’s repair advice. Those changes can indicate that moisture has affected material below the surface, where repeated mopping cannot help. Catching moisture early can keep a small maintenance issue from lingering unnoticed.
Pack a compact kit that fits RV life
A few small tools make floor care easier to repeat: a compact broom or cordless vacuum, a microfiber mop, washable cloths, and a small bottle of cleaner approved for your flooring. Compact gear suits an RV’s limited storage and makes it practical to clean as you go rather than wait until dirt covers the aisle. Choosing tools for the space also means you are more likely to use them between stops.
Keep the tools together in a bin or cabinet where they will not shift during travel. Secure the cleaner upright and follow its label for storage. A dry cloth can handle quick crumbs or a drip; the mop is there for visible soil, not for every small mark. Using the smallest suitable tool reduces setup and cleanup time, while keeping the bottle and pads secured prevents spills or loose items in transit.
For instance, on a weeklong trip with a dog, you might keep a hand vacuum and two washable cloths close to the entry. Sweep after a muddy walk, blot water near the door, and damp-clean the affected patch once the loose dirt is gone. That takes less time than unpacking a full household cleaning set, and it avoids using more cleaner than the floor needs. The tradeoff is that a compact kit may not tackle every deep-cleaning job, but routine grit and fresh spills are the messes most likely to benefit from quick attention.
Wash reusable pads and cloths between uses so grit or residue does not transfer back onto the floor. Replace a worn pad when it stops picking up dirt well. The aim is not a spotless floor after every stop; it is a manageable routine that keeps grit, spills, and dampness from building up, while reserving more involved cleaning for when the floor actually needs it.
Frequently Asked Questions
What is the easiest way to clean RV floors?
Sweep or vacuum first, then wipe hard flooring with a lightly damp microfiber mop and a cleaner approved for that floor. Dry wet areas promptly. After a sandy campsite walk, start at the entry so grit does not get tracked through the RV.
Can I use a steam mop in my RV?
Only if the flooring manufacturer permits steam for your exact floor. Steam and heat can harm some vinyl, laminate, adhesives, and seams. If the guidance is unclear, choose a low-moisture method that the maker approves.
How do I clean laminate floors without making them swell?
Remove grit, use minimal moisture, and wipe the floor rather than soaking it. Keep liquid away from joints and damaged edges, then dry the area promptly. Follow the laminate maker’s current care instructions.
Can I use vinegar, bleach, or dish soap on RV flooring?
Use any of these only if the flooring maker permits it and the product label supports that use. They may affect finishes, discolor a surface, or leave residue on some floors. Never mix cleaning products.
How often should I clean an RV floor?
Sweep or vacuum as often as conditions call for; sandy, muddy, or rainy trips may mean daily attention near the entrance. Damp-clean when you see soil or a spill, using a method approved for the flooring. Occupancy, pets, and campsite conditions all affect the schedule.
How can I get rid of a musty smell near the floor?
Clean and dry the area, lift removable rugs, and check for moisture around doors, plumbing, windows, and floor edges. A smell that keeps returning may point to hidden dampness or a leak. Follow the RV maker’s maintenance guidance if you find persistent moisture or damage.
Conclusion
Keep RV floor care simple: catch dirt at the door, remove grit before wiping, and damp-clean only when the floor needs it. Match every cleaner and tool to the flooring manufacturer’s instructions, and dry wet areas promptly.
A small broom, a washable cloth, and a few mindful minutes can keep campsite sand from following you down the aisle like a trail of tiny footprints.