TL;DR
Steam mopping a tiled shower floor is a safe, eco-friendly way to remove grime and kill mold. The key is choosing the right equipment, prepping properly, and using gentle, deliberate passes. Regular steam cleaning keeps your shower fresh and mold-free without harsh chemicals.
If you want a quick, effective way to clean your shower without harsh chemicals, a steam mop might be your best tool. It’s like giving your tiles a hot, deep breath that lifts grime and kills mold spores. But using steam on your shower floor isn’t as simple as just turning it on. You need the right approach to protect your tiles and grout, especially in a moist environment where damage can hide.
This guide will walk you through everything—how to prep, which tools work best, and the step-by-step process. Whether you’re tackling soap scum or mold, you’ll learn practical tips to make your shower sparkling clean and mold-free, safely and sustainably.
Choose a steam mop with adjustable steam levels and appropriate attachments for grout and corners.
Always prep your shower by removing items and inspecting tiles for damage before steaming.
Use slow, overlapping passes and focus on grout lines to lift grime and kill mold spores.
Dry the surface thoroughly after steaming to prevent water pooling and mold growth.
Regular steam cleaning—once a week or biweekly—keeps your shower fresh and mold-free without harsh chemicals.
How to Steam Mop a Tiled Shower Floor
A steam mop can lift soap scum, loosen grime and neutralize mold spores without harsh chemicals. The winning method is simple: choose tile-safe equipment, inspect before cleaning, make slow overlapping passes and remove every trace of pooled moisture.
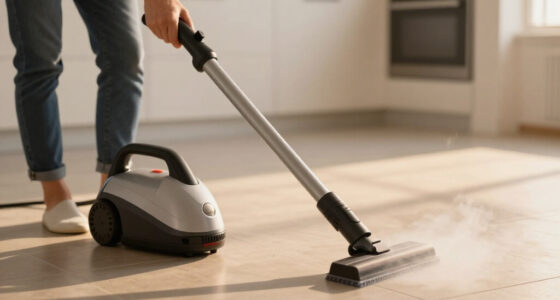
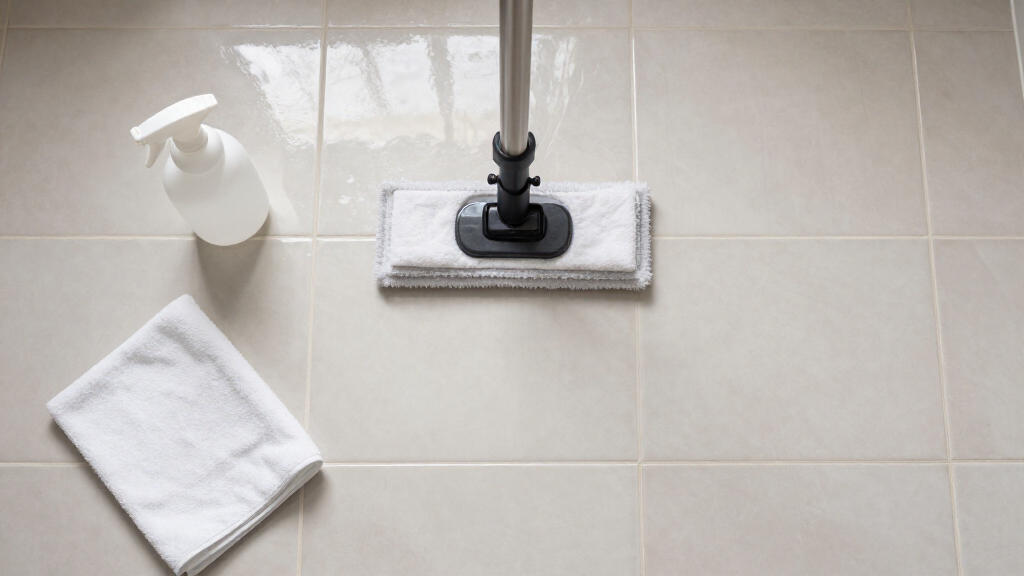
steam mop for tiled shower
As an affiliate, we earn on qualifying purchases.
As an affiliate, we earn on qualifying purchases.
Choose a mop built for controlled cleaning
Adjustable output and focused attachments give you enough heat to clean effectively without flooding grout lines or forcing moisture into vulnerable areas.
Adjustable levels
Start on a moderate setting. Increase only when sealed ceramic or porcelain tile has stubborn buildup and the manufacturer permits it.
Practical tank size
A tank around 300ml can provide roughly 15–20 minutes of cleaning—usually enough for a standard shower floor without a disruptive refill.
Grout attachments
Choose a small brush, corner nozzle or grout head. Focused tools reach edges while reducing the temptation to press too hard with the mop.
tile-safe steam cleaner attachments
As an affiliate, we earn on qualifying purchases.
As an affiliate, we earn on qualifying purchases.
Inspect first. Steam second.
Preparation stops loose debris from becoming wet grit and prevents steam from entering cracks where hidden moisture can encourage mold.

Seyomi Steam Mop, 12-in-1 Powerful Handheld Steam Cleaner Detachable Steam Mops for Floor Cleaning, 565ML Removable Tank, 23FT Power Cable, MultiPurpose Steamer for Hardwood, Tile, Grout, Furniture
【Powerful & Fast Heating Steam Mop】With the 1200W steam mop that transforms water into high-pressure steam in just…
As an affiliate, we earn on qualifying purchases.
As an affiliate, we earn on qualifying purchases.
Four deliberate steps to a cleaner shower floor
The objective is controlled contact—not maximum steam. Give heat time to loosen buildup, overlap each route and finish by actively removing moisture.
Use clean water
Fill with distilled or filtered water, switch on and allow 3–5 minutes to reach operating temperature.
Glide and overlap
Move slowly across the tile. Slightly overlap every pass so no strip is missed or repeatedly saturated.
Trace grout lines
Use the grout attachment with gentle strokes. Pause briefly over buildup, but never grind the brush into grout.
Remove moisture
Squeegee toward the drain, wipe remaining water with microfiber and ventilate until the floor is fully dry.
handheld steam cleaner for bathroom
As an affiliate, we earn on qualifying purchases.
As an affiliate, we earn on qualifying purchases.
Match the technique to the tile
Manufacturer guidance always comes first. Tile composition, sealants, grout condition and previous repairs can change how a floor responds to heat and moisture.
| Surface | Steam suitability | Recommended approach | Main concern |
|---|---|---|---|
| Ceramic tile | ✓Generally suitable | Moderate steam, overlapping passes | Cracked grout or damaged glaze |
| Porcelain tile | ✓Generally suitable | Moderate steam, gentle pressure | Unsealed or deteriorated joints |
| Sealed grout | ~Use with care | Focused nozzle, brief contact | Excess pressure and saturation |
| Natural stone | ~Check first | Test discreetly; seek specialist advice | Heat, moisture, sealant or finish damage |
| Damaged tile or grout | ✗Do not steam | Repair and reseal before cleaning | Water intrusion and hidden mold |
Rule of thumb: intact ceramic and porcelain usually tolerate steam well; damaged grout and uncertain natural stone should be evaluated before heat is applied.
Consistency prevents heavy scrubbing
A short routine session stops soap scum and mold from settling deeply into porous grout. Increase frequency when humidity, poor airflow or recurring mold raises the risk.
Suggested cleaning rhythm
Use these intervals as a practical guide, then adjust for ventilation, shower use and the speed at which residue returns.
Avoid these mistakes
Most steam-related problems come from surface damage, excessive moisture or rushed technique.
The clean-floor chain
Every stage supports the next. Skipping inspection or drying weakens the entire process, even when the steam pass itself is thorough.
Choose the Right Steam Mop for Your Shower Floor
The first step is selecting a steam mop that’s safe and effective for your tiles. Look for models with adjustable steam levels, a large water tank, and attachments suited for grout and corners. A steam mop with a temperature of around 212°F (100°C) kills most germs and mold spores without damaging ceramic or porcelain tiles.
For example, a model with a 300ml tank can run for about 15-20 minutes, giving you enough time to thoroughly clean a standard shower. Attachments matter—use a small brush or a grout-scrubbing head to reach tight corners and grout lines without applying too much pressure.
Always check your tile manufacturer’s guidelines. According to an anonymous researcher, most ceramic and porcelain tiles tolerate steam cleaning well, but natural stones like marble may need extra caution or professional advice.
Prep Your Shower for a Successful Steam Mop Session
Before you start steaming, clear out everything—soap bottles, shampoo, loofahs, and loose debris. Wipe down the surface with a dry cloth to remove excess water, so the steam can do its job without slipping or pooling.
Inspect your tiles and grout for cracks or damage. Damaged grout can let water seep behind tiles, which not only compromises the structural integrity but also creates hidden mold colonies that are difficult to remove later. Fix or seal those areas first to prevent future issues. If there’s soap scum or loose grime, a quick dry wipe or pre-spray with a mild cleaner helps loosen stubborn buildup, making the steam more effective.
Imagine it’s like preparing a garden bed before planting. You want a clean, even surface to get the best results. This step ensures your steam mop will be effective and won’t spread dirt around or cause damage. Proper prep reduces the risk of pushing dirt into cracks or damaging fragile grout, ultimately extending the life of your tiles and preventing costly repairs down the line.
How to Steam Mop a Tiled Shower Floor in 4 Simple Steps
- Fill the water tank of your steam mop with distilled or filtered water to avoid mineral buildup, which can clog the device and reduce its effectiveness over time. Turn it on and let it heat up for 3-5 minutes, ensuring the steam reaches the optimal cleaning temperature.
- Start with dry passes to remove loose dirt and soap residue. Glide the mop over the tile, overlapping each pass slightly. These initial dry passes are crucial—they loosen surface grime, making subsequent steam passes more effective and reducing the risk of spreading dirt around.
- Focus on grout lines using the attachment or a small brush. Use slow, deliberate strokes to allow the steam to penetrate deep into the grout, breaking down buildup and killing mold spores embedded within. This step is vital because grout is porous and prone to harboring mold; thorough cleaning here prevents future mold growth and maintains the integrity of your tiles.
- Finish with a wipe or squeegee to remove excess moisture. Use a microfiber cloth or a squeegee to prevent water pooling, which can lead to water stains or promote mold if left damp. Proper drying ensures your tiles stay pristine and mold-free, especially in humid environments.
For example, in a shower with stubborn soap scum, slow passes with the steam mop and a grout brush can lift even years of buildup. Remember, patience and gentle pressure protect your tiles, and thorough drying prevents moisture from seeping into vulnerable areas, prolonging the life of your grout and tiles.
Tips to Protect Your Tiles and Keep Them Looking New
- Test a small, hidden area first to check for any adverse reaction. This is especially important if you have natural stone or delicate tiles, as some materials can be damaged by high heat or moisture. If any discoloration or damage appears, discontinue use or consult a professional.
- Keep the steam at a moderate level—too much can damage delicate grout or natural stone. High heat or excessive moisture can weaken grout over time, causing cracks or crumbling. Adjusting steam levels helps balance effective cleaning with care for your surfaces.
- Avoid pressing too hard; let the steam do the work. Applying excessive pressure can chip or crack tiles, especially if they are already damaged or fragile. Gentle, consistent passes are more effective and preserve the longevity of your tiles.
- Dry the floor thoroughly after steaming to prevent water damage or mold growth. Residual moisture in grout lines or under tiles can lead to deterioration and mold, particularly in poorly ventilated bathrooms.
- Ventilate the bathroom well during and after cleaning to help everything dry faster. Proper airflow reduces humidity, preventing mold spores from settling and growing in damp areas.
Imagine the steam as a gentle, warm breeze—it lifts dirt without forcing or scraping. Proper testing and gentle handling preserve your tiles’ beauty and integrity over time, ensuring your investment in quality tilework pays off in the long run.
How Often Should You Steam Your Shower Floor?
For best results, aim to steam your shower once a week or biweekly. Regular cleaning prevents soap scum, mold, and grime from building up deep in grout lines, which can be difficult to remove if left untreated. When done consistently, it reduces the need for harsher scrubbing or chemical cleaners later. If your shower is prone to mold, more frequent sessions—maybe twice a week—can help keep it under control, especially in humid climates where mold spores thrive.
Think of it like brushing your teeth: consistent, gentle care prevents bigger problems later. With steam, you’re not just cleaning surface dirt—you’re actively killing mold spores and bacteria, which thrive in damp, warm environments. This ongoing maintenance helps preserve the integrity of your tiles and grout, preventing costly repairs or replacements.
Common Mistakes and How to Avoid Them
Using too much steam on damaged or sensitive tiles can cause cracking or grout deterioration, especially if the tiles or grout are already compromised. Rushing or pressing too hard can also damage delicate surfaces, and neglecting proper ventilation leaves excess moisture, which can lead to mold growth and tile damage over time. These mistakes undermine the very benefits steam cleaning offers and can result in costly repairs.
For instance, in a poorly ventilated bathroom, moisture can become trapped and create a breeding ground for mold, which is difficult to eradicate once established. To avoid this, open a window or run the exhaust fan during and after steaming, ensuring moisture escapes and surfaces dry thoroughly. Additionally, understanding your tile material and adjusting your technique accordingly—such as using lower steam settings on natural stone—helps prevent unintended damage.
Remember, gentle, deliberate passes and proper testing are your best tools for safe, effective cleaning. Recognizing the importance of these precautions preserves your investment in your bathroom’s aesthetic and structural integrity.
Frequently Asked Questions
Is steam mopping safe for all types of tiles in a shower?
Most ceramic and porcelain tiles handle steam well, but natural stone like marble can be sensitive. Always check your tile manufacturer’s guidelines and test a small, hidden area first to avoid damage.Can steam mopping remove mold and mildew from shower tiles?
Yes, high-temperature steam effectively kills mold spores and mildew, helping sanitize your shower. For stubborn or deep-seated mold, consider a combined approach with cleaning solutions or professional treatment.How often should I steam mop my shower?
Once a week or biweekly is ideal to prevent soap scum and mold buildup. More frequent steaming helps keep the surface fresh, especially in humid environments prone to mold growth.Do I need special cleaning solutions for steam mopping?
No, steam cleaning relies on heat and moisture alone. It’s a chemical-free, eco-friendly way to sanitize your shower, making it safe for families and the environment.Can I damage my grout lines by steam mopping?
If used gently with appropriate attachments, steam mopping is safe for grout. Be cautious with natural stone grout or damaged grout—test first and avoid excessive pressure to prevent deterioration.Conclusion
Steam mopping your tiled shower floor is a safe, eco-friendly way to keep it spotless. The trick is in gentle, deliberate passes, proper prep, and avoiding damage to delicate surfaces. With consistent care, your shower will stay fresh, mold-free, and inviting.
Think of your shower as a living space—regular steam cleaning is like giving it a deep, warm breath that keeps it healthy and beautiful for years to come.