
TL;DR
Listen free for 30 days with Audible
Thousands of audiobooks and originals — cancel anytime.
Start your free trialAs an affiliate, we earn on qualifying purchases.
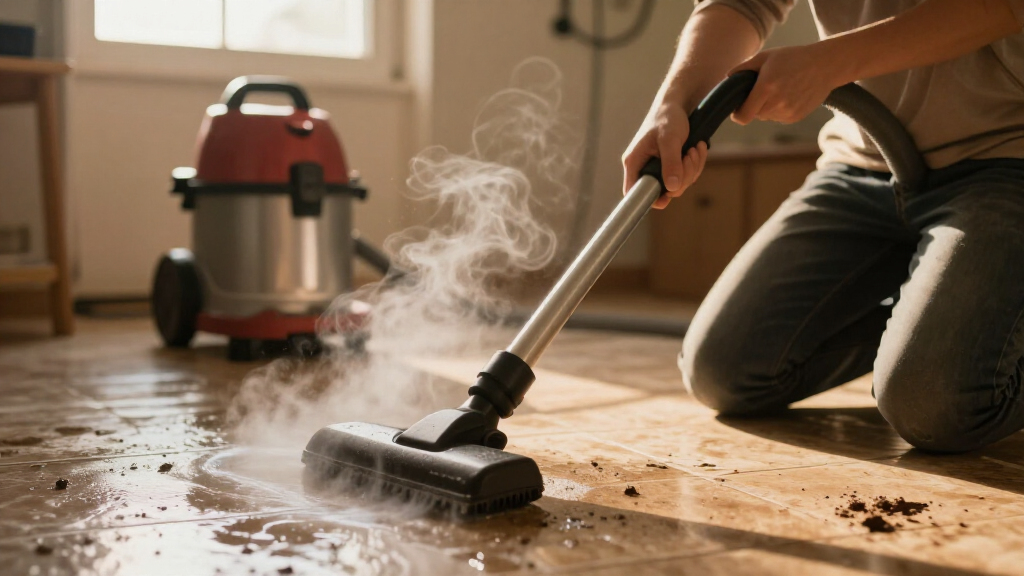
Steam cleaning a muddy mudroom floor works best after dry debris removal. Always check your floor type first, let mud dry, and use proper technique for quick, safe cleaning. It’s a low-water, chemical-free way to refresh your space.
Few things ruin your day faster than stepping onto a muddy, squelchy mudroom floor. Yet, many try to steam clean without preparation, risking damage or simply spreading the mess. If you want a safe, effective way to restore your mudroom’s surface, proper technique matters. This guide walks you through exactly how to steam clean a muddy floor—step by step—while protecting your surfaces and saving time.
Whether you have ceramic tiles, vinyl plank, or sealed concrete, knowing what works and what doesn’t can make a huge difference. And yes, steam cleaning can cut through mud, dirt, and salt stains, but only when done right. Let’s break down everything you need to know to get that floor spotless, without risking damage or wasting effort.
Always let mud dry before cleaning—wet mud smears and complicates cleaning.
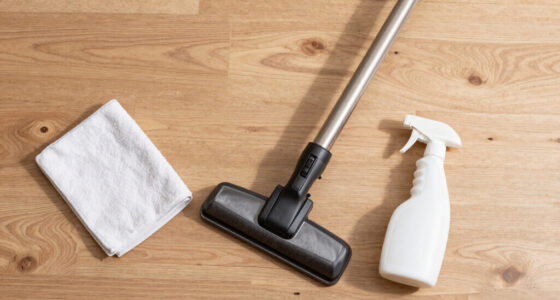
Pre-clean by sweeping, vacuuming, and scraping to remove bulk debris.
Check your floor type first—steam is safe for some surfaces, risky for others.
Use distilled water and work in small sections for best results.
Finish by drying the floor quickly and adding protective mats or trays to keep mud out.
How to Steam Clean a Muddy Mudroom Floor
Let the mud dry before the steam starts. Remove loose debris, verify that the flooring is steam-compatible, then clean with controlled heat, clean pads, and slow overlapping passes. The result is a low-water, chemical-free refresh without turning dirt into slurry.
Know the floor before adding heat
Floor compatibility is the primary safety decision. Steam is well suited to durable, sealed surfaces, but heat and moisture can swell seams, loosen adhesive, degrade finishes, or affect porous materials. Manufacturer care instructions and warranty terms always take priority.
Ceramic & porcelain tile
Durable tile tolerates steam well. Use higher output only where approved, and keep attention on grout lines and edges.
Sealed concrete
A strong mudroom candidate when the sealer is intact. Avoid dwelling over cracks, damaged coatings, or failing sealant.
Most vinyl tile
Choose the lowest effective setting and keep moving. Heat concentrated over edges may soften adhesive or finishes.
Luxury vinyl plank
Many LVP manufacturers prohibit steam mops. Check the exact product warranty before cleaning; do not assume “waterproof” means steam-safe.
Laminate & unsealed wood
Moisture can enter seams and cause swelling, cupping, or warping. Use the manufacturer-approved dry or barely damp method.
Stone, cork & adhesive tile
Unsealed marble or travertine may etch or spall; cork can swell; peel-and-stick vinyl may loosen under heat.
“Water-resistant” is not the same as “steam-approved.” Test a hidden area only after confirming that steam use will not conflict with the flooring warranty.
Turn mud into removable debris
Steam loosens residue through heat and moisture; it does not make piles of soil disappear. A thorough dry pre-clean prevents streaks, pad overload, scratches, and muddy redistribution.
Let it dry
Wait until fresh mud is firm and crumbly. Winter deposits may dry in roughly 15–20 minutes.
Vacuum
Use a stiff broom or vacuum crevice tool to collect grit, soil, pet hair, and dried fragments.
Scrape
Lift caked deposits with a plastic scraper or stiff nylon brush—never a sharp metal blade.
Pre-treat
For approved surfaces, mist salt residue with 1 part vinegar to 3 parts water; let it work and dry.
Steam
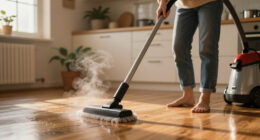
Fill with distilled water, fit a clean pad, and work in controlled sections with constant movement.
Wet mud travels.
Introducing steam too early creates a slurry that settles into grout, seams, corners, and textured finishes.
Vacuum or stiff broom: removes abrasive grit before the mop pad can drag it across the finish.
Plastic scraper: releases hardened mud near thresholds, grout lines, and baseboards.
Several microfiber pads: keep lifted soil from being deposited across the next section.
Never add vinegar to the tank. Use it only as a separate, floor-approved pre-treatment.
Small zones. Clean pads. No lingering.
Divide the floor into roughly 3 × 3 ft sections. Use the lowest effective steam level, move slowly with overlapping passes, and replace the pad as soon as it looks dirty.
The pass pattern
Start low: low steam for vinyl and sealed finishes; higher output may suit approved tile and concrete.
Keep moving: prolonged heat can weaken grout sealer, floor finish, adhesive, or vulnerable seams.
Swap pads: a dirty microfiber pad redistributes mud instead of carrying it away.
Use distilled water: it limits mineral buildup inside the machine and reduces white streaks.
Match output to the surface
Choose the right setup
Mudrooms collect the home’s heaviest soil load—often requiring cleaning two to three times more frequently during wet or snowy seasons. The best setup handles dry debris, tight edges, and controlled steam without slowing the workflow.
| Cleaning setup | Typical cost | Best use | Edges & grout | Muddy-floor verdict |
|---|---|---|---|---|
| Basic steam mop | $50–$150 | Open floor areas | ~Limited | ✓Good after vacuuming |
| Vac-and-steam combo | Model dependent | Dry debris plus routine steaming | ~Moderate | ✓Efficient for frequent soil |
| Canister steamer | $100–$300+ | Attachments and detailed work | ✓Strong | ✓Best for grout-heavy tile |
| Cordless steam mop | Model dependent | Fast, cord-free passes | ~Varies | ~Runtime often 15–25 min |
| Steam on prohibited LVP | Potential warranty cost | Not recommended | ✗Risk at seams | ✗Use approved care method |
Use a nylon brush
Fit a grout attachment or use a handheld steamer with a nylon brush. Work along baseboards and grout lines without holding heat in one place.
Inspect every 1–2 years
Frequent steam cleaning can degrade grout sealer. Check for darkening, water absorption, or crumbling joints and re-seal as needed.
Check before traffic
Steam-cleaned floors often dry in under five minutes. Increase ventilation and keep shoes, pets, and furniture off until fully dry.
A clean floor starts at the door
Preventive layers reduce how much soil reaches the floor, making every later step faster and gentler. Build a simple chain from outdoor capture to final drying.
Steam at roughly 212–245°F can kill many common household bacteria and dust mites, but meaningful sanitization requires sufficient dwell time—often cited as about ten seconds or more per spot. Casual moving passes clean effectively, but should not automatically be described as sanitizing.
Why Drying Mud First Is the Secret to a Clean Floor
Steam cleaning a muddy floor works best when the mud is fully dry. Wet mud smears, spreads, and can turn your cleaning into a muddy mess. Imagine trying to wipe glue from a paper—better to let it dry first, then peel it away cleanly.
Dry mud is essentially solidified dirt and salt deposits that have lost their moisture content, making them easier to remove. If you attempt to steam over wet mud, you risk spreading the mess, creating stubborn stains, or even damaging your floor’s surface—especially on porous or unsealed materials that absorb water. Additionally, wet mud can turn into a slurry that clings to your mop or steam pad, reducing cleaning efficiency and increasing the risk of streaking or streaky residues.
For example, in a typical winter mudroom, snowmelt and salt leave behind chunky deposits that dry within 15–20 minutes. Once hardened, vacuum or sweep up the bulk mud before steaming. This prevents the steam from just spreading dirt around and makes the process much more effective. If you skip this step, you might find yourself battling a muddy slurry rather than cleaning it, which can lead to more work and potential damage.
Remember: patience with drying times not only improves cleaning results but also preserves the integrity of your flooring. Rushing the process can cause scratches, warping, or other damage, especially on delicate surfaces. Taking the time to dry the mud thoroughly is a small investment that yields a much cleaner, safer floor in the end.
steam cleaner for tile and concrete floors
As an affiliate, we earn on qualifying purchases.
As an affiliate, we earn on qualifying purchases.
Step-by-Step: How to Prepare Your Muddy Floor for Steam Cleaning
- Sweep or vacuum thoroughly to remove loose dirt and dry mud. Use a stiff broom or a vacuum with a crevice tool. This initial step reduces the amount of debris that steam needs to penetrate, preventing streaks and ensuring more effective cleaning. Skipping this can leave loose dirt on the surface, which steam alone cannot lift, leading to a dull appearance or streaky finish.
- Scrape stubborn deposits with a plastic scraper or stiff brush. Focus on caked-on mud near baseboards or grout lines. Removing these hardened spots early prevents them from turning into stubborn stains or causing scratches when you steam over them. It also reduces the risk of mud smearing or building up in corners, which can be difficult to remove later.
- Pre-treat salt stains with a diluted vinegar solution (1 part vinegar, 3 parts water). Spray lightly, then let dry. Salt deposits can be particularly challenging because they crystallize and bond to the surface. Pre-treating with vinegar dissolves these salts, making them easier to lift during steaming. This step also helps prevent salt buildup that can damage grout or sealants over time if left untreated.
- Check your floor type: ensure your surface is compatible with steam—tile, sealed concrete, vinyl tile are safe; unsealed wood or natural stone need caution. Knowing your surface helps you avoid damage like warping, cracking, or discoloration. For example, unsealed wood can swell or warp when exposed to moisture, while natural stone might etch or stain if exposed to high heat or moisture. Confirming compatibility allows you to adjust your technique accordingly, such as using lower steam settings or avoiding steam altogether on delicate surfaces.
Once prepped, you’re ready for the steaming process. This routine ensures you won’t just spread mud around, and it helps salt stains lift more easily. Proper preparation is the key to efficient, damage-free cleaning, saving you time and effort in the long run.
handheld steam mop for muddy floors
As an affiliate, we earn on qualifying purchases.
As an affiliate, we earn on qualifying purchases.
Choosing the Right Steam Mop and Settings for Your Floor
Not all steam mops are created equal. For muddy floors, a unit with adjustable steam control and a large water tank makes life easier. Use the lowest setting on vinyl or sealed floors; higher steam levels suit tile and concrete.
Distilled water prevents mineral buildup, especially in hard-water areas—think of it as giving your steam mop a long, happy life. Work in small sections, about 3×3 feet, with slow, overlapping passes.
For example, a ceramic tile mudroom might need maximum steam for grout lines, while vinyl plank floors require gentle, lower steam levels to avoid warping or bubbling.
Choosing the right settings isn’t just about safety; it impacts cleaning effectiveness. Too much steam can damage delicate surfaces or cause water to seep into seams or unsealed areas, leading to long-term damage. Conversely, too little may not loosen embedded dirt or salt residues. Finding the optimal balance ensures thorough cleaning without harm, extending the lifespan of your flooring and equipment.
chemical-free steam cleaning machine
As an affiliate, we earn on qualifying purchases.
As an affiliate, we earn on qualifying purchases.
How to Steam Clean Without Damaging Your Floor Surface
To avoid damage, always test a small, hidden area first—especially on natural stone or unsealed surfaces. Use clean microfiber pads and swap them often. Dirty pads just smear mud and dirt around. Reusing dirty pads can redeposit debris onto your floor, making it look dull and uneven. Regularly changing pads or cleaning them ensures that only clean material contacts your floor, maintaining a pristine appearance.
Work slowly, in small sections, and keep the steam moving. Avoid lingering in one spot; prolonged heat or moisture can degrade grout sealer or damage delicate finishes. Keeping the steam moving prevents excess moisture from seeping into seams or porous materials, which can cause swelling, warping, or staining. Also, using the correct steam level minimizes the risk of surface damage, especially on sensitive finishes like unsealed wood or natural stone.
For example, a sealed concrete mudroom responds well to frequent passes, but unsealed wood could swell or warp if exposed to excess moisture. Always check manufacturer guidance first and adjust your technique accordingly. When in doubt, opt for lower heat settings or dry cleaning methods to preserve your flooring’s integrity.
As an affiliate, we earn on qualifying purchases.
How to Tackle Grout and Edges—Get Every Spot
Grout lines and baseboards trap dirt like a magnet. Use a steam mop with a grout attachment or a handheld steamer fitted with a nylon brush. This lets you blast out mud and salt from tight spots, which are often overlooked but are critical for a truly clean floor. Dirt and salt tend to settle in these crevices because of their low profile and limited airflow, making them stubborn to clean with just a mop or cloth.
Hot steam penetrates deep into grout lines, loosening embedded grime and salt crystals. When combined with a nylon brush or small scrub tool, it helps lift even the most stubborn deposits without harsh scrubbing, reducing the risk of damaging the grout or surrounding surfaces. Regularly cleaning these areas prevents buildup that can lead to discoloration or deterioration over time. Re-sealing grout every 1–2 years, especially after deep cleanings, helps maintain its protective barrier against dirt and salt intrusion, prolonging the appearance and durability of your flooring.
Pay extra attention to edges—those areas see the most mud splashes and salt deposits. A dedicated tool makes the job quick and thorough, preventing small patches of dirt from turning into larger, more stubborn stains over time. This meticulous attention ensures your entire floor is uniformly clean and protected against future damage.
Dry and Prevent: How to Finish Strong and Keep Mud Out
After steaming, floors dry rapidly—usually under 5 minutes—so you can resume normal use quickly. Just check for any puddles or streaks. If needed, wipe with a dry microfiber cloth for extra shine. This quick-drying process minimizes the risk of water damage or streak formation, especially on sensitive surfaces. Wiping excess moisture ensures no residual dampness remains, which could attract dirt or promote mold growth over time.
Prevent future mud buildup with simple measures: a sturdy boot tray, washable entry mats, and a designated shoe-removal zone. These tricks cut mud load by up to 50%, according to industry reports. Regularly cleaning and maintaining these areas reduces the amount of dirt and salt that gets tracked in, making your cleaning routine less intensive and more effective in the long run. Additionally, encouraging family members to remove muddy shoes outside prevents the problem altogether, saving time and effort.
For example, a mudroom with a large rubber mat outside the door sees much less residual dirt after steaming. Keeping mud off the floor is half the battle, and consistent preventive measures dramatically extend the cleanliness and lifespan of your flooring.
What Surfaces Are Safe for Steam Cleaning? Know Before You Start
Not all floors tolerate steam. Ceramic, porcelain, sealed concrete, and most vinyl tiles are safe, but unsealed hardwood, natural stone, or peel-and-stick vinyl often aren’t. Check your flooring’s manufacturer instructions before proceeding. Understanding the material properties helps you avoid unintended damage, such as warping, staining, or etching. For example, unsealed wood is highly porous and moisture-sensitive; exposing it to steam can cause swelling, warping, or even delamination. Natural stone, like marble or limestone, can absorb water and acids, leading to etching or staining. By knowing your surface, you can decide whether to proceed, adjust settings, or opt for alternative cleaning methods.
For example, a vinyl plank floor from Shaw warns against steam, risking warranty void if used. Always verify before steaming. When in doubt, perform a patch test on an inconspicuous area, and if any discoloration or damage occurs, avoid steam cleaning that surface altogether. This awareness protects your investment and ensures you don’t unintentionally void warranties or cause costly repairs. Proper surface identification is a crucial step in planning a safe and effective cleaning routine, especially in multi-surface environments like mudrooms.
Frequently Asked Questions
Can I use a steam mop on unsealed hardwood floors?
No, unsealed hardwood is too sensitive to moisture and heat. Steam can cause the wood to swell, warp, or peel. Always check your manufacturer’s guidance and consider dry cleaning methods instead.
Do I need to vacuum or sweep before steaming a muddy floor?
Absolutely. Removing loose dirt and dried mud ensures steam doesn’t just spread debris around. It also speeds up the process and prevents streaks or smears.
Will steam cleaning disinfect my mudroom floor?
Steam heats water to over 212°F, which can kill many bacteria and dust mites. However, effective sanitization depends on dwell time—casual mopping usually doesn’t provide enough contact time for full disinfection.
Can I add cleaning solutions to my steam mop tank?
Most manufacturers advise against it. Adding chemicals can damage the boiler or void warranties. Instead, pre-treat stains or salt deposits with diluted vinegar or a mild cleaner, then steam as usual.
How often should I steam clean my muddy mudroom floor?
Frequency depends on traffic and mud load, but typically every 1–2 weeks during muddy seasons. Regular cleaning keeps salt and dirt from settling and prolongs your floor’s life.
Conclusion
Steam cleaning a muddy mudroom floor isn’t magic—it’s about proper prep, gentle technique, and knowing your surface. When done right, it lifts dirt and salt without risking damage or leaving streaks. A tidy mudroom keeps your home fresher and your floors happier.
Think of steam cleaning as giving your floor a gentle, heat-powered bath—effective, chemical-free, and quick. Next time mud finds its way in, you’ll have a clear plan for a spotless, healthy space.
NFL season / tailgating Picks
team gear
As an affiliate, we earn on qualifying purchases.