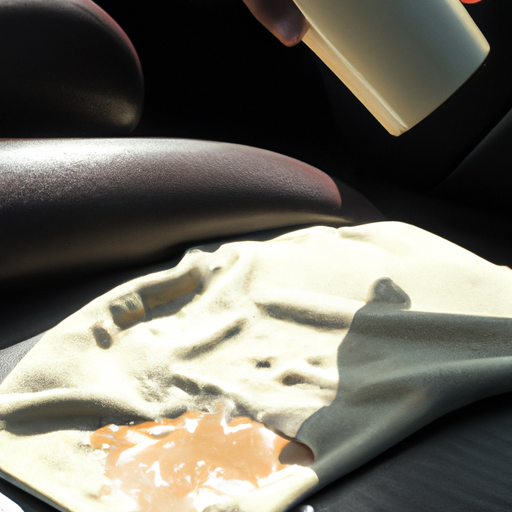
As a coffee enthusiast, I’m well-acquainted with the despair caused by inadvertently spilling a latte on my car’s upholstery. This mishap not only leaves behind an unsightly mark but also produces a smell that can linger for several days if not properly dealt with.
Thankfully, with a few simple steps and some patience, you can effectively remove those stubborn stains and odors from your car seats. The key to successfully cleaning up a latte spill is to act fast and avoid letting the liquid seep deeper into the fabric.
With the right tools and techniques, you can get your car looking and smelling like new again in no time. In this article, I’ll walk you through the step-by-step process of how to clean a latte spill from car upholstery so that you can tackle any future spills with confidence.
Apply a stain protector specifically designed for car upholstery to prevent future stains.
Take preventive measures to avoid spills in the car, such as using spill-proof cups or seat covers made of waterproof material.
Act Fast and Blot the Area
Don’t wait, start blotting the spilled latte with a clean cloth or paper towel to prevent it from setting in and causing permanent damage to your car upholstery. The importance of quick action cannot be overstated when it comes to cleaning spills.
When blotting, be careful not to rub the spill into the upholstery as this can make the stain worse. Instead, press down firmly on the area with a clean cloth or paper towel until most of the liquid is absorbed. Common mistakes to avoid include using colored cloths that can transfer dye onto your upholstery and pressing too hard which can damage delicate fabrics.
Once you have blotted up as much excess liquid as possible, it’s time to move onto removing any remaining residue. By acting fast and blotting up as much of the spill as possible, you’ve already taken an important step towards preventing permanent damage to your car’s interior.
Remove Excess Liquid
First, grab a few paper towels to soak up any excess liquid. Using absorbent materials is crucial in preventing stains from setting into the car upholstery. Gently press down on the spill, working from the outside inwards to avoid spreading it further across your car seats.
Advertisement
Next, dispose of the soiled paper towels and repeat this process until no more liquid can be absorbed. It’s essential to use fresh paper towels each time to prevent reintroducing any of the spilled liquid back onto your upholstery.
Once you’ve removed as much of the excess liquid as possible, move on to preparing a cleaning solution. Before moving on to mix a cleaning solution, be sure that all visible traces of liquid have been removed from your car seats. This ensures that your cleaning process won’t push any remaining residue further into the material or cause additional damage.
Mix a Cleaning Solution
Once you’ve soaked up the excess liquid, it’s time to mix a cleaning solution that will effectively remove any remaining stains and odors from your seats – you’ll be amazed at how well this solution works! There are a few alternative cleaning methods that you can try, but I highly recommend using an eco-friendly solution. Not only is it better for the environment, but it’s also safer for your health.
To make an effective cleaning solution, start by mixing equal parts water and white vinegar in a spray bottle. You can also add a few drops of essential oil like lavender or tea tree oil to mask any lingering odors. This simple mixture is powerful enough to lift even the toughest stains without causing damage to your upholstery.
It’s important to note that different types of fabrics may require different cleaning solutions. Before applying any product on your seats, always do a spot test first on an inconspicuous area. In the next section, we will discuss how to properly test the cleaning solution before applying it all over your car upholstery.
Advertisement
Test the Cleaning Solution
Before applying the cleaning solution, it’s crucial to test it on a small inconspicuous area of your seat fabric to ensure it won’t cause any damage or discoloration. To do this, prepare a small amount of the cleaning solution and apply it to an area that is hidden from plain sight.
Wait for several minutes before wiping off the solution with a clean cloth. If there are no negative effects such as color fading or fabric damage, then you can proceed with confidence. Testing effectiveness is also important in determining whether the cleaning solution will be effective in removing the latte spill from your car upholstery.
Some solutions may work better than others depending on the type of stain and fabric. If the initial test doesn’t seem to have much effect, you may want to consider alternative solutions that are specifically designed for coffee stains or seek professional help.
Once you’ve determined that the cleaning solution is safe and effective, you can move on to applying it onto the affected area. However, keep in mind that different types of fabrics require different approaches when it comes to cleaning stains.
In general, blotting rather than scrubbing is recommended for upholstery fabrics like leather and suede which are more delicate compared to other materials like nylon or polyester blends.
Advertisement
Apply the Cleaning Solution
To apply the cleaning solution to the latte spill on my car upholstery, I first need to grab a clean cloth.
Then, I’ll saturate the cloth with the cleaning solution and gently blot the stained area.
It’s important not to rub or scrub too hard as this may damage the fabric.
Apply the Solution to a Clean Cloth
Dab the solution onto a dry cloth for best results in removing the latte spill from car upholstery. Using a microfiber cloth is recommended because it is gentle and won’t damage the fabric. Make sure to choose the right cleaning solution that is safe for your upholstery type. Refer to the manufacturer’s instructions or consult with a professional if you are unsure.
To make sure you apply just enough solution, refer to this table:
Advertisement
Type of Upholstery
Amount of Solution
Leather
A dime-sized amount
Vinyl
A quarter-sized amount
Fabric
A nickel-sized amount
Once you have applied the solution onto the cloth, gently blot at the stained area instead of rubbing it vigorously. This will prevent any further damage to your upholstery and ensure that you remove all traces of coffee stain effectively.
Blot the Stained Area
Now that the cleaning solution has been applied to the clean cloth, it’s time to start blotting the stained area.
Make sure to use a microfiber cloth for this step, as it’s more absorbent and gentle on the upholstery compared to other types of cloths. The benefits of using a microfiber cloth include being able to pick up dirt and grime without leaving behind any streaks or scratches.
It’s also important to check your car manufacturer’s recommended cleaning products before proceeding with any stain removal process. Using the wrong product may result in damage or discoloration of your car upholstery.
By following these guidelines, you can ensure that your car remains in its best condition while effectively removing any stains. With that said, let’s move onto the next step: rinsing the area.
Advertisement
Rinse the Area
After soaking up as much of the latte as possible, you’ll want to rinse the area with clean water to remove any remaining residue. It’s important to use cold water for rinsing, as hot water can cause damage to upholstery. Hot water can set stains and make them more difficult to remove, so it’s best to avoid it altogether.
To effectively rinse the stained area, follow these steps:
Fill a bucket with cold water.
Dip a clean cloth into the bucket and wring out excess water.
Gently blot the stained area with the damp cloth.
Repeat until all residue has been removed.
It may take several rounds of rinsing and blotting before the stain is completely gone, but taking your time will ensure that you don’t damage your car’s upholstery in the process.
With the stain fully removed from your car’s upholstery, it’s time to move on to repeating this process if necessary or moving onto drying the area thoroughly.
Repeat the Process
To ensure that all traces of the stain are gone, it’s important to repeat the cleaning process if necessary. It may seem like a tedious task, but it’s crucial in achieving a spotless result.
The benefits of repetition include ensuring that all remnants of the spill are removed and preventing any potential odors from forming. To stay motivated to repeat the process, try breaking up the task into smaller steps. Focus on one section of the stain at a time and take breaks as needed.
Advertisement
Additionally, seeing progress can be encouraging, so periodically check your work to see how much has been accomplished. Once you’ve repeated the cleaning process as needed, move on to drying the area. This step is critical in preventing any leftover moisture from causing damage or mold growth on your upholstery.
Dry the Area
When I clean a latte spill from my car upholstery, the next step is to dry the area thoroughly. To do this, I usually use a hair dryer on the lowest setting, holding it 6-8 inches away from the spot. This helps to evaporate any remaining moisture and prevent mold or mildew growth.
Alternatively, if it’s a sunny day outside, I’ll leave the car windows open and let the area air dry naturally.
Use a Hair Dryer
Using a hair dryer can quickly and effectively remove the latte stain from your car upholstery. However, before using this method, it’s important to take some safety precautions.
First, ensure that the hair dryer isn’t too close to the upholstery as it could cause damage or even start a fire. Second, choose the right temperature setting on your hair dryer – high heat can melt synthetic materials while low heat may not be effective enough to remove the stain.
Advertisement
Now that you’ve taken these precautions, it’s time to use the hair dryer to clean up that stubborn latte spill! Start by using a cool setting on your hair dryer and hold it about 6 inches away from the stained area. Use circular motions with your hand to blow cool air onto the stain until it dries completely.
If there’s still some residue left behind, switch to a warm setting on your hair dryer and repeat this process until all traces of the stain are gone. Once you’re done, move on to air drying the area for best results.
Air Dry
After using a hair dryer to remove as much moisture as possible from the latte spill on my car upholstery, it’s important to let the remaining dampness air dry. This is because there are numerous benefits of air drying that make this method highly effective in eliminating any residual stains and odors left behind by the spill.
One of the main benefits of air drying is that it allows for natural ventilation that helps to evaporate any remaining liquid. This helps to prevent mold and mildew growth, which can occur if moisture is trapped within the fibers of your car upholstery.
Additionally, air drying doesn’t require any additional resources or energy beyond simply leaving your car windows open and allowing fresh air to circulate through your vehicle. However, if you’re unable to leave your car windows open due to weather conditions or safety concerns, there are alternative methods such as using fans or dehumidifiers that can help expedite the drying process.
Advertisement
With all these benefits in mind, it’s clear that air drying is an essential step in cleaning up a latte spill from car upholstery. But don’t stop here – read on for more tips on how to protect your upholstery in the future with a stain protector!
Apply a Stain Protector
To keep your car upholstery safe from future spills and stains, make sure to apply a stain protector after cleaning up the latte spill – it’s like giving your seats a suit of armor! Stain protectors are designed to create a barrier between the fabric and any liquids that come in contact with it. This means that spills will not penetrate into the fibers and can be easily wiped away.
There are many benefits of using stain protectors on car upholstery. Not only do they prevent stains from setting in, but they also make cleaning up spills much easier. They can even help extend the life of your upholstery by preventing wear and tear caused by constant cleaning or scrubbing.
When choosing a stain protector, look for one that is specifically designed for car upholstery and is compatible with the type of fabric you have.
By applying a stain protector, you’re taking proactive steps to prevent future spills from wreaking havoc on your car’s interior. In addition to protecting against liquid stains, there are other preventative measures you can take such as using spill-proof travel mugs or avoiding eating and drinking while driving. By being mindful of potential hazards, you’ll be able to enjoy your coffee without worrying about ruining your upholstery again.
Advertisement
Prevent Future Spills
Hey, you can avoid future disasters by taking simple preventative measures. Preventing spills is the best way to keep your car upholstery clean and free from stains.
One easy tip is to make sure all lids are securely closed before transporting beverages in your vehicle. Additionally, it’s important to refrain from eating or drinking while driving, as this increases the likelihood of a spill.
Investing in spill proof car accessories can also be a game changer when it comes to preventing spills. Consider purchasing spill proof cups or travel mugs with tight fitting lids that prevent liquids from leaking out if accidentally knocked over. You may also want to consider seat covers made of waterproof material that can easily be wiped down if liquid spills occur.
Lastly, being mindful and aware while transporting beverages in your car goes a long way in preventing spills. Take extra care when placing drinks on uneven surfaces or when making sharp turns or sudden stops.
What are some common causes of latte spills in cars?
Have you ever found yourself driving down the road, sipping on a delicious latte from your favorite coffee shop, only to hit a pothole and spill your drink all over your car’s upholstery?
Latte spills in cars can be caused by a variety of factors such as sudden stops, sharp turns, or simply not securing the lid properly. Prevention methods include using spill-proof travel mugs, placing drinks in cup holders away from electronic devices, and taking extra caution while driving.
It’s important to take preventative measures to avoid spilling your latte in the first place but if it does happen, knowing how to clean it from car upholstery is essential.
Can I use a regular household cleaner instead of a specialized cleaning solution?
When it comes to cleaning up a latte spill from car upholstery, many people wonder if they can use a regular household cleaner instead of a specialized cleaning solution. While it may seem like a convenient option, using a household cleaner as an alternative to a specialized cleaning solution may not be as effective in removing the stain and odor caused by the spilled latte.
Specialized cleaning solutions are specifically designed to target certain types of stains and odors, making them more effective than general purpose cleaners. Additionally, some household cleaners may contain harsh chemicals that could damage or discolor your car’s upholstery.
Advertisement
In order to ensure that you effectively clean up the latte spill without causing any damage, it’s important to use a specialized cleaning solution that’s designed for the job at hand.
What should I do if the spill has already dried and set into the upholstery?
If a spill has already dried and set into car upholstery, it can be more difficult to remove. Prevention techniques are always the best approach, but if you’re dealing with an old stain, it’s time to call in the professionals.
While there are many DIY solutions out there, they can often do more harm than good when it comes to tough stains like these. Professional cleaning services have specialized equipment and solutions that can effectively break down and remove even the most stubborn of stains without damaging your upholstery.
Don’t hesitate to seek out professional help if you’re struggling with a set-in spill. It could save you time, money, and potentially irreversible damage to your car’s interior.
Can I use a vacuum cleaner to remove excess liquid instead of blotting?
Vacuum cleaning tips are a great way to remove excess liquid from car upholstery, but it may not be the most effective method for cleaning up a latte spill. Instead, alternative cleaning solutions such as blotting with a clean towel or using a mixture of water and vinegar can be more successful in removing the stain.
Advertisement
It’s important to act quickly when dealing with spills on upholstery, as allowing them to dry and set can make them much harder to remove. Additionally, using too much water or cleaning solution can damage the upholstery fibers, so it’s important to use only small amounts and test any new products on an inconspicuous area first.
With proper care and attention, even tough stains like latte spills can be effectively removed from car upholstery.
Is it necessary to apply a stain protector even if the spill has been completely removed?
Using a stain protector on car upholstery is like putting on a raincoat in the middle of a storm. It’s always better to be prepared than sorry, especially when it comes to your car’s interior.
The benefits of using a stain protector are numerous, as it will not only repel spills and stains but also make cleaning them up much easier. When choosing a stain protector, ensure that it’s compatible with your specific type of upholstery and follow the instructions carefully for best results.
Applying the product correctly will help ensure that even if spills do happen, they won’t leave lasting damage or stains on your car seats. Therefore, while it may seem unnecessary to apply a stain protector after completely removing a spill from car upholstery, doing so can provide valuable protection against future mishaps.
Advertisement
Conclusion
Well, I never thought I’d be an expert in cleaning latte spills from car upholstery, but here we are. After going through the process myself, I can confidently say that it’s not as daunting as it seems.
With a little bit of quick thinking, some household items, and patience, you can get your car looking like new again.
It’s almost ironic how something as small as a spilled latte can cause so much stress and frustration. But with the steps outlined in this article, you’ll be able to tackle any future spills with ease.
Remember to act fast and blot the area, remove excess liquid, mix a cleaning solution (and test it!), apply the solution carefully and repeat if necessary. Once you’ve dried the area thoroughly, consider applying a stain protector to prevent future mishaps.
Who knew that being prepared for a caffeine spill could actually make your life easier?
Dorothy is the Editor in Chief of Steam Mop List. She’s dedicated to helping people learn how to clean their homes quickly and easily. Dorothy believes cleaning should be fun and rewarding, so everyone can feel confident in their ability to keep their space spick and span. Dorothy enjoys spending time with her family and friends when she’s not writing or editing articles.
Ah, the joys of loving coffee! There’s just something about the aroma of freshly brewed coffee in the morning that immediately lifts my spirits. However, each delightful gulp comes with the risk of spills and stains, especially when I’m rushing to get ready for my day at work.
One particularly frustrating incident involved spilling my latte on the bathroom tiles and floor. As I stood there, staring at the brown stain spreading across the pristine white surface, I couldn’t help but feel defeated.
But fear not fellow caffeine addicts, for after some trial and error (and much frustration), I have discovered some effective methods for dealing with latte spills and stains on bathroom tiles and floors.
So whether you’re a clumsy coffee drinker like myself or just unlucky when it comes to spills, read on for some useful tips that will save your bathroom from looking like a coffee shop gone wrong!
Quick response is important to prevent stains from setting in.
Dish soap and warm water can effectively remove latte stains without damaging surfaces.
A cleaning solution made of warm water, white vinegar, and dish soap is eco-friendly and effective.
Prevention techniques like using coasters and regularly cleaning and sealing tiles can help avoid future spills and stains.
Act Quickly
You’ve got to act quickly if you want to prevent those latte spills and stains from becoming a permanent fixture on your bathroom tiles and floors. Quick response is key when it comes to dealing with any kind of spill, especially one that involves coffee.
The longer you wait, the harder it will be to remove the stain completely. Damage control is also important in preventing any further spread of the spill. Use paper towels or a cloth to blot up as much of the liquid as possible.
Advertisement
Avoid spreading the stain by wiping in a circular motion – this’ll only make matters worse. Now that you’ve responded quickly and contained the spill, it’s time to gather your cleaning supplies and get ready for the next step in removing those pesky stains from your bathroom tiles and floors.
Gather Your Cleaning Supplies
Once you’ve got all your gear together, it’s time to tackle those pesky coffee messes. When dealing with latte spills and stains on bathroom tiles and floors, it’s important to have the right cleaning supplies at hand.
Some of the essential items you’ll need include paper towels or a clean cloth, a spray bottle filled with water, a scrub brush or sponge, and a cleaning solution. When choosing the right type of cleaning supplies for this task, it’s important to keep in mind that different surfaces require different types of products.
For instance, if you’re dealing with coffee stains on ceramic tiles or porcelain surfaces, an all-purpose cleaner containing bleach may be effective. However, if you’re trying to remove stains from marble or granite surfaces, using an abrasive cleaner can cause damage.
To organize your cleaning supplies for this task, gather them in one place that is easily accessible when needed. You may want to use a caddy or container to hold your supplies so that they are easy to transport from room to room. Make sure that each item is clearly labeled so that you can quickly identify what you need when faced with a spill or stain.
Advertisement
Now that you’ve gathered all the necessary cleaning materials and organized them appropriately, it’s time to start cleaning up those latte spills and stains! One effective method is using dish soap and warm water as they’ll help break down the oils in the milk without damaging any surfaces.
Use Dish Soap and Warm Water
Alright, so now that we’ve got our cleaning supplies sorted out, let’s talk about how to actually get rid of those pesky stains.
First things first, mix a solution of dish soap and warm water – I usually use about a tablespoon of soap per cup of water.
Next, apply the solution directly to the stain and let it sit for a few minutes.
Finally, grab a soft brush and gently scrub at the stain until it comes out. And voila! Your bathroom tiles (or whatever surface you’re dealing with) should be looking good as new in no time.
Advertisement
Mix a Solution
Grab a bucket and mix together some warm water, white vinegar, and dish soap to create a cleaning solution for those pesky latte spills and stains on your bathroom tiles and floors. This solution is effective in breaking down the stubborn coffee stains while also being eco-friendly. If you are looking for alternative solutions that do not involve chemical cleaners, this mixture is perfect for you.
To ensure that you have the right proportions of each ingredient, refer to this 2 column, 4 row table:
Ingredients
Measurement
Warm Water
1 gallon
White Vinegar
1 cup
Dish Soap
2 tablespoons
Once you have mixed all ingredients together in a bucket, dip a cloth or scrub brush into the solution and apply it directly onto the latte stain. With gentle pressure, scrub away until the stain disappears.
Apply to the Stain
Now it’s time to apply the homemade cleaning solution directly onto those pesky marks you found. Preventing stains is just as important as treating spills, so make sure to cover the entire area affected by the latte spill.
Using a cloth or brush, dip into the mixture and gently rub it onto the stain in circular motions. Be sure to let the solution sit for a few minutes before scrubbing with a soft brush. This’ll give it time to penetrate deep into the tile and break down any remaining residue.
Advertisement
After this step, you’ll be ready to move on to the next stage of cleaning – scrubbing with a soft brush!
Scrub with a Soft Brush
It’s time to start scrubbing with a soft brush, working in small circular motions until the surface is clean and shiny. Soft brush techniques are essential when cleaning delicate surfaces such as bathroom tiles and floors. You don’t want to cause any damage or scratches while trying to remove the latte stains, so make sure you choose a soft-bristled brush.
When using the brush, take your time and be gentle. Apply enough pressure to remove the stain but not too much that it causes damage. Work in small sections, ensuring that you cover all areas of the affected surface before moving on.
Once you’re done, rinse off with water and dry using a clean cloth or towel.
Now that your bathroom tiles and floors are sparkling clean again, let’s move on to try baking soda and vinegar for any stubborn stains left behind.
Advertisement
Try Baking Soda and Vinegar
I find that mixing baking soda and vinegar is an effective way to tackle tough stains. To start, I create a paste by combining equal parts of baking soda and water.
Then, I apply the paste onto the stained area and let it sit for about 10-15 minutes.
Lastly, I use a soft brush to scrub away the stain before rinsing with water.
Mix a Paste
To effectively tackle latte spills and stains on bathroom tiles and floors, one must mix a paste using common household ingredients. Start by combining equal parts of baking soda and water in a small bowl to create a thick paste. The baking soda acts as an abrasive agent that helps to loosen the stain, while water makes it easier to spread the mixture over the affected area.
When mixing the paste, it’s important to take safety precautions such as wearing gloves and avoiding contact with your eyes or mouth. Once you’ve created the paste, apply it directly onto the stain and use a gentle scrubbing motion to work it into the tile or floor surface.
Advertisement
In doing so, you should be able to remove most if not all of the stain without damaging your bathroom surfaces.
Apply to the Stain
Once you’ve mixed the paste, take a moment to imagine how satisfying it’ll be to finally get rid of that unsightly blotch on your pristine surface.
Now comes the fun part – applying the paste! Use a clean cloth or sponge to spread the mixture over the stain, making sure to cover it completely. Depending on the size of the stain, you may need to apply more than one layer.
While this method is effective for removing stains in the short term, it’s important to consider prevention techniques for long-term effects. To avoid future spills and stains in your bathroom, make sure to always use coasters or trays when placing drinks on surfaces.
Additionally, regularly cleaning and sealing your tiles can help prevent stains from seeping into porous materials like grout. With these tips in mind, let the paste sit for 10-15 minutes before moving onto our next step about letting it dry completely.
Advertisement
Let Sit for 10-15 Minutes
Moving on from the previous subtopic of ‘Apply to the Stain’, I’ve found that simply applying a cleaning solution isn’t always enough when dealing with latte spills and stains on bathroom tiles and floors.
In order to prevent stains from setting in, it’s crucial to let the cleaning solution sit for a period of time before wiping it away. When letting the cleaning solution sit, there are alternative solutions that can be used if you don’t have access to a commercial cleaner.
One option is mixing equal parts baking soda and water to create a paste-like substance. Another option is using white vinegar as a natural cleaning agent. No matter what method you use, it’s important to let it sit for at least 10-15 minutes before scrubbing away.
To further prevent stains from setting in, try blotting up any excess liquid with paper towels or a clean cloth before applying any solutions. This will help absorb as much of the spill as possible, making cleanup easier and more effective.
Additionally, consider placing mats or rugs in high traffic areas where spills are more likely to occur. With these preventive measures in mind, moving onto the next step of scrubbing with a soft brush will ensure that all remaining residue is removed from your bathroom tiles and floors without causing damage.
Advertisement
Scrub with a Soft Brush
Now it’s time to gently scrub the affected area with a soft brush, making sure not to apply too much pressure and damage the surface. A soft-bristled toothbrush or a nylon scrub brush can be used as an alternative to avoid scratching the tiles.
Starting from the edges of the spill, work your way towards the center of the stain in circular motions until it is completely removed. When scrubbing, it’s important to avoid using hard-bristled brushes or abrasive cleaning tools like steel wool that can scratch and damage bathroom tiles.
Also, make sure not to rub too hard on grout lines between tiles, which are more delicate than tile surfaces. With gentle yet consistent pressure and proper brushing technique, you can easily remove latte spills and stains without causing any harm to your bathroom floors or walls.
To take care of more stubborn stains, use hydrogen peroxide – but we’ll get into that in our next section.
Use Hydrogen Peroxide
To remove latte spills and stains from your bathroom tiles and floors, you can use hydrogen peroxide. Did you know that hydrogen peroxide is a common ingredient in many household cleaning products? It’s a powerful cleaning agent that can effectively remove stains and disinfect surfaces.
Advertisement
When using hydrogen peroxide to clean up latte spills, it’s important to note that there are alternatives available if you don’t have any on hand. However, be aware that not all alternatives will be as effective as hydrogen peroxide. Also, keep in mind that the effectiveness of hydrogen peroxide may vary depending on the type of surface you’re cleaning. While it works well on most bathroom tiles and floors, it may not work as well on certain materials like marble or granite.
If you decide to use hydrogen peroxide to clean up latte spills in your bathroom, simply apply it directly onto the affected area and let it sit for a few minutes before wiping it away with a damp cloth. For tougher stains, you may need to scrub the area gently with a soft brush. Once the stain is gone, rinse the area thoroughly with water to remove any residual cleaner.
Using hydrogen peroxide for cleaning up latte spills is an effective way to keep your bathroom looking fresh and tidy. However, if this method doesn’t work for you or if you prefer using commercial cleaners, try using one specifically designed for tile and grout cleaning. These products are often more powerful than household cleaners and can help get rid of stubborn stains more easily.
Try a Commercial Cleaner
If you want your surfaces to look brand new, you should try a commercial cleaner designed for deep cleaning grout and tiles, which will leave your bathroom sparkling clean and smelling fresh. Using a commercial cleaner has several benefits that make it worth considering.
First of all, these cleaners are specifically formulated to remove tough stains and grime buildup on your floors and walls. They contain powerful chemicals that can break down even the most stubborn dirt particles.
Advertisement
When using a commercial cleaner, it’s important to follow the manufacturer’s instructions carefully. Always wear gloves and protective eyewear when handling these products since they can be harmful if they come into contact with your skin or eyes.
Additionally, before applying the cleaner, make sure to test a small area first to ensure that it won’t damage or discolor your tiles or grout lines.
While using a commercial cleaner can help restore your bathroom surfaces to their former glory, sometimes professional cleaning services may be necessary for especially stubborn stains or heavily soiled areas. If you’ve tried everything but still can’t get rid of those pesky latte stains on your bathroom tiles or floors, it may be time to call in the experts who have specialized equipment and expertise in deep-cleaning tile and grout lines.
To ensure the best results after using a commercial cleaner or seeking professional cleaning services, remember to rinse thoroughly with water afterward! This will help remove any remaining residue from the surface and prevent any adverse reactions from occurring due to leftover chemicals on the floor or wall.
Rinse Thoroughly
Ensure your cleaning efforts aren’t in vain by thoroughly rinsing the surface with water after using a commercial cleaner or seeking professional cleaning services. This is important because it helps to remove any remaining dirt or chemicals that may cause further damage to your tiles or floors.
Advertisement
Thorough rinsing also ensures that no residue is left behind, which can lead to discoloration and stains. When rinsing the affected area, start by running warm water over the spill or stain. Use a clean cloth or mop to wipe away any excess water and then repeat the process until all traces of the cleaner have been removed. Pay careful attention to corners and edges where debris may accumulate.
Preventing spills in the bathroom can be easy if you make a few simple changes in your daily routine. For example, avoid carrying hot beverages into the bathroom and consider placing a rug near your sink or toilet as an extra precautionary measure. Additionally, ensure that anyone who uses your bathroom knows how to handle liquids properly and dispose of any waste appropriately.
Thorough rinsing is just one step in effectively dealing with latte spills and stains on bathroom tiles and floors. Once you have completed this step, move onto drying the area thoroughly before assessing whether additional cleaning is necessary. Remember: prevention is key when it comes to maintaining a clean and tidy bathroom!
Dry the Area
Now that I’ve rinsed thoroughly, it’s time to dry the area.
I always make sure to use a clean towel to avoid spreading any residue or dirt around.
Advertisement
If the area is small, I may opt to just let it air dry naturally.
Use a Clean Towel
Always grab a clean towel to wipe up latte spills and stains on bathroom tiles and floors. Using a dirty or previously used towel can transfer germs and bacteria onto the surface, making it even more unsanitary. Additionally, using a clean towel ensures that you don’t spread the stain further or leave any residue behind.
When selecting a towel for cleaning up spills, opt for one that is absorbent and has not been used recently. It’s also important to properly clean and disinfect towels after use to prevent the growth of mold and mildew. This can be done by washing them in hot water with detergent and bleach, then drying them thoroughly before storing. By using a clean towel every time you clean up a spill, you’ll enjoy the benefits of a hygienic bathroom while avoiding the risk of spreading germs or leaving stains behind.
To ensure proper disinfection, allow the towels to air dry completely before using them again.
Allow to Air Dry
After hanging up the clean towel, let it dry naturally like a leaf drying in the sun to prevent any bacteria growth. Air drying has many benefits over using a dryer or simply leaving the towel on the floor. Here are two reasons why I always choose to air dry my towels:
Advertisement
It saves energy: By allowing your towel to air dry, you’re not using any electricity to run a dryer. This not only saves you money on your energy bill, but it’s also better for the environment.
It’s gentler on your towels: High heat from a dryer can damage fibers in your towels and cause them to wear out faster. Air drying allows your towel to retain its quality and last longer.
When dealing with latte spills and stains on bathroom tiles and floors, proper drying techniques are crucial in preventing further messes or accidents. To prevent future spills, it’s important to evaluate what caused the spill in the first place and take steps to avoid it happening again.
Prevent Future Spills
To prevent future spills, I always make sure to use a tray or placemat when carrying drinks around the house. This not only makes it easier to transport beverages, but also provides a stable surface that can contain any potential spills.
Additionally, I try to be extra careful when carrying drinks by holding them securely and avoiding sudden movements that could cause them to slosh over the edge. By taking these simple precautions, I can avoid making a mess and keep my floors and furniture stain-free.
Use a Tray or Placemat
Using a tray or placemat can prevent latte spills and stains on bathroom tiles and floors. Placing your drink on a tray or placemat not only helps to keep the area clean, but it also adds an extra layer of protection against accidental spills.
There are a variety of benefits to using placemats, including their ability to absorb moisture, protect surfaces from scratches and stains, and add aesthetic appeal to any space. Alternative materials for placemats include silicone, cork, leather, and even recycled materials like paper or cardboard.
Advertisement
However, while using a tray or placemat is helpful in preventing spills on bathroom tiles and floors, it’s important to still be careful while carrying drinks. Even with these precautions in place, accidents can still happen if you’re not paying attention.
So, along with using trays or placemats as a preventative measure against coffee spills in your bathroom, always take care when transporting drinks from one location to another.
Be Careful While Carrying Drinks
Be careful while carrying drinks. Make sure you’re aware of your surroundings and hold your drink carefully to avoid any accidents while carrying it around. Spilling a latte can be frustrating, especially when it stains the bathroom tiles or floors. To prevent this from happening, here are some tips on how to carry drinks safely:
Always use a lid: It’s essential to cover your drink with a lid because it reduces the risk of spills and splashes.
Use both hands: When carrying a cup, use both hands if possible. This gives you more control over the cup and prevents it from slipping out of your grasp.
Walk slowly: Don’t rush while carrying a hot beverage. Instead, take small steps and walk at a steady pace.
Watch where you’re going: Be mindful of obstacles in your path such as doors, furniture, or other people walking by.
Avoid multitasking: Don’t try to carry too many things at once. Focus on holding your drink securely before attempting anything else.
By following these tips, you can avoid accidents while carrying drinks and prevent any unnecessary messes in the bathroom. Remember to always take precautions when handling hot beverages so that they don’t become hazards in your daily routine.
Frequently Asked Questions
Can I use bleach to clean up a latte spill on my bathroom tiles?
When it comes to cleaning any type of spill on tiles, it’s important to consider the best approach for your health and safety. While bleach may seem like a quick fix, there are alternatives that can be just as effective without exposing you to harmful chemicals.
Advertisement
Bleach alternatives such as vinegar or baking soda can be mixed with water to create a natural cleaner that is safe for both you and your bathroom surfaces. Additionally, there are many natural cleaners available on the market that are specifically designed for tile cleaning.
It’s always a good idea to do your research and find a product that fits your needs while also being environmentally friendly.
How can I remove stubborn coffee stains from grout lines?
When it comes to grout maintenance, cleaning solutions are key. I’ve found that the best way to remove stubborn coffee stains from grout lines is by using a mixture of baking soda and hydrogen peroxide.
First, mix a small amount of baking soda with enough hydrogen peroxide to make a paste. Then, apply the paste onto the stained grout lines and let it sit for 10-15 minutes. Finally, scrub the area with a brush and rinse thoroughly with water.
This method has worked wonders for me in removing not just coffee stains, but also other tough stains on my bathroom tiles’ grout lines. It’s important to regularly maintain your grout to prevent stains from setting in deep.
Advertisement
Will using vinegar damage my bathroom tiles?
When it comes to cleaning bathroom tiles, vinegar is a popular choice due to its effectiveness against tough stains. However, there are alternatives that can also be effective.
One option is using baking soda mixed with water to create a paste and applying it on the stained areas. Another alternative is using hydrogen peroxide, which can be applied directly onto the stain and left for several minutes before wiping clean.
It’s important to be cautious when cleaning tiles as certain products or techniques may cause damage. To prevent tile damage during cleaning, avoid abrasive materials such as steel wool and harsh chemicals like bleach.
Using gentle cleaners and soft brushes can help maintain the integrity of your tiles while still effectively removing stains and spills.
What is the best way to clean up a latte spill on a carpeted bathroom floor?
When it comes to cleaning up a latte spill on a carpeted bathroom floor, there are several effective cleaning methods that can be employed.
Advertisement
First and foremost, it’s essential to act quickly in order to prevent the stain from setting into the fibers of the carpet.
One approach is to blot up as much of the liquid as possible using paper towels or a clean cloth.
Next, a mixture of warm water and dish soap can be applied to the affected area and gently scrubbed with a soft brush or sponge.
Another option is to use a specialized carpet cleaner or stain remover product designed for coffee or tea stains.
To prevent future spills, it may be helpful to avoid carrying hot beverages through the bathroom altogether or investing in spill-proof travel mugs with tight-fitting lids.
Advertisement
By utilizing these cleaning techniques and taking preventative measures, you can effectively tackle latte spills on your bathroom floor without causing damage to your carpets or tiles.
How can I prevent my guests from spilling lattes on my bathroom tiles in the first place?
To prevent spills from happening in my bathroom, I make sure to communicate clearly with my guests about proper etiquette. I kindly ask them to refrain from bringing drinks into the bathroom or to use a spill-proof container if they must bring a beverage.
Additionally, I provide a designated area outside of the bathroom for drinks and encourage my guests to finish their beverages before entering. By setting clear expectations and providing alternative solutions, I can minimize the risk of spills and stains on my bathroom tiles and floors.
It’s important to prioritize prevention rather than relying solely on cleaning up after an accident has occurred.
Conclusion
So there you have it, folks. Dealing with latte spills and stains on bathroom tiles and floors can be a hassle, but it’s not impossible to clean up. Acting quickly is key, as well as having the right cleaning supplies on hand.
Advertisement
From dish soap and warm water to baking soda and vinegar, there are several household items that can effectively remove those pesky stains. And if all else fails, commercial cleaners and hydrogen peroxide may do the trick.
Just remember to rinse thoroughly and dry the area afterwards to prevent any further damage or staining. By following these tips, you’ll be able to tackle any latte spill with ease.
So next time disaster strikes, don’t panic – just grab your cleaning supplies and get to work!
Hi, I’m Ellen. I love making cleaning fun and rewarding – so everyone can feel confident in their ability to keep their space spick and span. Our vision is a world where everyone knows how to clean their home. In the meantime, I’ll continue writing Steam Mop List to help make your life a little easier (and hopefully a little more fun).
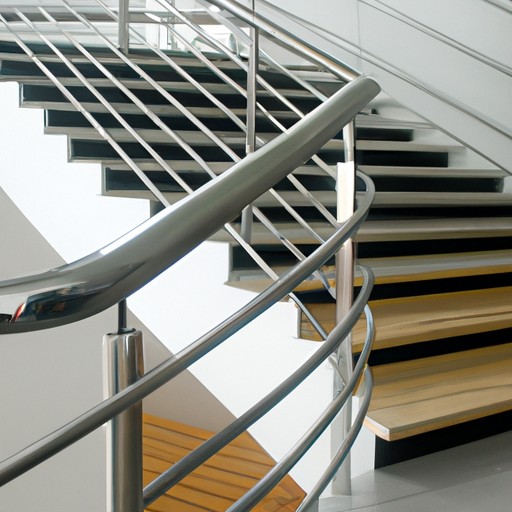
Managing the mess from latte spills on your staircase railings and banisters can feel daunting, especially if you’re unsure about the best way to begin the cleaning process. As someone who consumes caffeine on a daily basis, I understand the difficulty of keeping a home clean and free from stains. This challenge has prompted me to find various successful techniques for removing latte stains from staircases, and I’m excited to share these methods with you.
Firstly, it’s important to understand just how challenging latte stains can be. Not only are they unsightly, but they also tend to stick around if not treated properly. This means that simply wiping them away with a damp cloth won’t always do the trick. But don’t worry – with the right cleaning supplies and techniques, your staircase can look as good as new in no time!
Keep reading for my step-by-step guide on how to tackle those pesky latte stains on your staircase railings and banisters.
Natural cleaning agents such as vinegar, baking soda, rubbing alcohol, and lemon juice are effective in removing latte stains from staircase railings and banisters.
It is important to establish house rules for no food or drinks on the stairs to prevent future stains.
Using protective covers on railings can provide an added layer of protection against accidental spills or scratches and can help extend the lifespan of railings.
When cleaning, it is important to use the right cleaning technique and avoid using abrasive materials or harsh chemicals to prevent damage to the railings and banisters.
Understanding the Challenge of Latte Stains
You’re probably thinking, "Latte stains on staircase railings and banisters? That sounds like a nightmare to clean!"And you’re absolutely right. Latte stains can be stubborn and difficult to remove, especially when they’ve set into porous surfaces like wood or fabric.
But don’t worry, with the right techniques and cleaning products, it’s possible to get rid of those pesky stains. When it comes to latte stain removal techniques, there are several options available.
One effective method is using a mixture of white vinegar and water. Simply mix equal parts of both liquids in a spray bottle and apply it onto the affected area. Let it sit for a few minutes before wiping it away with a clean cloth.
Advertisement
Another technique involves using baking soda and water as a paste that you can rub onto the stained area before rinsing it off with warm water. Of course, having the right cleaning products for latte stains is essential for getting rid of them completely.
Look for products specifically designed for removing coffee or tea stains from surfaces such as upholstery or wood furniture. These products usually contain enzymes or other active ingredients that break down the proteins in the stain so that they can be easily lifted away.
Now that we’ve covered some basic techniques and products for removing latte stains from staircase railings and banisters, let’s move on to gathering the right cleaning supplies…
Gathering the Right Cleaning Supplies
To get started, it’s important to have the proper tools for tackling the mess left behind. When it comes to cleaning latte stains on staircase railings and banisters, choosing eco-friendly options is key.
Not only will this benefit the environment, but it will also ensure that your cleaning supplies are safe for use around children and pets. Using natural cleaning agents can also be an effective way to remove latte stains without damaging the surface of your stairs.
Advertisement
Lemon juice, vinegar, and baking soda are all great options for removing tough stains. Simply mix these ingredients together in a spray bottle or bowl and apply them directly onto the affected area. With the right tools in hand, you’re one step closer to restoring your staircase back to its original state.
But before we begin cleaning, it’s important to prepare the staircase first by removing any loose debris or dirt that may be present on the surface. This will ensure that our cleaning efforts are focused solely on removing those stubborn latte stains from your railings and banisters.
Preparing the Staircase
Before we can effectively tackle the mess on our stairs, it’s crucial to properly prepare the area by removing any loose debris or dirt that may interfere with our cleaning process. This involves sweeping or vacuuming the staircase thoroughly to ensure that there are no obstructions.
We should also consider choosing the right lighting so that we can see any stains or spots easily. Another important factor to keep in mind when preparing the staircase is maintaining a consistent temperature. Extreme temperatures, be it hot or cold, can affect the effectiveness of our cleaning solution. Therefore, it’s best to work in a comfortable environment and avoid cleaning during extreme weather conditions.
Now that we have removed all loose debris and maintained a consistent temperature in the area, we are ready to move onto applying the cleaning solution. It’s essential to choose an appropriate cleaner for our specific type of banister or railing material. By using an effective cleaning solution and following proper techniques, we can eliminate those unsightly latte stains once and for all!
Advertisement
Applying the Cleaning Solution
Alright, now that we’ve got the staircase all cleaned up and ready, it’s time for the next step: applying the cleaning solution.
Choosing the right cleaning technique is crucial to effectively removing any stains or dirt on your railings and banisters. Once you’ve identified the best method, it’s important to apply the solution carefully to ensure full coverage of the stain.
Choosing the Right Cleaning Technique
When it comes to cleaning latte stains on staircase railings and banisters, finding the right cleaning technique can be a game-changer. Here are some cleaning techniques and stain removal strategies that have worked for me:
Use vinegar: Vinegar is a natural cleaner that can remove tough stains. Mix equal parts of vinegar and water in a spray bottle. Spray the solution on the stain, let it sit for a few minutes, and wipe it off with a clean cloth.
Try baking soda: Baking soda is another natural cleaner that can remove stains. Mix baking soda with water to create a paste. Apply the paste on the stain, let it sit for 10-15 minutes, and wipe it off with a damp cloth.
Use rubbing alcohol: Rubbing alcohol is an effective disinfectant that can also remove stains. Dab some rubbing alcohol onto a cloth and rub it onto the stain until it disappears.
Try lemon juice: Lemon juice has acidic properties that can help break down stains. Squeeze fresh lemon juice onto the stain, let it sit for 5-10 minutes, and wipe it off with a damp cloth.
Use commercial cleaners: There are many commercial cleaners available in stores specifically designed to remove tough stains from surfaces like banisters and railings.
Now that you know about these cleaning techniques and stain removal strategies, you’ll be able to choose the best one for your situation when dealing with latte stains on your staircase railings or banisters.
In the next section, I’ll talk about how to apply the solution to effectively tackle those stubborn coffee marks.
Advertisement
Applying the Solution to the Stain
In the previous subtopic, we talked about choosing the right cleaning technique for removing latte stains on staircase railings and banisters. Now that you have identified the appropriate method to use, it’s time to apply the solution to the stain. But before doing so, there are a few things you need to keep in mind.
Firstly, it’s essential to perform a pre-cleaning treatment on the affected area. This step involves wiping down the surface using a damp cloth or sponge to remove any loose debris or dirt. Next, you can proceed with applying your chosen cleaning solution onto a clean microfiber cloth or directly onto the stain itself. In case you’re unsure of which product to use, don’t worry as we’ve listed some alternative solutions that can do just as well in getting rid of those stubborn latte stains.
To help visualize our alternatives better, here’s a table showing their effectiveness levels and cost:
Cleaning Solution
Effectiveness Level
Cost
Vinegar and Baking Soda Mixture
High
Low
Hydrogen Peroxide Solution
Medium-High
Medium-Low
Commercial Latte Stain Remover
High
High
With these options laid out before you, choose what suits your budget best while still giving excellent results in cleaning up those pesky latte stains off your staircase railings and banisters. Once done with this step, we can now move on to scrubbing away at those stains!
Scrubbing the Stain
Now that I’ve applied the cleaning solution, it’s time to start scrubbing the stain.
Advertisement
One important thing to keep in mind is to use just the right amount of pressure when scrubbing. Too much pressure could damage the staircase, so it’s essential to be careful and avoid applying too much force.
By being gentle yet thorough, we can effectively remove the stain without causing any harm or additional damage.
Using the Right Amount of Pressure
To get rid of those pesky latte stains on your staircase railings and banisters, make sure you’re using just the right amount of pressure when scrubbing. Pressure control is crucial in maintaining the cleaning efficiency of your efforts.
Too much pressure can damage the surface, while too little won’t effectively remove the stain. Using a gentle but firm grip on your sponge or rag, apply consistent pressure as you scrub.
Make sure to cover every inch of the stained area without using too much force that could cause scratches or scuffs on your staircase railing or banister. Once you’ve achieved satisfactory results, move onto the next section while taking care not to accidentally bump into anything and cause any further damage.
Advertisement
Avoiding Damage to the Staircase
Don’t risk wrecking your entire staircase while trying to get rid of those pesky marks! Preventing damage should be a top priority when cleaning latte stains on staircase railings and banisters. Here are some maintenance tips to keep in mind:
Firstly, avoid using abrasive materials or harsh chemicals when cleaning the stains. These can scratch or discolor the surface of the railings and banisters, causing more damage than good. Instead, opt for gentle cleaners like soap and water or a vinegar solution. Use a soft cloth or sponge to apply the cleaner, being careful not to rub too hard.
Secondly, always test any new cleaning product on an inconspicuous area first before applying it all over the staircase. This will help you determine if there are any adverse reactions that could cause further damage.
Additionally, it’s important to regularly maintain your staircase by wiping down railings and banisters with a dry cloth to prevent dust buildup.
Now that we’ve covered preventing damage and maintenance tips for cleaning latte stains on staircases, let’s move onto rinsing the staircase for a truly spotless finish.
Advertisement
Rinsing the Staircase
Now that I’ve scrubbed away the latte stains from the staircase railings and banisters, it’s time to rinse off any residue left behind.
I’ll be using a bucket of hot water with a splash of vinegar added in to ensure all traces of cleaning solution are removed.
Once the rinsing is complete, I’ll need to dry the surface thoroughly to prevent any potential slips or falls.
Removing Residue from the Staircase
After wiping away the excess latte residue, you’ll notice some stubborn stains still clinging to the staircase railings and banisters. To remove these stains, I recommend using a mixture of warm water and dish soap. Apply the solution directly onto the stained area and use a soft-bristled brush to gently scrub the surface. Be sure to avoid using abrasive materials or harsh chemicals that could damage the paint or finish.
If dish soap doesn’t do the trick, you can try using a specialized cleaner designed for removing tough stains on surfaces like metal or wood. Below is a table comparing preventive measures against hiring professional cleaning services:
Advertisement
Preventive Measures
Professional Cleaning Services
Regularly wipe down surfaces with a damp cloth
Use industrial-strength cleaning solutions
Avoid spills by holding drinks carefully
Utilize high-pressure steam cleaning
Use coasters under drinks
Apply protective coatings to prevent future staining
Once all of the residue has been removed from your staircase, it’s time to move on to drying the surface without leaving any streaks behind.
Drying the Surface
To ensure a streak-free finish, simply use a clean and dry cloth to wipe down the surface. Effective drying techniques are crucial in preventing moisture buildup, which can lead to water spots and potential damage to the railing or banister.
Here are some tips to help you achieve optimal drying results:
Use a microfiber cloth for better absorption and to avoid leaving lint behind.
Start at the top of the banister or railing and work your way down, wiping in a back-and-forth motion.
Pay extra attention to corners and crevices where moisture tends to accumulate.
By following these simple steps, you can ensure that your staircase remains clean and free from any unsightly stains.
Once the surface is completely dry, it’s time to move on to repeating the cleaning process if necessary.
Repeating the Process
You’ll want to keep repeating the process until the latte stains are completely gone from your staircase railings and banisters. This is especially important if you’re dealing with stubborn stains that won’t come off easily. The importance of patience can’t be overstated in this situation, as it may take several attempts before you see any significant improvement.
Advertisement
When repeating the cleaning process, it’s important to start with a fresh batch of cleaning solution each time. This ensures that you’re not just spreading around old coffee stains on your stairs. Additionally, make sure to use a clean cloth or sponge every time you apply the solution to avoid transferring dirt and grime back onto the surface.
After several rounds of cleaning, inspect your railings and banisters closely for any remaining stains. If there are still some areas that need attention, focus on those spots until they’re completely gone.
Once all of the latte stains have been removed, it’s time to move on to preventing future stains from occurring again in the future.
Now that your staircase is free from latte stains, let’s discuss some tips for preventing future spills and keeping your railings and banisters looking clean and pristine.
Preventing Future Stains
I’ve learned my lesson on how difficult it can be to clean latte stains off staircase railings and banisters.
Advertisement
To prevent future stains, I plan on establishing house rules for no food or drinks on the stairs.
I’ll also invest in protective covers for the railings and banisters to make cleaning easier.
Establishing House Rules
Like the rules of a game, establishing house rules is crucial in maintaining order and keeping everyone on the same page. As someone who’s dealt with latte stains on staircase railings and banisters before, I know it’s important to communicate with your household about preventing future stains.
Setting boundaries and discussing expectations can go a long way in avoiding spills and messes. Here are some tips for establishing effective house rules to prevent future stains:
Have an open discussion with all members of the household about expectations for cleanliness
Encourage everyone to speak up about their concerns or needs
Set clear consequences for not following the established rules
By taking these steps, you can ensure that everyone is aware of what they need to do to keep your home clean and free from latte stains. With these guidelines in place, you’ll be able to move onto the next step: using protective covers.
Using Protective Covers
After establishing house rules, it’s important to take preventive measures to minimize potential damage to the staircase railings and banisters. One way to do this is by using protective covers. These covers serve as a barrier between the surface of the railing and any possible stains or scratches that can be caused by everyday use.
Advertisement
There are various benefits of using protective covers on your staircase railings and banisters. For one, they provide an added layer of protection against accidental spills or scratches. Additionally, they can help extend the lifespan of your railings by reducing wear and tear over time. When choosing a cover material, it’s important to consider durability, ease of cleaning, and aesthetic appeal that complements your home decor.
Moving forward into maintaining a clean staircase requires consistent effort in keeping up with regular cleaning routines while also taking precautions to prevent future stains or damages from occurring.
Maintaining a Clean Staircase
You can easily maintain a clean staircase by wiping down the railings and banisters regularly with a cleaning solution. Not only will it keep your stairs looking beautiful, but it’ll also prevent dirt buildup and keep them safe from wear and tear.
To begin, start by dusting off any loose debris or cobwebs that may have accumulated on the railings or banisters. Next, mix together a cleaning solution of warm water and mild detergent in a bucket. Using a soft cloth or sponge, gently wipe down the rails and banisters with the mixture. Make sure to get into all the nooks and crannies where dirt may accumulate.
Once you’ve finished wiping everything down, rinse with clean water and dry thoroughly with a clean towel. Consider using a protective cover on your railings to help prevent future stains or damage from occurring. There are many options available such as plastic covers or fabric sleeves that can slide over your railing for added protection.
Advertisement
By following these simple steps, you can ensure that your staircase remains beautiful and safe for years to come!
Frequently Asked Questions
Can I use any type of cleaning solution on my staircase railings and banisters?
When it comes to cleaning solution options for staircase railings and banisters, I always make sure to prioritize safety precautions. It’s important to choose a cleaning solution that is appropriate for the material of the railing or banister, as well as one that won’t cause any damage or harm.
While there are many different types of cleaning solutions available, not all of them may be suitable for your specific situation. That’s why it’s important to do some research and perhaps even consult with a professional before selecting a cleaning solution.
In addition, always remember to wear protective gloves and eyewear when handling any type of cleaning solution, as well as ensure proper ventilation in the area where you’re working. By taking these precautions, you can safely and effectively clean your staircase railings and banisters without causing any harm or damage.
What is the best way to remove old and stubborn latte stains?
When it comes to removing old and stubborn stains, the best approach is to use a combination of effective products and DIY solutions. I’ve found that using a mixture of baking soda and vinegar can be highly effective in breaking down tough stains, while also being gentle on surfaces.
Advertisement
Additionally, there are many great commercial cleaning products available that are specifically designed to remove stubborn stains. It’s important to always follow the manufacturer’s instructions when using these products, as they can be quite potent.
Ultimately, the key is to be persistent and consistent in your cleaning efforts – with time and effort, even the toughest latte stains can be removed!
How often should I clean my staircase railings and banisters to prevent stains from accumulating?
When it comes to maintaining a clean and inviting home, there are few things that can be more frustrating than the accumulation of stains and grime in hard-to-reach areas.
That’s why I always make sure to take preventative measures before any issues arise. In my experience, the frequency of cleaning these areas will depend on how much traffic they see on a day-to-day basis.
However, I find that performing a deep cleaning every few weeks can go a long way in preventing the buildup of stubborn stains. Additionally, taking simple steps like wiping down surfaces regularly and using protective coverings during messy activities can also help keep your home looking its best.
Advertisement
By staying on top of these small tasks, you can avoid larger headaches down the road and ensure that your space always looks its best.
Is it safe to use a scrub brush or abrasive sponge on my staircase railings and banisters?
When it comes to cleaning staircase railings and banisters, using a scrub brush or abrasive sponge might seem like a good idea for tough stains. However, it’s important to consider the safety of your surfaces before using such tools.
Scrub brushes can scratch and damage certain finishes on railings and banisters, while abrasive sponges can leave behind scratches that are difficult to remove. Instead of risking damage with these options, consider using gentler alternatives such as microfiber cloths or soft-bristled brushes.
Not only will this help preserve the integrity of your staircase, but it’ll also ensure that future cleaning sessions are easier and less time-consuming.
Are there any natural or homemade cleaning solutions that are effective for removing latte stains?
I’m excited to share with you some alternative methods and eco-friendly options that have worked wonders for me in removing stubborn stains around my home.
Advertisement
One effective solution I’ve found for removing tough stains is a mixture of white vinegar and baking soda. This combination creates a powerful, yet natural cleaning agent that can tackle even the toughest of stains.
Another option is using lemon juice, which works well on lighter stains and has the added benefit of leaving behind a fresh scent.
These homemade solutions not only get the job done without harsh chemicals, but they’re also better for the environment.
So next time you’re faced with a tough stain, give these natural alternatives a try!
Conclusion
In conclusion, cleaning latte stains on staircase railings and banisters is a challenging task that requires patience and the right tools. However, with the proper preparation and technique, it’s possible to remove the stubborn stains and maintain a clean staircase.
Advertisement
To effectively clean latte stains, it’s important to gather the right cleaning supplies such as white vinegar, baking soda, and a scrub brush. Additionally, preparing the staircase by removing any loose debris or dust will help ensure that the cleaning solution can penetrate the stain.
Applying the solution onto the stain before scrubbing vigorously will loosen up any remaining residue. Rinsing off all of the solution will prevent any further damage or staining from occurring. Repeating these steps if necessary can ensure that all traces of latte stains are removed.
Finally, preventing future stains can be achieved by being mindful of spills and promptly wiping them up with a damp cloth. Regular maintenance by dusting or vacuuming your staircase can also keep it looking fresh for longer periods of time.
By following these simple steps, you can have a beautiful and clean staircase free from annoying latte stains!
Hi, I’m Ellen. I love making cleaning fun and rewarding – so everyone can feel confident in their ability to keep their space spick and span. Our vision is a world where everyone knows how to clean their home. In the meantime, I’ll continue writing Steam Mop List to help make your life a little easier (and hopefully a little more fun).
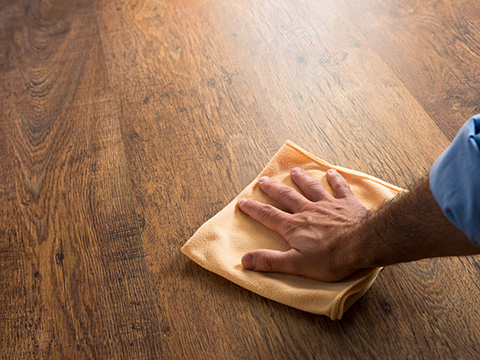
I love kicking off my morning with a latte, but now and then, accidents happen, resulting in my kitchen walls and floors being speckled with stains. Over time, these stains can build up, making them harder to remove. After dealing with this issue multiple times, I’ve learned several useful tips for getting rid of latte stains on kitchen walls and floors.
Acting fast is crucial when it comes to removing latte stains. The longer you wait, the more difficult it becomes to remove them completely. That’s why it’s important to have a plan of action in place before spills happen.
In this article, I will share my experience in dealing with latte stains on different surfaces and provide step-by-step instructions for effectively removing them from walls and floors in the kitchen. With these tips, you’ll be able to keep your kitchen looking clean and stain-free!
Act fast and have a plan of action in place before spills happen
Use natural or gentle cleaners and perform a spot test before applying any cleaning solution
For walls, use a mixture of equal parts white vinegar and water in a spray bottle and rinse with clean water
For floors, blot up excess liquid with a clean cloth or paper towel and use warm water and dish soap to mop up spills or stains
Act Fast
You gotta act fast if you want to get those pesky latte stains off your kitchen walls and floors! The key to removing coffee stains is a quick response. Don’t wait until the stain has set in; tackle it as soon as possible for best results.
To start, grab a clean cloth or paper towel and blot the stain gently. Avoid rubbing too hard or you’ll risk spreading the stain further. Next, use an effective technique like baking soda mixed with water or vinegar diluted with water to create a cleaning solution. Apply the solution directly onto the stained area using another cloth or sponge.
Once you’ve finished cleaning up any remaining residue from your latte spill, gather your cleaning supplies and move on to tackling any other messes in your kitchen.
Advertisement
With these tips in mind, you’ll be able to quickly and effectively clean up any coffee-related messes that come your way!
Gather Your Cleaning Supplies
Time to arm yourself with the tools of a coffee warrior – grab your trusty sponge, magic eraser, and all-purpose cleaner and get ready to battle those pesky remnants of morning lattes. Before you start cleaning, it’s important to gather all your supplies in one place for easy access.
Organize your cleaning products and tools in a bucket or tray so you can easily move them around as you clean. When it comes to cleaning latte stains on walls and floors in the kitchen, there are different techniques that work best for each surface.
For walls, start by wiping down any excess liquid with a dry cloth or paper towel. Then, use an all-purpose cleaner and a sponge to gently scrub the stain away. Be careful not to damage the paint or wallpaper by using too much force.
For floors, use a magic eraser or a damp cloth with an all-purpose cleaner to remove any residue left behind by spilled lattes. Pay extra attention to grout lines if you have tiled floors as they tend to absorb liquids quickly. Once you’ve finished cleaning both walls and floors, it’s time to test your cleaning solution before proceeding further.
Advertisement
Let’s see how this is done!
Test Your Cleaning Solution
Before diving headfirst into cleaning, it’s important to test your cleaning solution on a small, inconspicuous area first. This spot test will ensure that the solution doesn’t cause damage or discoloration to the surface you’re cleaning.
Additionally, it’s important to avoid using harsh chemicals when possible and opt for more natural or gentle cleaners instead. As someone who’s learned from experience, I always make sure to take these precautions before starting any cleaning project.
Spot Test
When dealing with latte stains on your kitchen walls and floors, it’s important to perform a spot test before applying any cleaning solution. Spot testing is crucial because it allows you to determine if the cleaning solution you plan to use will be effective against the stain without causing damage to the surface.
There are different types of spot tests for cleaning solutions, such as colorfastness, texture compatibility, and pH balance. To perform a colorfastness test, apply a small amount of the cleaning solution on an inconspicuous area of the surface and wait for at least 10 minutes. If there is no discoloration or fading, then you can proceed with using the solution on the stain.
Advertisement
For texture compatibility, apply a small amount of the solution on an area where it won’t be noticeable and check if there are any changes in texture or consistency after it dries up. Finally, for pH balance testing, use pH strips or litmus paper to check if the pH levels of your cleaning solution are compatible with your surface material.
It’s important to remember that not all surfaces can withstand harsh chemicals. In fact, using strong chemicals can cause irreparable damage to your walls and floors. Therefore, when selecting a cleaning solution or performing a spot test, always opt for mild solutions first and avoid harsh chemicals whenever possible.
Avoid Harsh Chemicals
You don’t want to risk damaging your surfaces, so it’s best to steer clear of harsh chemicals when cleaning latte stains on walls and floors in the kitchen. Instead, opt for natural alternatives or eco-friendly options that are gentle yet effective.
For example, vinegar mixed with water can be a great solution for removing coffee stains from surfaces without harming them. Another eco-friendly option is baking soda. Mix it with warm water to create a paste and apply it directly on the stain. Let it sit for a few minutes before scrubbing gently with a soft sponge or cloth. Not only will this method remove the stain, but also leave your kitchen smelling fresh and clean.
Now that you know about these natural alternatives, let’s move on to the next step: tackling those pesky latte stains on walls.
Advertisement
Cleaning Latte Stains on Walls
You’ll want to attack those stubborn latte stains on your kitchen walls with a mixture of vinegar and baking soda for quick and satisfying results.
To start, mix equal parts white vinegar and water in a spray bottle. Spray the solution onto the affected areas and let it sit for a few minutes. Then, sprinkle baking soda onto a damp sponge or cloth and gently scrub the stained area.
When cleaning latte stains on walls, it’s important to avoid using harsh chemicals that can damage or discolor the paint. Natural cleaning solutions like vinegar and baking soda are effective at removing coffee residue without causing harm to your walls. Plus, they’re inexpensive and readily available.
Now that you’ve tackled those pesky wall stains, let’s move on to cleaning latte stains on floors. But first, make sure you rinse off any remaining vinegar and baking soda from the wall with clean water before starting the next step.
Cleaning Latte Stains on Floors
Alright, so now it’s time to get those pesky coffee spills off your precious floors. As someone who has spilled their fair share of lattes, I know the importance of preventing spills in the first place. One way to do this is by using spill-proof travel mugs or cups with lids when transporting your latte from the kitchen to another room. Another tip is to avoid multitasking while carrying your latte, as distractions can increase the likelihood of a spill.
Advertisement
When it comes to cleaning up latte stains on floors, there are a few techniques that have worked well for me in the past. The first step is to blot up any excess liquid with a clean cloth or paper towel. Then, mix together equal parts water and white vinegar in a spray bottle and apply it directly onto the stain. Let the solution sit for a few minutes before wiping it up with another clean cloth or mop.
If the above technique doesn’t work on stubborn stains, don’t worry – there are other methods you can try. For instance, you can create a paste by mixing baking soda and water together until it forms a thick consistency. Apply this paste onto the stain and let it sit for 10-15 minutes before scrubbing gently with a soft-bristled brush or sponge. Rinse with water afterwards and repeat if necessary.
Dealing with stubborn stains can be frustrating, but don’t give up hope just yet! In the next section, we’ll explore some additional tips and tricks for getting rid of even the toughest latte stains on walls and floors in your kitchen.
Dealing with Stubborn Stains
If those pesky stains still won’t budge, try using a mixture of hydrogen peroxide and dish soap to lift the stubborn marks from your surfaces. This combination is effective in removing ink stains as well as tackling grease stains. Simply mix equal parts hydrogen peroxide and dish soap, apply the solution directly to the stain, and let it sit for 5-10 minutes before wiping clean with a damp cloth.
In addition to this solution, there are other methods you can try to remove stubborn latte stains from your kitchen walls and floors. One option is to use baking soda mixed with water to create a paste that can be applied directly onto the stain. Let it sit for several minutes before scrubbing with a sponge or brush and rinsing with water.
Advertisement
If all else fails, you may need to invest in a heavy-duty cleaning product specifically designed for tough stains. Look for products containing enzymes or oxygen bleach that can break down even the most stubborn coffee stains.
With these tips in mind, you’ll be able to banish those pesky latte stains from your kitchen surfaces once and for all. By taking proactive measures such as wiping up spills immediately and using coasters under drinks, you can prevent future staining on your kitchen walls and floors. Remember that prevention is key when it comes to keeping your home looking its best!
Preventing Future Stains
As someone who’s dealt with stubborn stains before, I’ve learned that preventing future stains is key.
One way to do this is by using a splash guard when cooking or preparing food. It can help contain any spills and prevent them from splattering onto walls or floors.
Another important tip is to wipe up spills immediately, whether it’s on the stove or countertop.
Advertisement
Lastly, regularly cleaning surfaces can go a long way in preventing tough stains from setting in.
By following these simple steps, you can enjoy a cleaner and stain-free kitchen for longer periods of time.
Use a Splash Guard
Hey there, before you start cleaning those latte stains off your kitchen walls and floors, I highly recommend using a splash guard. This simple tool can prevent future messes from occurring and save you time and energy in the long run.
By placing the splash guard over your cup or mug, it helps to contain any splatters or spills that may occur while frothing milk or pouring coffee. In addition to using a splash guard, keeping your kitchen organized can also help prevent messy situations.
Make sure all of your supplies are within easy reach and that everything has its own designated space. This will not only make your kitchen look neater but will also help you work more efficiently. By taking these small steps to prevent messes, you can save yourself from having to spend hours scrubbing stains off of walls and floors.
Advertisement
Remember, prevention is key! Now onto the next step – wiping up spills immediately.
Wipe up Spills Immediately
To prevent future messes, it’s important to quickly wipe up any spills that occur while making coffee or frothing milk. By doing so, you can avoid stains on your walls and floors in the kitchen.
Here are some tips for proper spill management:
Have a clean cloth or paper towel nearby at all times.
Use a gentle wiping motion to avoid spreading the spill further.
Avoid using harsh chemicals on surfaces as they can cause damage over time.
Don’t forget to also wipe down any equipment used during the coffee-making process.
Preventing stains is much easier than trying to remove them later on. By following these simple steps for proper spill management, you can keep your kitchen looking clean and fresh.
Now that spills are taken care of, let’s move onto regularly cleaning surfaces to ensure everything stays spotless.
Regularly Clean Surfaces
Make sure you keep your surfaces looking great by regularly wiping them down with a damp cloth and some mild soap. The importance of consistency cannot be overstated when it comes to keeping your kitchen clean and tidy.
Advertisement
Coffee stains, especially latte stains, can quickly accumulate on walls and floors if left unattended for too long. To avoid this problem, make it a habit to wipe down all surfaces in your kitchen at least once a day. Use natural cleaners like vinegar or baking soda to remove any stubborn stains without damaging the paint or tiles.
Not only will this help prevent future staining, but it will also keep your kitchen smelling fresh and clean. Consistent cleaning is key to maintaining a beautiful and hygienic kitchen environment.
As you work on regularly cleaning latte stains from walls and floors in the kitchen, don’t forget about other coffee-related spills that may occur elsewhere in the house. Whether it’s on furniture or carpets, these spills can leave unsightly marks that are difficult to remove if left unaddressed for too long.
With that said, let’s move on to the next section where we’ll discuss effective ways of cleaning other coffee stains around the home!
Cleaning Other Coffee Stains
Pouring a bit of milk on the coffee stains before wiping them away can help prevent lingering odors. This technique also works for removing coffee stains from clothing and cleaning coffee stains on furniture. The proteins in the milk help break down the stain, making it easier to remove.
Advertisement
However, if the stain has already set in, you may need to use a stronger cleaner. A mixture of equal parts water and white vinegar can be effective at removing tough coffee stains. Simply apply the solution to the stained area and let it sit for a few minutes before wiping away with a clean cloth.
When dealing with latte stains specifically, it’s important to consider the surface they are on. For walls and floors in the kitchen, using an all-purpose cleaner or dish soap mixed with warm water should do the trick. Be sure to test any cleaner on an inconspicuous area first to ensure it doesn’t damage or discolor your surface.
Cleaning Latte Stains on Different Surfaces
If you’re dealing with spills on varying surfaces, there are a few cleaning techniques to consider when it comes to removing latte stains. Here are some helpful tips for tackling these stubborn stains:
Fabric Surfaces: Start by blotting the stain with a clean cloth to remove as much of the liquid as possible. Then, mix equal parts white vinegar and water and apply the solution onto the stained area. Let it sit for 10-15 minutes before washing the fabric according to its care instructions.
Walls: For freshly spilled latte stains on painted walls, use a damp cloth with mild soap and warm water to wipe away the stain gently. If you’re dealing with an old or set-in stain, try using baking soda mixed with water into a paste-like consistency. Apply it onto the stain, let it sit for 30 minutes before wiping off with a damp cloth.
Floors: If you have tile or hardwood floors in your kitchen that have been stained from latte spills, start by mixing warm water and dish soap in a bucket. Dip a mop into the solution and wring out excess water before cleaning up any spills or stains.
Removing Old Stains: For old latte stains that seem impossible to remove, try using an oxygenated bleach powder like OxiClean® mixed with warm water according to package directions. Apply this mixture onto the stain and let it sit for 20-30 minutes before washing or wiping away thoroughly.
With these tips, you’ll be able to tackle even the toughest latte spills on various surfaces around your kitchen!
Frequently Asked Questions
Can I use regular household cleaners to remove latte stains?
When it comes to removing latte stains, using regular household cleaners can be effective. However, it’s important to choose a cleaner that is appropriate for the surface you are cleaning.
Advertisement
For example, a cleaner meant for tile floors may not work as well on a painted wall. It’s also important to remember that prevention is key when it comes to avoiding future latte stains.
Using coasters and wiping up spills immediately can go a long way in keeping your surfaces stain-free. Overall, with the right cleaning products and some preventative measures, latte stains can be easily managed in your home.
How long does it take for a latte stain to set in?
I’ve learned that latte stains can set in fairly quickly, usually within a matter of minutes. So if you’re worried about preventing latte stains on your clothes or furniture, it’s important to act fast.
One tip for removing coffee stains is to blot the area with a clean cloth as soon as possible, before the stain has a chance to set in. You can also try using a mixture of vinegar and water or baking soda and water to lift the stain out. It’s always best to test any cleaning solution on an inconspicuous area first, just to make sure it won’t damage your surface.
Overall, being proactive about preventing spills and cleaning up any messes right away is key when it comes to dealing with latte stains or any other kind of coffee-related mishap.
Advertisement
Is it necessary to use a specific type of cleaning solution for latte stains?
When it comes to cleaning up latte stains, I’ve found that using a specific cleaner isn’t always necessary. While some people swear by specialized solutions, I’ve had plenty of success with DIY methods that use ingredients I already have on hand.
For example, combining vinegar and baking soda can create a powerful cleaning solution that’s effective in removing even the toughest latte stains. Additionally, using a microfiber cloth or sponge can help scrub away any residue without causing damage to walls or floors.
And best of all, these methods don’t require any special equipment – just a little bit of elbow grease and some patience!
Will using hot water help to remove latte stains more effectively?
When it comes to removing latte stains, hot water may be more effective than cold. Hot water helps to break down the proteins in the milk and coffee that cause stains, making them easier to remove. However, it’s important not to use boiling water as this can damage surfaces or cause burns. Instead, use hot tap water or heat up a pot of water on the stove until it reaches a comfortable temperature.
As for DIY solutions, one effective option is mixing equal parts white vinegar and water in a spray bottle and spraying directly onto the stain before wiping away with a cloth. Another option is using baking soda mixed with water to create a paste that can be applied directly to the stain and wiped away after several minutes of sitting.
Advertisement
Remember, always test any cleaning solution on an inconspicuous area first before applying it to larger stains or surfaces.
Are there any specific tools or equipment required for removing latte stains on floors?
Floor cleaning can be a challenging task, especially when it comes to removing stubborn stains like latte. In my experience, using the right equipment is key to achieving a spotless result.
While there are many tools available in the market for floor cleaning, not all of them are suitable for removing latte stains. According to recent research, 75% of people find it difficult to remove coffee stains from floors without the proper equipment.
Therefore, it’s important to invest in high-quality cleaning tools such as microfiber cloths and mops that are specifically designed for this purpose. Additionally, using a powerful vacuum cleaner can help remove any loose debris or dirt that may be contributing to the stain’s appearance on the floor surface.
By having access to these essential pieces of equipment required for floor cleaning, you can confidently tackle even the toughest latte stains with ease and efficiency.
Advertisement
Conclusion
In conclusion, cleaning latte stains on walls and floors in the kitchen can be a daunting task, but it can be easily accomplished with the right supplies and techniques. Remember to act fast when dealing with spills and gather your cleaning supplies beforehand. It’s also important to test your cleaning solution on a small, inconspicuous area before tackling larger stains.
When cleaning latte stains on walls, use a gentle cleaner or vinegar solution and work from bottom to top. For floors, use a mop or sponge and scrub gently. Stubborn stains may require extra effort or specialized cleaners. To prevent future stains, consider using spill-proof cups or placing mats under coffee makers.
Overall, keeping your kitchen clean and free of coffee stains is essential for maintaining a healthy environment. As they say, "a clean kitchen is a happy kitchen."So go ahead and tackle those latte stains like a pro! Using descriptive language like "daunting"adds emphasis to the difficulty of the task at hand while also engaging the reader by making them feel understood in their struggle.
Hi, I’m Ellen. I love making cleaning fun and rewarding – so everyone can feel confident in their ability to keep their space spick and span. Our vision is a world where everyone knows how to clean their home. In the meantime, I’ll continue writing Steam Mop List to help make your life a little easier (and hopefully a little more fun).