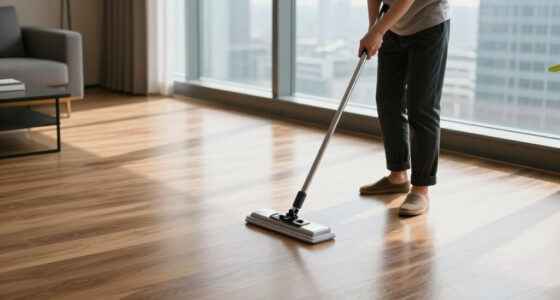
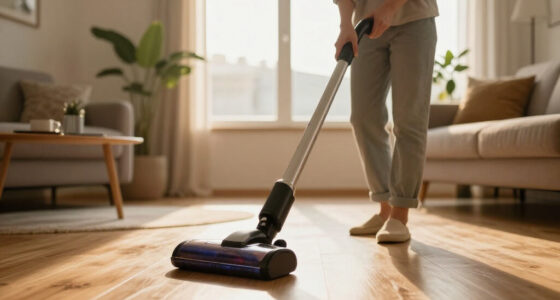
Use this guide to prepare, operate, and put away a steam mop for compatible hard floors. It is written for beginners and covers how to check flooring, remove loose dirt, mop in controlled passes, and confirm the floor has dried without damage. Allow about 20-40 minutes, depending on the room size and drying time.

Get cleaning gear delivered free with Prime
- Fast, free delivery on millions of items
- Prime Video, Amazon Music and more included
- Member-only deals all year

Shark Steam & Scrub Hard Floor Steam Mop – Teal (S8002BRN)
- ✔ Wattage: 1120 watts
- ✔ Weight: 6.9 pounds
- ✔ Tank capacity: 11.83 fluid ounces
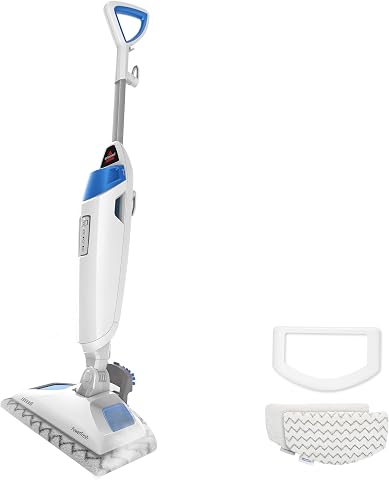
BISSELL PowerFresh 1940A Steam Mop
- ✔ Wattage: 1500 watts
- ✔ Weight: 6.2 pounds
- ✔ Tank capacity: 16 fluid ounces

Shark Steam Mop for Sealed Hard Floors with 2 Dirt Grip Pads (White, S1000)
- ✔ Wattage: 1050 watts
- ✔ Weight: 4.6 pounds
- ✔ Tank capacity: 12.68 fluid ounces
Difficulty: Beginner | Time: 20-40 minutes
What You’ll Need
Tools & Materials:
- Steam mop with its user manual
- Clean mop pad approved for the model
- Water specified by the manufacturer
- Broom or vacuum suitable for the floor
- Dry cloth for small spills or spot checks
Knowledge:
- Basic ability to operate the mop and follow its safety instructions
- Ability to identify the floor type or check its product information
Check the flooring and steam mop manuals before filling or heating the appliance. Steam can damage some floors, including unsealed wood, waxed surfaces, and certain laminate or vinyl products. Use steam only when both the floor manufacturer and mop manufacturer allow it. Clear people and pets from the work area, and keep the hot mop away from skin.
Shark Steam & Scrub Hard Floor Steam Mop – Teal (S8002BRN)
The Shark Steam & Scrub is the most distinctive cleaner in this group because it combines steam with two rotating pads. That added movement is intended to help work on stuck-on stains, giving it a more hands-on cleaning approach than the basic Shark S1000. For buyers who routinely face dried spills or tracked-in dirt on sealed floors, the scrubbing action is the main reason to choose it.It has two steam modes and a removable tank holding 11.83 fluid ounces. That is a useful combination for adjusting cleaning intensity, although the BISSELL’s 16-ounce tank holds more water and may suit a longer session better. At 6.9 pounds, this Shark is also heavier than the S1000’s 4.6 pounds. Swivel steering helps with maneuvering, but it does not erase the weight difference when carrying the mop between floors or putting it away.We should also account for the washable pads: they can be reused, but need regular laundering. Like both alternatives, this model is limited to sealed hard floors and is not intended for carpets or rugs. It makes the most sense when stain tackling matters more than keeping the mop especially light or maximizing tank capacity.
Pros:
- Rotating pads add scrubbing action for stuck-on stains.
- Two steam modes offer a choice of cleaning intensity.
- Removable tank supports convenient filling.
- Swivel steering helps navigate around furniture.
Cons:
- At 6.9 pounds, it is heavier than the Shark S1000.
- The 11.83-ounce tank is smaller than the BISSELL’s stated 16-ounce capacity.
- Washable pads need regular laundering, and the mop is for sealed floors only.
Best for: Households with sealed hard floors and frequent stuck-on spills that want rotating pads to add scrubbing action.
Not ideal for: Buyers who prioritize the lightest mop, the longest time between refills, or a tool for rugs and carpets.
Bottom line: Choose the Shark Steam & Scrub when powered pad movement for stuck-on messes is more important than low weight or the largest tank.
“Choose the Shark Steam & Scrub when powered pad movement for stuck-on messes is more important than low weight or the largest tank.”
BISSELL PowerFresh 1940A Steam Mop
Where the Shark Steam & Scrub centers on rotating pads, the BISSELL PowerFresh takes a more adaptable approach. Its three steam settings let us choose among different levels for the cleaning task, while a flip-down scrubber is designed to help with dried-on messes and grout. This makes it a strong fit for households that want one mop to handle routine floor cleaning and occasional tougher spots.The 16-ounce removable tank is the largest stated capacity among these three, and the 23-foot cord is longer than the S1000’s 18-foot cord. Together, they may make it easier to cover a room without stopping as often to refill or switch outlets. The tradeoff is its 6.2-pound weight: lighter than the Shark Steam & Scrub, but still noticeably heavier than the compact S1000.Compared with the Shark Steam & Scrub, the BISSELL offers more steam settings and more tank capacity, while its scrubber flips down for targeted cleaning instead of using rotating pads during the pass. It remains a corded mop and needs access to an outlet. As with the other picks, we should confirm that our flooring is sealed and suitable for steam before use.
Pros:
- Three steam settings provide more adjustment than either Shark model.
- The 16-ounce tank is the largest stated capacity in this comparison.
- A flip-down scrubber targets dried-on messes and grout.
- The 23-foot cord offers more reach than the S1000’s 18-foot cord.
Cons:
- Its corded design requires an accessible outlet.
- At 6.2 pounds, it is heavier than the S1000.
- It is intended for sealed hard floors, not carpets or rugs.
Best for: Buyers who want multiple steam settings, a targeted scrubber and extra cord reach for cleaning larger rooms.
Not ideal for: Anyone seeking a cordless or especially lightweight mop, or a product for unsealed floors, carpets or rugs.
Bottom line: Pick the BISSELL PowerFresh if steam adjustment, targeted scrubbing and longer cord reach matter more than minimizing weight.
“Pick the BISSELL PowerFresh if steam adjustment, targeted scrubbing and longer cord reach matter more than minimizing weight.”
Shark Steam Mop for Sealed Hard Floors with 2 Dirt Grip Pads (White, S1000)
The Shark S1000 is the practical choice when carrying, storing and moving a mop are bigger concerns than built-in stain scrubbing. At 4.6 pounds, it is the lightest model here, and its 30-second heat-up time gets it ready quickly. Compared with the heavier Shark Steam & Scrub, it gives up rotating pads and two steam modes in exchange for a simpler, easier-to-handle design.Its 12.68-ounce removable tank is slightly larger than the Steam & Scrub’s stated capacity, but falls short of the BISSELL’s 16 ounces. That makes the S1000 better suited to smaller areas or quick cleanups than long sessions across multiple rooms. An 18-foot cord and swivel steering provide useful reach and maneuverability, though the BISSELL offers six additional feet of cord.Two machine-washable microfiber pads mean we can reuse the cleaning surfaces, but they still need washing between uses. There is no separate scrubber feature listed, so buyers regularly dealing with dried-on messes may prefer the BISSELL’s flip-down tool or the Steam & Scrub’s rotating pads. This is a straightforward steam mop for sealed hard floors, not a general-purpose carpet cleaner.
Pros:
- Lightest model in the comparison at 4.6 pounds.
- Heats up in 30 seconds.
- Removable tank and two machine-washable pads simplify routine use.
- Swivel steering and an 18-foot cord support room-to-room maneuvering.
Cons:
- Its 12.68-ounce tank is smaller than the BISSELL’s 16-ounce tank.
- No rotating pads or flip-down scrubber are listed for targeting stubborn messes.
- Designed for sealed hard floors only.
Best for: Buyers who want a light, quick-start steam mop for smaller sealed-floor areas and easy storage.
Not ideal for: People who need powered stain scrubbing, a larger tank for extended sessions, or a mop for rugs and carpets.
Bottom line: Choose the Shark S1000 for light weight and quick setup, provided we can accept more limited stain-scrubbing features and tank capacity.
“Choose the Shark S1000 for light weight and quick setup, provided we can accept more limited stain-scrubbing features and tank capacity.”
As an Amazon Associate we earn from qualifying purchases.
Before You Start
Remove loose grit before steaming; debris under a damp pad can scratch the surface. Do not add detergent, fragrance, or other cleaning products to the water tank unless the mop maker specifically permits them. Steam mops can leave floors very damp if held in place or moved too slowly, so keep the mop moving and follow the manual’s directions for steam settings and water.
Step-by-Step Instructions
Step 1: Confirm the floor is suitable for steam
Identify the floor material and check its care instructions for permission to use a steam mop. Check the appliance manual for any floor restrictions. If the floor is unsealed, waxed, damaged, or its instructions prohibit steam, do not steam it; use a cleaning method approved for that surface.
Tip: If you cannot confirm that the floor tolerates steam, choose a non-steam method recommended by the flooring maker.
Check: You have confirmed that both the floor and the mop allow steam cleaning.
Step 2: Clear and dry-clean the room
Move small furniture, rugs, cords, and objects off the floor. Sweep or vacuum the entire area, including corners and edges, to collect grit, crumbs, hair, and dust. Pick up sticky debris by hand with a suitable cloth rather than pushing it around with the mop.
Tip: Keep the route from the far side of the room to the exit clear so you do not have to walk across a freshly cleaned area.
Check: The floor is clear of loose debris, and you have an unobstructed path out of the room.
Step 3: Fit a clean pad and fill the tank
Make sure the mop is unplugged and cool. Attach a clean, compatible pad according to the manual. Fill the tank only with the water type and amount specified by the manufacturer, and close it securely. Do not overfill or add unapproved cleaning products.
Tip: Keep a spare pad nearby for a large or especially dirty room. Replace a pad that becomes saturated or heavily soiled.
Check: The pad sits flat and secure, and the tank is filled within the marked limit using the specified water.
Step 4: Heat the mop safely
Plug the mop into a suitable outlet and place it on a heat-safe surface while it warms. Select a setting allowed for your floor, if the model offers settings. Wait for the ready indicator or the time stated in the manual. Keep hands and feet away from the pad and steam outlet.
Tip: Do not leave a hot mop resting on one spot of the floor. Use the storage or resting position specified in the manual.
Check: The mop indicates that it is ready, with no leaks or unusual warning lights.
Step 5: Mop in steady, overlapping passes
Start at the farthest point from the exit. Move the mop steadily across the floor in overlapping passes, following the grain or plank direction when practical. Keep it moving and avoid dwelling over seams, edges, or one spot. Use only the steam level and technique permitted by both manufacturers.
Tip: Work in small sections so you can watch for excess moisture. Do not use the mop to loosen heavy grease, stuck-on residue, or large spills; spot-clean those with a floor-approved method first.
Check: Each section has received an even pass, with no puddles or prolonged steaming in one place.
Step 6: Check the pad and floor as you work
Pause in a safe way described by the manual and inspect the pad periodically. If it is dirty, saturated, or dragging, unplug the mop and allow it to cool before changing the pad. Check the cleaned section for moisture collecting in seams or around edges, and use less steam or move faster if it stays wet.
Tip: Never remove a hot pad with bare hands. Follow the manufacturer’s cooling and pad-change instructions.
Check: The pad is clean enough to lift dirt rather than spread it, and the floor has no standing water.
Step 7: Finish the room and let the floor dry
Continue toward the exit, then unplug the mop. Allow the floor to dry before replacing rugs or furniture or allowing regular foot traffic. Keep children and pets away while the floor is damp, since it may be slippery. Ventilate the room if the floor is slow to dry.
Tip: Do not use a fan or heat source unless the flooring maker permits it; ordinary room ventilation is usually sufficient.
Check: The floor feels dry underfoot and shows no puddles, streaks, or new surface changes.
Step 8: Clean and store the mop
Let the appliance cool, then remove the pad as directed. Wash or discard the pad according to its care label and empty the tank if the manual calls for it. Wipe the mop body, check the cord and pad attachment, and store the appliance upright in a dry place.
Tip: Do not wind a warm cord tightly around the appliance or store a damp pad on the mop.
Check: The mop is unplugged, cool, clean, and stored with its pad dry or removed.
Common Mistakes to Avoid
- Adding detergent or fragrance to the tank. — Use only what the manufacturer specifies; unapproved additives can damage the mop or leave residue.
Troubleshooting
Problem: The mop produces little or no steam.
Solution: Unplug it and check the manual’s water-fill and startup instructions. Confirm the tank is seated, the mop has reached its ready state, and the water type is permitted. If it still does not steam, stop and contact the maker rather than probing the steam outlet.
Problem: The floor looks streaky or feels sticky.
Solution: Stop steaming and let the surface dry. Check whether the pad is dirty or whether cleaning products were used previously. Wash or replace the pad and, if the flooring maker allows, remove residue with its recommended cleaning method before trying again.
Problem: Water collects in seams or the floor stays very wet.
Solution: Stop and dry any standing water promptly with a soft cloth. Reduce the steam setting if permitted, keep the mop moving faster, and use shorter passes. Check for leaks and discontinue use if the appliance is leaking.
Problem: The floor changes color, swells, lifts, or develops a rough surface.
Solution: Stop immediately, unplug the mop, and dry the area without applying more heat. Do not steam that floor again. Contact the flooring maker or installer for care advice; have the mop checked if it may be malfunctioning.
What Success Looks Like
The completed floor has no visible loose dirt, puddles, or fresh streaks, and it dries without discoloration, swelling, lifted edges, or other surface changes. The mop is unplugged, cool, and stored with a clean, dry pad. If you notice surface damage, stop using steam and seek advice from the flooring maker.
Next Steps
Wash the pad after use according to its label, and inspect the mop before each cleaning session. Repeat only as often as the flooring maker recommends. For routine spills or floors that do not permit steam, use a compatible cleaner and method listed in the floor care instructions.
Frequently Asked Questions
Can I use a steam mop on every hard floor?
No. Some sealed tile and stone floors may permit steam, while unsealed wood, waxed floors, and some laminate or vinyl products may be damaged. Check the floor and appliance instructions for your exact materials.
Should I add floor cleaner to the water tank?
Only if the mop manufacturer explicitly approves that product. Many models require water alone, and additives can damage the appliance or leave residue.
Do I need to sweep or vacuum first?
Yes. Remove grit, dust, hair, and crumbs before steaming so the damp pad does not drag them across the surface.
How long should I wait before walking on the floor?
Wait until the surface is dry. Drying time depends on the room, steam setting, and flooring; ventilate the room and keep people and pets away while it is damp.
What should I do if the mop leaves a puddle?
Stop, unplug the mop if needed, and dry standing water promptly. Check for a leak, then use shorter passes and a lower permitted steam setting. Stop using the appliance if it continues to leak.