TL;DR

Get cleaning gear delivered free — and shop member deals
- Fast, free delivery on millions of items
- Access to Prime Big Deal Days deals on October 6–7
- Prime Video, Amazon Music and more included
Cleaning floors in a pet grooming space involves removing debris first, then disinfecting with the right product at the correct contact time. Proper routines and tools prevent contamination and damage, keeping pets and staff safe.
Always remove organic debris before disinfecting; disinfectants are less effective on organic matter.
Use a validated disinfectant with proper dilution and contact time—more chemical isn’t better.
Clean hidden areas like grout lines and drains regularly to prevent buildup and odors.
Implement a consistent routine: after accidents, between animals, daily, and weekly inspections.
Avoid mixing chemicals, reusing contaminated tools, or rushing the process—these errors compromise safety and hygiene.
How to Clean Floors in a Pet Grooming Space
Floors collect fur, skin flakes, moisture, saliva, waste, parasites, and microorganisms carried between animals. Safe floor care is therefore an infection-control system: remove debris, clean away organic matter, disinfect at the correct strength, and keep the surface wet for the full contact time.
Disinfectant belongs on a visibly clean surface, not on top of fur, feces, grease, or soap residue.
A two-bucket mopping system can sharply reduce the amount of contamination returned to the floor.
The entire surface must remain visibly wet for the period stated on the disinfectant label.
Debris removal, cleaning, then disinfection.
From restricting access to complete drying.
Never combine bleach with ammonia, acids, or other cleaners.
Pets and staff return only when the treated floor is safe.
Follow the sequence every time
Each stage prepares the floor for the next. Work from cleaner zones toward dirtier ones, control wastewater, and never move contaminated tools into reception, kennels, or food-preparation areas.
Restrict access
Keep animals and people away. Place wet-floor signs and control slip hazards.
Put on PPE
Use the gloves, eye protection, footwear, or mask specified on the label.
Collect solid waste
Remove feces, vomit, and other solid material immediately and safely.
Remove loose debris
Use a rubber broom, scraper, squeegee, or suitable vacuum to capture fur.
Wash with cleaner
Apply detergent and scrub textured areas to lift grease and organic residue.
Rinse if required
Remove cleaner residue when either product label instructs you to rinse.
Apply disinfectant
Use a compatible product at the exact labeled concentration.
Hold contact time
Keep every treated area visibly wet for the complete labeled dwell time.
Final rinse
Rinse when directed, especially where animals may lick the surface.
Dry and reopen
Allow complete drying before pets or staff re-enter the cleaned zone.
Clean does not automatically mean disinfected
A pleasant smell is not proof of pathogen control. Read the label for approved settings, named organisms, dilution, contact time, rinsing instructions, and surface compatibility.
Remove debris
Physically collect fur, hair, skin flakes, solid waste, and loose particles before adding liquid.
Clean
Detergent loosens grease, urine residue, dirt, and organic matter that can shield microorganisms.
Disinfect
A labeled disinfectant kills or inactivates specified organisms on the already-clean surface.
Match chemistry to the risk and surface
No disinfectant is universally suitable. Choose by the pathogens relevant to the facility, the flooring material, label directions, staff safety requirements, and the likelihood that animals will contact or lick the treated surface.
| Option | Typical role | Key advantage | Watch for | Decision check |
|---|---|---|---|---|
| Accelerated hydrogen peroxide | Broad-spectrum routine disinfection | ✓ Fast-acting options may be available | Concentration, contact time, and material compatibility | Confirm the exact pathogen claim on the label |
| Sodium hypochlorite | Targeted disinfection when label claims fit | ✓ Can be effective against resilient organisms | Corrosion, ventilation, exact dilution, and toxic mixtures | Never mix with ammonia, acids, or other cleaners |
| Quaternary ammonium compound | Routine environmental disinfection | ~ Useful where the organism claim is appropriate | Not every formulation covers every pathogen | Do not assume activity against parvovirus |
| Peroxygen product | Commercial or animal-care disinfection | ✓ Broad applications depending on formulation | Mixing, storage, PPE, and flooring compatibility | Follow label and safety data sheet exactly |
| Odor or enzyme cleaner | Breakdown of urine residue and odor sources | ✓ Helpful for organic residue management | ✗ Not automatically a disinfectant | Use only as a disinfectant if the label says so |
Resistant pathogen warning: Canine parvovirus is unusually difficult to inactivate. Use a product specifically labeled as effective against it rather than relying on a general “antibacterial” or “commercial strength” claim.
Clean beyond the open floor
Grout lines, drains, edges, cracks, and equipment bases can retain moisture and organic material. These zones support buildup, odors, and biofilms even when the central floor appears clean.
Remove covers, clear trapped fur, scrub accessible surfaces, and use only compatible drain products.
Agitate with a small brush and inspect for porosity, staining, cracks, or failed sealant.
Clean wall junctions, corners, thresholds, and transitions where mops often fail to reach.
Move accessible equipment safely and clean beneath tubs, tables, cages, and storage units.
Build hygiene into the operating rhythm
A written routine makes infection control repeatable. Record the product, dilution, contact time, responsible person, and any damage or exposure that requires follow-up.
After an accident
Isolate the area, remove waste, clean, disinfect, complete contact time, and dry.
High-contact zones
Address contaminated work areas, splash zones, and animal-contact surfaces.
Full floor routine
Remove fur, wash, disinfect, inspect, and leave tools clean and dry.
Detailed inspection
Check drains, grout, edges, equipment bases, coatings, and chemical stock.
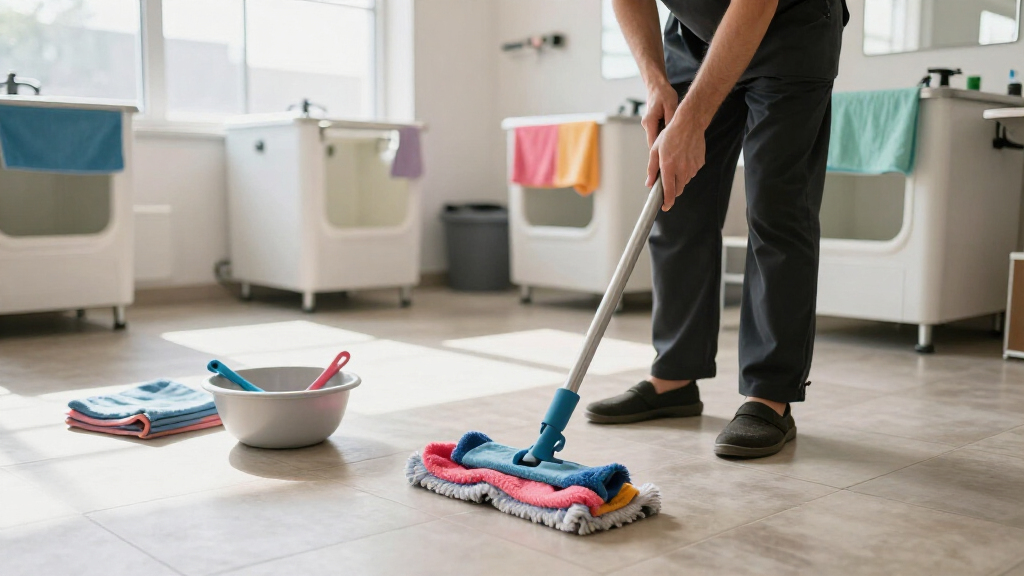
Use a two-bucket system
Keep cleaning solution separate from recovered wastewater. Rinse the mop in the waste bucket before reloading it from the clean bucket. This limits soil transfer and can reduce contamination spread by up to 80%.
Over-concentration can damage flooring, increase residue, expose staff and animals, and perform differently from the validated label instructions.
Every step protects the next animal
Restrict access and stop contamination from traveling.
Capture fur, waste, and loose organic material.
Lift the residue that shields microorganisms.
Apply the right product for the target organism.
Complete contact time, dry, inspect, and document.
Start by removing debris — don’t skip the basics
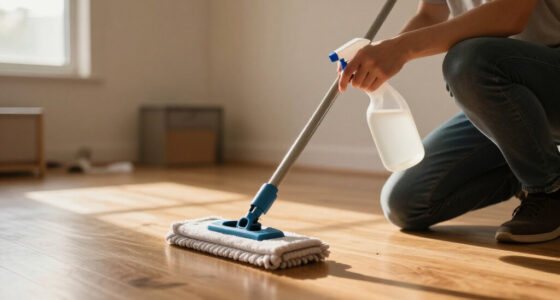
Before any disinfectant touches the floor, you must clear away fur, hair, and organic waste. Think of it like prepping a canvas—if you leave debris, disinfectants can’t do their job. Use tools like brushes, squeegees, or vacuum cleaners designed for grooming environments. For example, a groomer I spoke with swears by a rubber broom for quick fur collection before mopping.
This step reduces the organic load, making subsequent disinfection more effective and less wasteful. Organic matter acts as a barrier, shielding microbes from disinfectants and allowing pathogens to survive longer. If you skip this, you risk disinfectant failure and potential cross-contamination. Additionally, removing debris prevents foul odors and stains that can embed in porous surfaces, which are often difficult to disinfect thoroughly later. Taking the time to do this properly ensures the entire cleaning process is more efficient and effective, ultimately safeguarding the health of animals and staff.
As an affiliate, we earn on qualifying purchases.
Pick the right tools and chemicals for your floors
Every surface in a grooming space has different needs. Vinyl and sealed hardwood are generally forgiving, but porous materials like unsealed grout or worn laminate can absorb moisture and harbor bacteria. Using the correct tools—like microfiber mops or pads—can significantly improve cleaning efficacy because they trap fur, dirt, and microbes more effectively than traditional cloths. For chemical choices, a detergent that lifts soils is your first line of defense, followed by a disinfectant suited for pet environments and the specific pathogens you’re targeting.
Choosing the wrong tools or chemicals can lead to ineffective cleaning and even surface damage. For example, abrasive scrubbers on delicate surfaces can cause micro-scratches that trap dirt and microbes, making disinfection harder. Selecting a disinfectant that isn’t suitable for the material can cause deterioration or incomplete pathogen kill. Always check manufacturer labels, test products in a small hidden area first, and consider the nature of your surfaces. This tailored approach ensures thorough cleaning without unintended harm, ultimately protecting both the surfaces and the health of the animals and staff.
two-bucket mopping system for pet salons
As an affiliate, we earn on qualifying purchases.
As an affiliate, we earn on qualifying purchases.
Follow a proven cleaning and disinfecting sequence
- Secure the area—keep pets and staff out.
- Wear appropriate PPE—gloves, masks, eye protection as needed.
- Pick up solid waste immediately.
- Remove fur and loose debris with a scraper or vacuum.
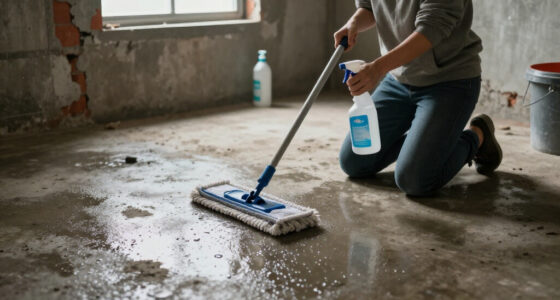
- Wash the floor with a detergent or suitable cleaner; scrub textured areas if needed.
- Rinse thoroughly if the product calls for it.
- Apply a disinfectant at the correct dilution—using a sprayer or mop.
- Keep the surface visibly wet for the specified contact time—don’t wipe it dry too soon.
- Rinse again if the label instructs and the surface contacts animals.
- Allow the floor to dry completely before animals re-enter.
Following this sequence isn’t just about cleanliness; it’s about breaking the cycle of contamination. Each step is designed to maximize pathogen removal and prevent cross-contamination. For example, removing solid waste first prevents organic matter from diluting disinfectants or creating biofilms that are resistant to cleaning. Maintaining the correct contact time ensures that disinfectants can effectively inactivate microbes, which is crucial in a setting where infectious agents like parvovirus or fungi could be present. Consistency in this routine minimizes the risk of outbreaks, protects animals from infection, and maintains a hygienic environment, which is essential for a professional grooming operation.
pet grooming space cleaning supplies
As an affiliate, we earn on qualifying purchases.
As an affiliate, we earn on qualifying purchases.
Choose disinfectants that actually kill germs, not just smell good
In a grooming environment, you need disinfectants proven to kill key pathogens like parvovirus, ringworm fungi, and bacteria. Look for products approved for veterinary or animal-care use. These disinfectants are formulated to break down the cell walls of microbes or disrupt their reproductive processes, ensuring that pathogens are truly eliminated rather than just masked by scent. For example, accelerated hydrogen peroxide formulations are broad-spectrum, fast-acting, and effective against many microbes in under 5 minutes, which is vital for maintaining a safe environment in a busy grooming space.
Always follow the label instructions for dilution and contact time. A common mistake is rushing the process or using too little disinfectant, which leaves microbes alive and capable of causing infections. Remember: a disinfectant is only as good as its contact time, so patience and proper application are key. Using disinfectants that don’t specify efficacy against specific pathogens or that are not approved for veterinary use can leave your environment vulnerable. Proper application and adherence to guidelines ensure that your disinfectant performs its intended function, providing peace of mind and a safer space for both pets and staff.
disinfectant for pet grooming floors
As an affiliate, we earn on qualifying purchases.
As an affiliate, we earn on qualifying purchases.
Don’t forget the details—drains, grout, edges, and equipment bases
Contamination hides in cracks, grout lines, drain covers, and around equipment bases. These spots often trap organic matter and biofilms resistant to regular cleaning. For example, a neglected drain in a grooming room can harbor bacteria and fungi, causing persistent odors and potential pathogen reservoirs. These hidden areas can become sources of cross-contamination if not addressed regularly.
Schedule regular deep cleaning of these areas, and use small brushes or putty knives to scrub grout lines, drain covers, and equipment bases. Enzymatic drain cleaners can help break down organic residues that feed biofilms, reducing microbial buildup. Incorporating these detailed cleaning steps prevents the re-emergence of odors, reduces infection risks, and extends the lifespan of your equipment and surfaces. Ignoring these areas may seem minor, but over time, they compromise overall hygiene, making your entire cleaning routine less effective and risking the health of animals and staff alike.
Maintain a flooring design that fights dirt and bacteria
The floors in a grooming space should be nonporous, seamless, and water-resistant. Cracks, worn coatings, or porous grout can trap moisture and microbes, making thorough disinfection impossible and creating breeding grounds for bacteria and fungi. For example, a worn epoxy coating on a grooming table or floor can absorb urine or saliva, leading to persistent contamination if not repaired promptly. Choosing durable, water-resistant flooring materials reduces the risk of microbial harborage and simplifies cleaning routines.
Sloped surfaces that direct water toward drains prevent pooling, which can harbor microbes and cause slips. Textured but slip-resistant surfaces help keep the area dry and safe for animals and staff. Regular inspections and repairs of these surfaces are essential—they prevent cracks or worn areas from becoming contamination traps, thereby maintaining a hygienic environment that is easier to disinfect and less prone to damage over time.
Set up a cleaning schedule that keeps germs at bay
Routine cleaning is about consistency. After every accident or spill, clean, disinfect, and dry immediately to prevent microbial growth. Between animals, wipe down tables and floors to remove fur, saliva, and other organic matter that can serve as breeding grounds for germs. During the day, remove hair and splashes, and keep walkways dry to prevent slips and microbial proliferation. At night, do a thorough cleaning—scrubbing edges, inspecting drains, laundering microfiber pads, and checking for cracks or worn surfaces.
In high-risk situations, like a suspected contagious case, follow an enhanced protocol. This includes isolating the area, using stronger disinfectants, and documenting the process for accountability and future reference. Establishing a scheduled routine—daily, weekly, and monthly inspections—ensures no detail is overlooked. Consistent cleaning routines are proven to significantly reduce the likelihood of infection outbreaks, creating a safer environment for pets and staff and maintaining the professionalism of your grooming operation.
Avoid common mistakes that undermine your efforts
- Disinfect without removing hair and organic matter first.
- Guess dilutions—measure carefully.
- Shorten contact time—wait for the disinfectant to work.
- Let disinfectants dry prematurely.
- Reuse dirty mops or tools across zones.
- Mix incompatible chemicals—bleach and ammonia are a deadly combo.
- Use household products without checking their suitability.
- Rely solely on fragrance—odor doesn’t equal cleanliness.
- Allow animals onto wet floors—slip hazards and paw exposure.
- Ignore drains, grout, or under equipment.
Each mistake compromises hygiene and can lead to outbreaks or damage. For example, rushing through disinfection may leave microbes alive, risking infections. Reusing contaminated tools spreads pathogens across surfaces, undoing your cleaning efforts. Mixing incompatible chemicals can produce hazardous fumes or damage surfaces. Overlooking hidden areas like drains or grout lines allows biofilms and organic residues to persist, creating reservoirs for microbes. To avoid these pitfalls, follow proper protocols, use the right tools and chemicals, and maintain a disciplined routine. This ensures your grooming environment remains safe, clean, and professional, reducing health risks and extending surface life.
Stay ahead with new practices and tools
Emerging trends include rapid-acting disinfectants, automated dilution systems, microfiber flat-mops, and ATP testing to verify cleanliness. These tools help maintain high standards while reducing chemical waste and staff exposure. For instance, ATP testing provides immediate feedback on residual organic matter—if levels are high, re-cleaning is necessary before reintroducing animals. Mechanical cleaning with advanced tools like rotary scrubbers or steam cleaners can reach into textured surfaces and grout lines more effectively than manual methods alone.
Biofilms in drains or textured floors are more resistant and require mechanical removal to fully eradicate. Sustainable practices like using concentrates, reusable microfiber pads, and environmentally friendly disinfectants also contribute to a safer, greener operation. Keeping up with these innovations not only improves cleaning efficacy but also demonstrates a commitment to animal and staff safety, regulatory compliance, and environmental responsibility. Regularly updating your techniques ensures your grooming space remains at the forefront of hygiene standards, reducing risks and enhancing reputation.
Frequently Asked Questions
What is the best floor cleaner for a pet grooming salon?
There’s no single magic product. Use a detergent that lifts soils first, followed by a disinfectant proven against relevant pathogens like parvovirus or ringworm. Always match your choice to your surface and follow label instructions carefully.How often should grooming-room floors be cleaned?
Clean up accidents immediately, wipe down surfaces between animals, and do a thorough disinfecting at least once daily. Higher-traffic or high-risk areas may need more frequent attention during the day.Is bleach safe to use?
When used at the proper dilution, bleach can be effective but can also irritate skin and damage materials. Always follow label directions, ensure good ventilation, and avoid mixing with other chemicals.Can vinegar disinfect grooming floors?
Vinegar can remove mineral deposits and odors but isn’t a broad-spectrum disinfectant. It’s best used as a supplementary cleaner, not a primary disinfectant in infection control.Are enzymatic cleaners enough for pet urine?
Enzymatic cleaners help break down odor-causing residues but don’t disinfect. Use them in combination with a proper disinfectant, especially after accidents involving urine or feces.Conclusion
Keeping floors in a pet grooming space clean isn’t just about appearance—it’s about stopping germs before they spread. A disciplined routine, the right tools, and attention to detail make all the difference. Think of your floor as the foundation of a healthy, safe environment—neglect it, and everything else suffers.Fall Picks
fall essentials
As an affiliate, we earn on qualifying purchases.