TL;DR

Get cleaning gear delivered free — and shop member deals
- Fast, free delivery on millions of items
- Access to Prime Big Deal Days deals on October 6–7
- Prime Video, Amazon Music and more included
A Bissell steam mop leaking from the bottom usually points to issues with the water tank, seals, or internal clogs. Regular maintenance and proper assembly can prevent leaks, while troubleshooting involves inspecting and replacing worn parts.
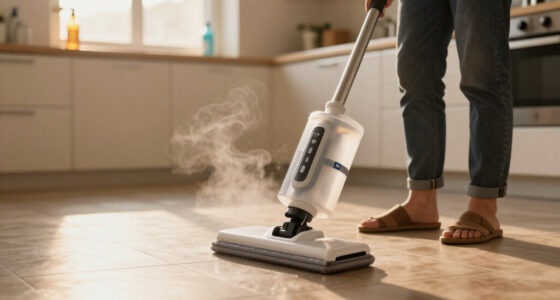
Nothing kills the mood like a steam mop leaking right where you don’t want it — on your freshly cleaned floors or even your feet. If you’ve noticed water pooling around your Bissell, you’re not alone. It’s frustrating, especially since these mops are designed to make cleaning easier, not messier.
In this guide, you’ll learn why your Bissell steam mop might be leaking from the bottom, how to fix common problems, and simple steps to prevent future leaks. Whether your unit is new or years old, understanding the cause can save you time, money, and potential damage to your floors or electrical parts.
Leaking from the bottom often involves a loose or cracked water tank, worn seals, or clogged nozzles.
Regularly inspecting and tightening connections can prevent many leaks.
Mineral buildup from hard water causes clogs, pressure changes, and leaks — descale often.
Replacing worn seals and damaged parts is usually straightforward and affordable.
Proper assembly, use of soft water, and storage habits extend your mop’s lifespan and reliability.
Bissell Steam Mop Leaking From the Bottom? Here’s Why
A bottom leak usually points to the water tank, a worn seal, mineral buildup, or physical damage. Most causes are straightforward to diagnose—but because water and powered components are a dangerous combination, the first move is always to unplug, cool, and inspect.
Where the water escapes
Like a garden hose with a loose fitting, a steam mop leaks when its water path loses a seal or pressure cannot exit normally. Start with the simplest external connection before investigating deeper damage.
Loose water tank
The tank may not be fully seated after refilling. A small gap at the connection lets water escape as the mop moves or warms.
Cracked tank
Drops, impacts, and hairline fractures compromise the reservoir. Heat and pressure can gradually enlarge a barely visible crack.
Worn gasket
A flattened, split, or mineral-coated seal cannot maintain pressure at the tank or steam outlet connection.
Mineral clog
Hard-water deposits narrow the steam outlet. Pressure then builds behind the blockage and seeks another escape point.
Overfilled tank
Water above the recommended line leaves insufficient operating space and may leak through vents or weak connections.
Cracked base
Damage to the mop head or internal housing can open a direct route for water and may expose powered components.
Six checks, in order
Work from low-risk, visible causes toward parts that may need replacement. Do not open the powered housing unless the product documentation specifically authorizes user service.
Unplug and let the mop cool
Disconnect it from power, place it on a water-safe surface, and wait until all hot components are cool.
Remove and inspect the tank
Look closely for wet seams, distortion, chips, and hairline cracks. Never pressure-test a damaged tank while installed.
Reseat the connection
Reattach the tank evenly and confirm it locks or clicks into its intended position without forcing it.
Examine seals and gaskets
Check for cracks, flattening, deformation, residue, or missing pieces around the tank and steam outlet.
Check the nozzle for buildup
Follow the model-specific cleaning instructions. Clear accessible residue only with an approved tool and method.
Inspect the base and decide
Replace damaged user-serviceable parts. If the housing is cracked or the leak remains, stop and arrange service.
Symptom to solution
The location and timing of the water offer useful clues. Match the symptom, confirm the part visually, and choose the least invasive effective fix.
| Likely cause | How it happens | Typical clue | Best response |
|---|---|---|---|
| Loose tank | Tank is not fully secured after filling. | ✓Leak begins after refitting. | Remove and reattach until securely seated. |
| Cracked tank | Impact or material failure opens a fracture. | ✗Water appears even while cool. | Replace the tank; do not patch a pressure crack. |
| Worn seal | Age, residue, or incorrect assembly deforms the gasket. | ~Drips gather at a connection. | Clean the seat and replace the compatible seal. |
| Mineral clog | Hard-water scale restricts normal steam flow. | ~Weak steam plus intermittent leaking. | Descale according to the model instructions. |
| Base damage | Impact cracks the head or dislodges internal parts. | ✗Water emerges from the housing seam. | Stop use and replace or professionally service the unit. |
Why maintenance matters
Scale and worn seals account for a large share of reported leak scenarios. Prevention protects both the intended steam path and the pressure integrity of every connection.
Leak-risk indicators
Relative diagnostic emphasis based on the supplied research facts—not a model-specific failure forecast.
Repair or replace?
The safest decision depends on where the leak originates and whether the repair restores a dependable seal.
Five habits that help
Gentle handling and routine maintenance reduce avoidable stress on tanks, seals, connections, and steam outlets.
Frequently asked
A leak is a symptom, not a diagnosis. These answers help narrow the likely fault while keeping safety ahead of convenience.
Why is it leaking from the bottom?
The usual causes are a poorly seated or cracked tank, worn seals, mineral clogs, overfilling, or damage to the base.
Can I fix it myself?
You can reseat the tank, inspect user-accessible seals, and perform approved descaling. Replace cracked or worn serviceable parts rather than improvising repairs.
Is it safe to keep using?
No. Water can damage floors, cause burns, and create an electrical hazard if it reaches powered components.
Can hard water cause leaking?
Yes. Deposits can restrict the steam path, disrupt normal flow, and increase stress at tanks, seals, and other weak points.
Are newer models less prone to leaks?
Some newer designs use improved seals, anti-calc features, and more durable construction, but maintenance and correct assembly remain essential.
When should I replace the mop?
Consider replacement when leaks persist after proper repair, damage reaches the housing, parts are unavailable, or service costs approach the value of a new unit.
A bottom leak calls for a checkup—not automatically a new mop.
Start cold and unplugged, inspect the tank and seals, restore clear steam flow, and replace damaged parts promptly. If water appears near the powered housing or survives these checks, stop using the unit and seek qualified service.
Why Is My Bissell Steam Mop Leaking from the Bottom?
The most straightforward answer: your mop is letting water escape where it shouldn’t. Common causes include a loose or cracked water tank, clogged nozzles, or worn seals. Think of it like a garden hose: if the connection isn’t tight or the rubber gasket is worn, water drips or sprays out.
But why does this matter? Because leaks can lead to more than just messy floors—they can cause water damage to your flooring surfaces, promote mold growth if moisture seeps into hidden areas, and even pose electrical hazards if water reaches internal components. Recognizing the root cause helps you address not just the leak but also prevent potential damage and safety risks. For example, a small crack in the tank might seem minor, but over time, pressure build-up can worsen the crack or cause additional internal damage, increasing repair costs. Similarly, worn seals may seem insignificant but can compromise the entire system’s pressure integrity, leading to persistent leaks and inefficient cleaning performance. Therefore, understanding these causes allows you to weigh the tradeoffs between simple repairs and more extensive replacements, ensuring safety and longevity of your device.
Bissell steam mop water tank replacement
As an affiliate, we earn on qualifying purchases.
As an affiliate, we earn on qualifying purchases.
How to Diagnose Your Bissell Steam Mop Leak — Step-by-Step
- Unplug the mop and let it cool down if recently used.
- Remove the water tank carefully and check for cracks or damage. Pay close attention to subtle hairline fractures that might not be immediately obvious but can expand under pressure, causing leaks over time.
- Inspect the water tank connection and tighten it if loose. A loose connection can allow water to escape during operation, reducing cleaning efficiency and increasing spill risk.
- Look at the seals and gaskets around the tank and steam outlet. Are they cracked or worn? Worn or deformed seals not only cause leaks but also reduce the pressure needed for effective steam cleaning, meaning your mop won’t perform optimally.
- Check the nozzle for mineral buildup or clogs. Clear any debris with a pin or small brush. Clogs can cause pressure buildup behind the blockage, which may force water out through weak points.
- Examine the base for cracks or damage that could cause leaks. Even small cracks in the base can lead to significant leaks over time, especially when internal pressure fluctuates during use.
- If you find damaged parts, replace them or contact customer service for repair options. Ignoring small cracks or worn seals can lead to larger, more costly repairs later, so early intervention saves money and hassle.
Following these steps can reveal whether the leak stems from a simple loose connection or a more serious crack. Recognizing the specific cause is essential because it influences your repair approach—quick fixes like tightening or sealing may suffice for minor issues, whereas replacing parts might be necessary for more significant damage. This thorough diagnosis ensures you don’t overlook hidden problems that could cause safety hazards or further damage if left unaddressed.
As an affiliate, we earn on qualifying purchases.
Compare Common Causes of Leaks in Bissell Steam Mops
| Cause | How It Happens | Best Fix |
|---|---|---|
| Loose Water Tank | Over time, connections loosen or aren’t fully secured after refilling, allowing water to escape during operation. | Tighten or reattach the tank securely, ensuring it clicks into place with a firm seal. This simple step can prevent ongoing leaks and improve steam performance. |
| Cracked Water Tank | Dropping the mop or manufacturing defect causes cracks. These cracks compromise the tank’s ability to contain water under pressure, leading to persistent leaks. | Replace the water tank. Investing in a new tank restores pressure integrity and prevents water damage. |
| Worn Seals or Gaskets | Age, mineral buildup, or improper assembly degrade seals. Worn seals can no longer maintain the necessary pressure, resulting in leaks at connection points. | Replace seals or gaskets. Proper sealing ensures the system maintains pressure, improving efficiency and safety. |
| Mineral Clogs | Hard water deposits minerals that clog the steam outlets, causing pressure to build up behind the clog, which can force water out at weak spots. | Descale the unit regularly. Removing mineral buildup restores proper flow and pressure, reducing leak risks. |
| Physical Damage | Impact damages the base or internal components, creating cracks or dislodging parts that lead to leaks. | Inspect and replace damaged parts. Prompt repairs prevent further damage and ensure safe operation. |
This comparison not only highlights common issues but also emphasizes why early detection and proper maintenance are crucial—neglecting these signs can lead to more expensive repairs, safety hazards, and decreased cleaning effectiveness. Understanding the implications of each cause helps you prioritize repairs and avoid unintended consequences, like electrical hazards or further structural damage, which could compromise your safety and the longevity of your mop.
hard water descaling for steam mop
As an affiliate, we earn on qualifying purchases.
As an affiliate, we earn on qualifying purchases.
Frequently Asked Questions
Why is my Bissell steam mop leaking from the bottom?
Leaks usually happen because the water tank isn’t sealed tightly, has cracks, or internal clogs cause pressure buildup. Worn seals or damage to the base can also be culprits.How can I fix a leaking Bissell steam mop myself?
Start by tightening the water tank connection, inspecting and replacing seals or gaskets, and clearing any mineral buildup in the nozzle. If the tank is cracked, replace it.Is it safe to keep using a leaking steam mop?
Not really. Leaks can cause water damage or electrical hazards. It’s best to repair the unit or consult professional service if repairs aren’t effective.Can hard water make my steam mop leak more?
Yes. Hard water deposits minerals that clog the system, increasing pressure and the likelihood of leaks. Regular descaling helps prevent this.When should I replace my Bissell steam mop?
If leaks persist after repairs or the unit shows extensive damage, replacing is often more cost-effective than constant fixing.As an affiliate, we earn on qualifying purchases.
Conclusion
Leaking from the bottom is a common sign your Bissell steam mop needs a checkup, not a replacement. A little troubleshooting, regular maintenance, and gentle handling can keep your floors sparkling without messes or hazards.
Next time your mop leaks, remember: most issues are fixable — and often simple. Keep an eye on the seals and connections, and your cleaning tool can serve you well for years to come.
Fall Picks
fall essentials
As an affiliate, we earn on qualifying purchases.