TL;DR
Open a free Amazon Business account
Business pricing, bulk buying and tax-exempt orders.
Create a free accountAs an affiliate, we earn on qualifying purchases.
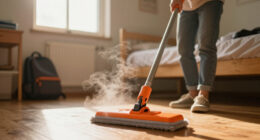
Weak steam from your steam mop often results from mineral buildup, low water levels, or clogged nozzles. Regular maintenance, descaling, and checking parts can fix the issue and keep your floors clean.
Few things are more frustrating than a steam mop that barely produces steam. You expect hot, steady bursts of steam to melt grime and sanitize your floors, but instead, it sputters or barely drips. If your trusty cleaning partner is underperforming, don’t rush to replace it. Chances are, a simple fix or routine maintenance can restore its power.
Understanding what causes weak steam output and how to troubleshoot it can save you money and extend your device’s life. This guide walks you through common issues, practical solutions, and smart maintenance tips so your floors stay sparkling without the fuss.
Mineral buildup from hard water is the main cause of weak steam; regular descaling prevents this.
Using distilled or filtered water significantly reduces mineral deposits, boosting longevity.
Simple checks like water level and nozzle cleanliness can fix most issues immediately.
Replacing worn or clogged nozzles, filters, and gaskets can restore steam power.
Routine maintenance and proper water choice keep your steam mop performing at its best.
Why Your Steam Mop Isn’t Steaming Like It Used To
Weak or inconsistent steam often boils down to one thing: mineral deposits. Hard water leaves behind calcium and magnesium that clog internal channels and nozzles. Imagine tiny mineral crystals building up inside the vents, blocking the hot steam from escaping freely. Over time, this reduces pressure and steam output. This buildup not only diminishes cleaning efficiency but can also cause the device to overheat or malfunction if left unchecked.
Other culprits include low water levels, dirty nozzles, or a malfunctioning heating element. Identifying the root cause is the first step to fixing your steam mop. For instance, mineral buildup acts like a barrier, preventing hot steam from reaching the surface and making cleaning less effective. Recognizing these issues early can help you decide whether cleaning, descaling, or replacing parts is necessary—saving you time and money in the long run.
Neglecting mineral buildup can lead to long-term damage. Over time, mineral deposits can corrode internal components, reducing the lifespan of your device and increasing the likelihood of costly repairs. Moreover, a clogged nozzle or vent can cause the device to overheat, potentially damaging the heating element or other sensitive parts. Therefore, understanding these causes underscores the importance of regular maintenance to keep your steam mop functioning optimally and prevent more expensive issues down the line.

OYSTERBOY 5 Pcs Premium Quality Replacement Accessories Steam Cleaner Descaling Cartridge and Microfiber Mop Cloth Pad Set Compatible for Karcher SC2 Upright SC3 Series
- Complete Accessory Set: Includes descaling cartridge and microfiber pads
- Efficient Descaling: Quickly removes scale from Karcher SC3
- High-Quality Microfiber: Durable, washable, dirt-gripping mop pads
As an affiliate, we earn on qualifying purchases.
As an affiliate, we earn on qualifying purchases.
Quick Checks Before Fixing Your Steam Mop
Start with the basics. Check that the water tank is full and properly seated. Sometimes, a loose tank or low water causes weak steam. Next, inspect the nozzles and vents for debris or mineral buildup. Use a flashlight to peek inside and see if anything’s blocking the steam flow. Clearing these obstructions can restore immediate functionality and prevent further damage caused by restricted airflow.
If these look fine, try cleaning the nozzles with a pin or needle. Often, a tiny clog is enough to cut down steam power. These quick steps can save you time and unnecessary repairs, but also serve as a diagnostic step to understand whether the issue is superficial or internal. Remember, simple fixes often mask underlying problems like mineral deposits that require deeper maintenance.
Performing these initial checks is crucial because they can reveal simple, easily fixable issues that, if ignored, could lead to more severe damage. For example, a blocked vent might seem minor but can cause the device to overheat or fail prematurely if not addressed. Regularly inspecting these parts helps catch problems early, saving money and extending the device’s lifespan.

Tolxh X5 H20 Mop Nozzle Connector Multi-Function Nozzle Adapter Spare Parts Quality Durable New Replacement Parts For Steam-Mop
- Quality Assurance: Well-designed, meets OEM standards
- Durable Materials: Highly durable, rigorously tested
- Easy Installation: Simple to install, saves time and money
As an affiliate, we earn on qualifying purchases.
As an affiliate, we earn on qualifying purchases.
How to Descale Your Steam Mop in 3 Easy Steps
- Empty the water tank and fill it with a mixture of equal parts white vinegar and water. This solution dissolves mineral deposits that accumulate inside the device, which are the primary cause of weak steam. Proper descaling ensures that internal channels are clear, allowing steam to flow freely and maintain consistent pressure.
- Turn on the steam mop and let it run until it releases steam steadily for about 5 minutes. This process helps break down stubborn mineral deposits and flush out any loosened residues from the internal pathways. Rushing this step may leave deposits intact, so patience is key.
- Turn off the device, let it cool, then empty and rinse the tank thoroughly. Refill with distilled or filtered water for regular use. This prevents future mineral buildup, which can compromise steam quality and damage internal components over time. Regular descaling not only restores performance but also extends the lifespan of your steam mop by preventing corrosion and clogs.
This routine prevents mineral buildup, which is the leading cause of weak steam. Always check your manufacturer’s instructions to ensure vinegar is safe for your model, as some materials may be sensitive to acidic solutions. Investing time in proper descaling is a small effort that yields significant benefits in cleaning efficiency and device longevity.
Deep descaling not only restores steam performance but also prolongs the life of internal components. Mineral deposits can cause internal corrosion, which weakens the structural integrity of the heating element and internal pathways. By regularly removing these deposits, you reduce the risk of internal damage, ensuring your device remains safe and effective over years of use. Furthermore, thorough descaling can prevent unexpected breakdowns and costly repairs, making it a vital maintenance step for long-term device health.

Steam & Go Demineralized Water for Steam Mop – Lavender Scent, 32 oz | Scented Floor Cleaner Solution, Ready-to-Use, Compatible with Any Steam Cleaner
- Limescale Prevention: Stops mineral deposits to maintain performance
- PVC-Free Formula: Safe for all sealed flooring types
- Lavender Scent: Naturally freshens rooms with a gentle aroma
As an affiliate, we earn on qualifying purchases.
As an affiliate, we earn on qualifying purchases.
Replacing Worn-Out Parts That Limit Steam Power
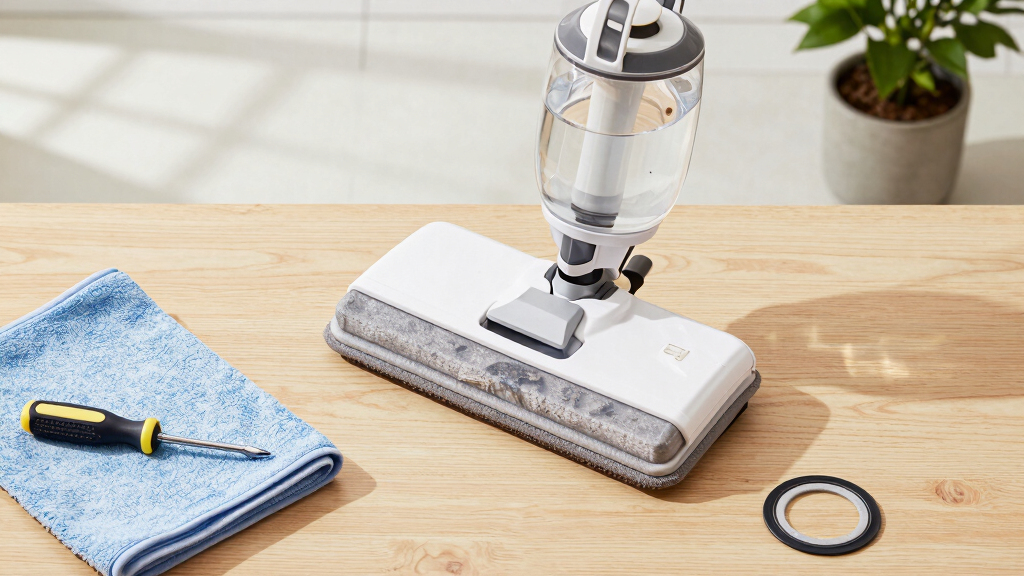
If cleaning and descaling don’t do the trick, some parts may need replacing. Key components include nozzles, filters, gaskets, and seals. Over time, these wear out or get clogged, choking the steam flow and reducing cleaning effectiveness. For example, a worn gasket can cause steam leaks, lowering pressure and heat transfer efficiency, which directly impacts cleaning results.
Replacing these parts is crucial because worn or damaged components can create internal leaks or blockages that compromise the entire system. For instance, a damaged gasket might not seal properly, allowing steam to escape before reaching the surface, resulting in weak or inconsistent steam. Addressing these issues ensures the internal pathways are sealed and functioning optimally, which maintains consistent pressure and heat transfer—key factors for effective cleaning.
Choosing the correct replacement parts and installing them properly is essential. Poor installation can lead to further leaks or damage, negating any performance gains. Always follow manufacturer instructions or consult a professional if unsure. Regularly inspecting and replacing worn parts not only restores steam power but also prevents more serious internal damage, saving money and extending your device’s lifespan.

Newbealer 13 Pieces Replacement Accessories for Steam Cleaner & Mop, White
- Compatibility: Designed for Newbealer NB282C and more
- Complete Kit: Includes 13 versatile cleaning accessories
- Versatile Tools: Brushes, squeegee, nozzle, and more
As an affiliate, we earn on qualifying purchases.
As an affiliate, we earn on qualifying purchases.
Choosing the Right Water for Your Steam Mop
Using the right water makes a big difference. Tap water contains minerals that accelerate buildup, especially if your water is hard. Switching to distilled or filtered water reduces mineral deposits by over 80%, according to research. This reduction minimizes internal clogging, corrosion, and scaling, which can impair steam production and damage internal components over time.
This simple switch can keep your steam mop running smoothly longer, saving money and time spent on descaling or repairs. It also means fewer interruptions during cleaning sessions and a more consistent steam output, which leads to better cleaning results. Investing in good-quality water is a small step with significant long-term benefits for your device’s performance and lifespan.
Choosing the right water is a cost-effective maintenance practice because it directly reduces mineral deposits that cause internal damage. While distilled water might seem like an extra expense, it actually saves money over time by reducing the frequency of descaling, repairs, and part replacements. This simple switch can make your steam mop more reliable and efficient, ultimately leading to cleaner floors and a longer-lasting device.
When to Call a Professional or Replace Your Steam Mop
If your steam mop still sputters after cleaning, descaling, and replacing parts, it might be time to consult a professional or consider replacement. Internal heating issues, electrical faults, or irreparable damage to internal components can pose safety risks if attempted DIY. For example, a malfunctioning heating element may overheat or cause electrical shorts, which could be dangerous and compromise the entire device’s safety and performance.
Ignoring these signs can lead to further internal damage, safety hazards, and even potential electrical fires. If basic troubleshooting doesn’t resolve the issue, seeking professional help ensures accurate diagnosis and safe repair. Sometimes, investing in a new model with advanced safety features, better thermal management, and energy efficiency can be more cost-effective and safer than risking further damage or electrical hazards. Remember, safety should always come first—never attempt complex electrical repairs yourself unless qualified.
When in doubt, consulting a professional not only mitigates safety risks but also helps you make an informed decision about replacing your device. Proper diagnostics can reveal underlying issues that DIY fixes might miss, ensuring your investment is well-placed and that your cleaning equipment remains safe and effective for years to come.
Frequently Asked Questions
Why is my steam mop not producing enough steam?
Common reasons include mineral deposits clogging vents, low water levels, or a faulty heating element. Regular descaling and checking water levels can fix most of these issues.
How often should I descale my steam mop?
It depends on your water type and usage. If you have hard water, every 1-3 months is recommended. Using distilled water can extend that interval.
Can I use vinegar to descale my steam mop?
Yes, vinegar is effective for descaling, but always check your manufacturer’s instructions. Some models may not tolerate vinegar or require specific cleaning solutions.
What parts are most likely to need replacement?
Nozzles, filters, gaskets, and seals wear out over time. Replacing these can often restore full steam power without buying a new device.
Is it safe to repair my steam mop myself?
Basic cleaning and descaling are safe, but for internal or electrical repairs, consult a professional. Always unplug before attempting any internal fixes.
Conclusion
Keeping your steam mop in top shape isn’t complicated — just a few simple habits. Regular descaling, using the right water, and quick inspections can prevent performance dips and extend its life. A well-maintained steam mop makes cleaning faster, easier, and more effective.
Don’t wait until your device sputters to action. Take these steps now, and enjoy spotless floors with steady, hot steam every time.
Baby shower & registry season Picks
baby registry must-haves
As an affiliate, we earn on qualifying purchases.