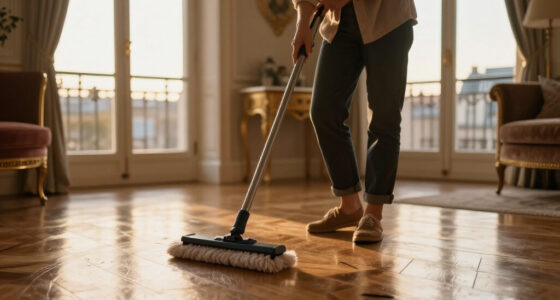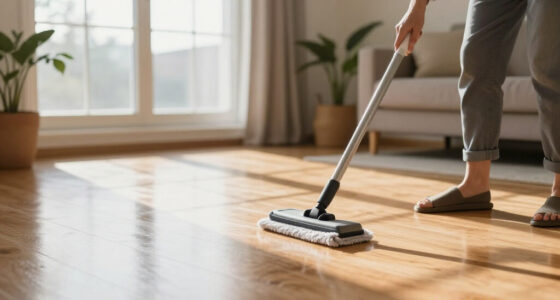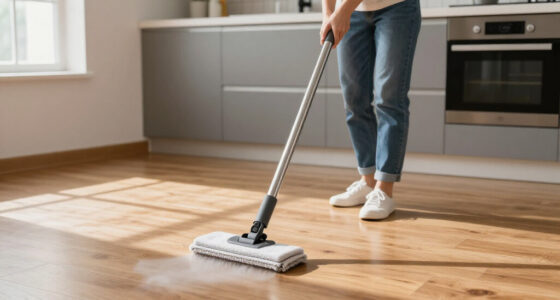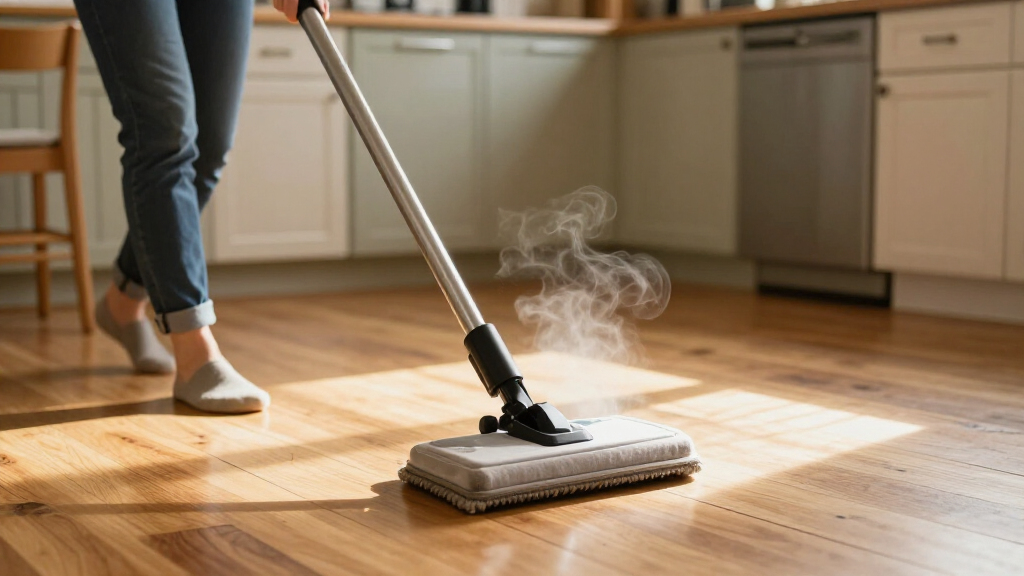
This guide shows beginners how to prepare, operate, and care for a cordless steam mop on compatible hard floors. You will finish with a clean floor, a used mop pad ready for washing, and a clear check that the floor’s finish has not been harmed. Allow 30-60 minutes for a typical room, depending on its size, the mop’s heat-up time, and how much furniture you need to move.

Get cleaning gear delivered free — and shop member deals
- Fast, free delivery on millions of items
- Access to Prime Big Deal Days deals on October 6–7
- Prime Video, Amazon Music and more included

Shark Steam & Scrub Steam Mop, S8001
- ✔ Model: S8001
- ✔ Steam modes: Light, Normal, Deep
- ✔ Scrubbing speed: Over 150 scrubs per minute
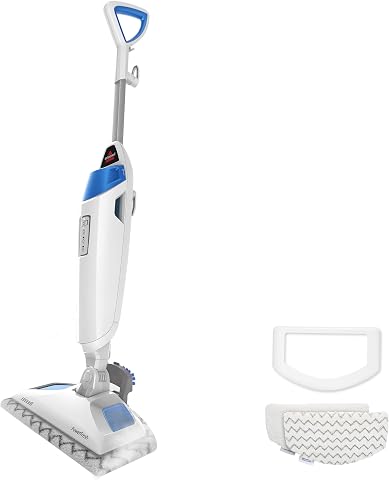
BISSELL PowerFresh Steam Mop 1940A for Sealed Hard Floors
- ✔ Model: 1940A
- ✔ Cleaning path: 12 inches
- ✔ Steam settings: Three

Shark Steam Pocket Mop with Two Washable Double-Sided Pads, S3501
- ✔ Model: S3501
- ✔ Weight: Under 5 lbs.
- ✔ Heat-up time: As little as 30 seconds
Steam and heat can damage some floor materials or finishes. Check both the flooring manufacturer’s care instructions and the mop manual before use; do not assume that a surface is steam-safe because it is hard or sealed.
Difficulty: Beginner | Time: 30-60 minutes, including preparation and drying
What You’ll Need
Tools & Materials:
- Cordless steam mop with its manual and a clean, compatible pad
- Water specified by the mop manufacturer
- Broom, dust mop, or vacuum suitable for hard floors
- Access to the mop’s charger or charging base
- Optional: a second clean mop pad for a larger area
Knowledge:
- Basic ability to identify your floor material and find its care instructions
- Ability to operate the mop’s controls and follow its safety instructions
Charge the mop before cleaning. Find out whether the floor maker permits steam cleaning: many unsealed floors, waxed or oiled surfaces, some laminate, and some engineered wood floors can be damaged by heat or moisture. If the floor maker does not approve steam, use a cleaning method they recommend instead. Follow the mop manual for water type, tank filling, heat-up, and cooldown. Do not add detergent, fragrance, or essential oils unless the manual specifically permits them.
Shark Steam & Scrub Steam Mop, S8001
The Shark S8001 is the most compelling pick here for buyers who want steam cleaning to do more than refresh an already tidy floor. Its rotating microfiber pads provide active scrubbing, while Light, Normal, and Deep modes let us match the cleaning intensity to the job. That combination gives it an advantage over the simpler Shark S3501, which relies on steam and manual movement rather than rotating-pad action.For sealed hard floors, the flexible mode selection is useful when a room has a mix of routine dust and more persistent marks. The removable tank and four machine-washable Dirt Grip pads also make ongoing upkeep more convenient: we can refill the tank separately and keep spare pads in rotation. LED headlights are a practical extra for spotting debris in dim areas, though they do not replace careful floor preparation.The main limitation is fit, not a lack of features. This is not cordless, so it cannot provide unrestricted movement away from an outlet. It is also intended for sealed flooring only, and buyers should follow the owner’s guide rather than assume any sanitizing result applies under all conditions. Compared with the BISSELL 1940A, it emphasizes powered scrubbing over the BISSELL’s stated cleaning-path width and longer cord. Choose it for pad action; skip it if cordless operation is non-negotiable.
Pros:
- Rotating pads scrub while steam is applied
- Three modes suit lighter cleaning and tougher messes
- Four washable pads and a removable tank simplify upkeep
- LED headlights help reveal debris in low-light areas
Cons:
- It is not cordless and requires access to a power outlet
- Designed for sealed hard floors only
- Sanitizing use depends on following the owner’s guide
Best for: People with sealed hard floors who prioritize rotating-pad scrubbing, adjustable steam modes, and washable pads over cordless operation.
Not ideal for: Shoppers who need a truly cordless mop, or anyone with floors that are not sealed or not approved for steam cleaning.
Bottom line: For cord-tolerant shoppers seeking the strongest active scrubbing in this group, the S8001 is our top pick, but it does not meet a cordless requirement.
“For cord-tolerant shoppers seeking the strongest active scrubbing in this group, the S8001 is our top pick, but it does not meet a cordless requirement.”
BISSELL PowerFresh Steam Mop 1940A for Sealed Hard Floors
The BISSELL PowerFresh 1940A suits buyers who want a conventional corded mop with a useful balance of coverage and spot-cleaning support. Its 12-inch cleaning path can help cover open floor areas efficiently, while the built-in scrubber is intended to loosen dried-on dirt and grout buildup. That makes it a stronger fit for broad, regular cleaning than the lightweight Shark S3501, which is more about simple handling and fast startup.Three steam settings provide some choice for different messes, and the removable extra-large tank is designed to support longer cleaning sessions between refills. Its 23-foot power cord is a practical advantage when moving around a room, although it still ties cleaning range to outlet placement. Washable microfiber pads keep routine maintenance straightforward. The optional fragrance discs are an add-on, not a core reason to choose this mop.Where the BISSELL falls behind the S8001 is active pad design: the supplied information describes a built-in scrubber, not rotating pads. It therefore makes more sense for a buyer who values a wide path, long cord, and straightforward scrubber than for someone seeking the S8001’s powered pad action. And like every option here, it is not cordless and should only be used on compatible sealed hard floors. Its sanitization claim is conditional on use as directed, so we should follow the product instructions rather than treat it as automatic.
Pros:
- 12-inch cleaning path supports coverage across open areas
- Built-in scrubber helps address dried-on dirt and grout buildup
- 23-foot cord and removable extra-large tank support longer sessions
- Three steam settings and washable microfiber pads
Cons:
- Corded design does not satisfy cordless cleaning needs
- Limited to sealed hard floors approved for steam
- Fragrance discs are optional rather than an included cleaning necessity
Best for: Households with larger areas of compatible sealed flooring that want a 12-inch cleaning path, built-in scrubber, and long cord.
Not ideal for: Anyone who needs cordless cleaning or wants the rotating-pad scrubbing approach of the Shark S8001.
Bottom line: The 1940A is a practical coverage-first alternative to the S8001, but its long cord is still a cord—not a substitute for cordless freedom.
“The 1940A is a practical coverage-first alternative to the S8001, but its long cord is still a cord—not a substitute for cordless freedom.”
Shark Steam Pocket Mop with Two Washable Double-Sided Pads, S3501
The Shark Steam Pocket S3501 is the straightforward choice for shoppers who want a light mop that is quick to get moving. At under five pounds, with swivel steering and heat-up in as little as 30 seconds, it is easier to reposition and prepare than a feature-heavy scrubber may be. Its double-sided microfiber pads offer two usable sides before washing, which can help reduce interruptions during a cleaning session.Compared with the S8001, this model gives up rotating scrubbing action and multiple steam modes in favor of a simpler, lightweight design. It also lacks the BISSELL’s stated 12-inch cleaning path and 23-foot cord details. That makes the S3501 most appealing for smaller or straightforward cleaning routines, where easy maneuverability matters more than tackling stubborn marks with powered pad movement.Its steam cleaning uses water, and the product information states that it removes 99.9% of common household bacteria on sealed hard floors. Buyers should still follow the instructions and flooring guidance closely. The core limitation remains decisive for this search: the S3501 is corded, so its quick heat-up does not make it cordless. Choose it if low weight and simple steering matter most; look to the S8001 for tougher messes or seek a different product if you need battery-powered freedom.
Pros:
- Weighs under five pounds and includes swivel steering
- Heats up in as little as 30 seconds
- Double-sided washable pads provide more usable cleaning surface
- Uses water for steam cleaning
Cons:
- Requires a power outlet and is not cordless
- Does not offer the S8001’s rotating-pad scrubbing
- Designed only for sealed hard floors compatible with steam
Best for: Buyers who want a light, easy-to-steer steam mop for routine cleaning on compatible sealed floors and can work near an outlet.
Not ideal for: People seeking cordless operation, powered scrubbing for stuck-on messes, or adjustable steam modes.
Bottom line: The S3501 is the easiest-handling pick in this lineup, but its simple, corded design is best for routine upkeep rather than cordless convenience or heavy scrubbing.
“The S3501 is the easiest-handling pick in this lineup, but its simple, corded design is best for routine upkeep rather than cordless convenience or heavy scrubbing.”
As an Amazon Associate we earn from qualifying purchases.
Before You Start
Test the assembled, heated mop on a small, inconspicuous spot only if both the floor-care instructions and mop manual allow steam on that surface. Follow the manuals for the test and inspect the spot after it dries. Stop if the finish changes, the surface swells, water enters a seam, or the floor becomes cloudy. Keep children and pets away from the work area, and never leave a hot mop standing unattended on the floor.
Steam mops are for floor cleaning, not for picking up crumbs or grit. Sweep or vacuum first, and keep the mop moving while steam is active. Do not use it on people, pets, walls, or surfaces that the manufacturer has not approved.
Step-by-Step Instructions
Step 1: Check the floor and mop instructions
Read the flooring care instructions and the steam mop manual. Confirm that the floor material and finish are approved for steam cleaning, then check which water the mop requires and how to attach the pad. If either manufacturer advises against steam, do not use the mop on that floor.
Tip:Pay particular attention to unsealed surfaces, wax, oil finishes, and joints or seams where moisture could enter.
Check: You can name the approved floor type, water type, and pad setup from the instructions.
Step 2: Charge and inspect the mop
Place the mop on its charger or charging base as directed. Check that the body, tank, cable or charger, pad, and floor head are intact. Fit a clean, dry pad securely, using the attachment method specified by the maker.
Tip:Do not use a mop with a cracked tank, damaged charger, loose parts, or a pad that will not stay attached.
Check: The battery indicator shows an adequate charge, and the pad sits flat and secure across the floor head.
Step 3: Clear and dry-clean the floor
Move rugs, small furniture, and loose objects out of the work area. Sweep, dust-mop, or vacuum the floor to remove dust, hair, grit, and crumbs. Check the mop’s manual before using a vacuum on a surface that may scratch.
Tip:Grit trapped beneath a damp pad can scratch a finish. Pick up larger debris before starting rather than pushing it around with the mop.
Check: The floor is free of visible loose dirt, and the route you plan to clean is clear.
Step 4: Fill the tank with approved water
Keep the mop switched off and cool. Remove the tank as directed, fill it only to the marked limit with the water type specified in the manual, and refit it firmly. Do not overfill or add cleaning products unless the maker explicitly allows them.
Tip:Some models specify distilled or demineralized water, while others permit tap water. The manual’s instruction takes priority; the wrong water can leave mineral deposits or affect the mop.
Check: The tank is seated without leaks, the water is below the fill limit, and no unapproved additive has been added.
Step 5: Heat the mop as directed
Set the mop upright on a stable, floor-safe surface, away from people and pets. Turn it on and wait for the ready indicator or the heat-up time stated in the manual. Select the lowest steam setting that the floor maker permits, if the mop offers settings.
Tip:Do not lay a heating mop on the floor or touch the steam outlet. Hot steam can burn, even when the mop looks ready to move.
Check: The mop’s ready signal indicates that it has heated, and the selected setting is approved for the floor.
Step 6: Clean in small, controlled sections
Begin in a far corner and work toward the exit so you do not walk over cleaned, damp areas. Move the mop in smooth, overlapping passes, following the manual’s operating instructions. Keep it moving while steam is on; do not hold it in one place or repeatedly steam a seam, edge, or spot.
Tip:Use only as much steam as needed. If a patch stays wet, reduce the steam setting or move more quickly, provided those adjustments are allowed by the manuals.
Check: The cleaned section looks evenly wiped, with no standing water, persistent wet streaks, or visible debris trails.
Step 7: Check and change the pad when needed
Pause according to the manual before checking the pad. If it is saturated, heavily soiled, or leaving dirt behind, switch the mop off and follow the maker’s directions for safely removing and replacing the hot pad. Attach a clean pad before continuing.
Tip:A dirty pad can spread soil instead of lifting it. Keep your hands away from the hot floor head, and use the handle or pad-release method provided.
Check: The attached pad is clean enough to lift dirt rather than smear it, and the floor remains free of excess moisture.
Step 8: Switch off and let the floor dry
After finishing, turn off the mop and follow the manual’s instructions for setting it down and letting it cool. Keep people and pets off the floor until it is dry. Avoid adding water or applying another product while the surface is still warm or damp.
Tip:Drying time depends on steam output, room airflow, and the floor. Ventilate the room if practical, but do not direct strong heat at the floor.
Check: The surface is dry to the touch, with no puddles or lingering wet tracks.
Step 9: Empty, clean, and store the mop
Once the mop is off and safe to handle, empty any remaining water if the manual directs you to do so. Remove the pad as instructed and wash or dispose of it according to its care label. Wipe the mop as directed, let the parts dry, and store the unit in a cool, dry place.
Tip:Do not store a damp pad against the floor head; trapped moisture can cause odor or damage. Follow the manual for battery charging and long-term storage.
Check: The tank and pad are handled according to the manual, the mop is cool, and no damp fabric is left attached in storage.
Common Mistakes to Avoid
- Steaming a floor that is not approved for steam. — Check the flooring maker’s care instructions before filling or heating the mop. Use another cleaning method if steam is not approved or the floor type is uncertain.
- Adding detergent, oils, or other products to the tank. — Use only the water and additives specifically allowed in the mop manual. Unapproved liquids can leave residue or damage the machine.
- Using the mop to pick up dry grit or holding it over one spot. — Sweep or vacuum first, keep the mop moving, and avoid lingering over seams, edges, or stubborn marks.
- Continuing with a dirty pad or leaving the floor wet. — Replace a saturated or soiled pad as directed, use a suitable low steam setting, and keep foot traffic off the floor until dry.
Troubleshooting
Problem: The mop does not heat or produce steam.
Solution: Check that the battery is charged, the tank is correctly installed and filled, and the mop has had the full heat-up time. Check the manual for the ready indicator and any model-specific reset or blockage procedure. Do not open or repair electrical parts yourself.
Problem: The mop leaves streaks, smears, or dirt behind.
Solution: Switch off the mop safely and check whether the pad is dirty or saturated; replace it with a clean one. Confirm that the floor was dry-swept or vacuumed first, and reduce excess steam if the manual allows. Do not apply a separate cleaner unless the floor maker recommends it.
Problem: Water remains on the floor after a pass.
Solution: Stop and check that the mop is approved for the floor and that the tank is not overfilled. Use a lower steam setting or quicker passes if permitted, and replace a saturated pad. If moisture is entering seams or the surface changes, stop using steam and contact the flooring maker.
Problem: The floor looks cloudy, swollen, or changed after steaming.
Solution: Stop immediately, switch off the mop, and keep further steam away from the area. Let the floor dry without applying more heat or cleaner. Contact the flooring maker or a qualified floor-care professional for advice; do not resume steam cleaning unless they approve it.
What Success Looks Like
The task is complete when the approved floor has been cleaned in even, controlled passes; visible loose soil and streaks are gone; no standing water remains; and the surface dries without a change in color, sheen, texture, or shape. The mop should be switched off, cool before storage, and left with its pad and tank cared for according to its manual.
Next Steps
Wash the reusable pad using its care label, and check it for wear before the next use. Recharge and store the mop as its manual directs. For future cleaning, sweep or vacuum first and repeat steam cleaning only as often as the floor maker recommends. If the floor finish changes or moisture appears in joints, stop using steam and ask the flooring maker or a qualified professional for guidance.
Frequently Asked Questions
Can I use a cordless steam mop on any hard floor?
No. Hard surfaces differ in material, finish, and resistance to heat and moisture. Use steam only when both the flooring instructions and mop manual approve that specific floor type.
Should I put floor cleaner in the water tank?
Usually, no. Add a cleaner only if the mop manufacturer explicitly permits it and gives directions for use. Otherwise, use the specified water alone.
Do I need to sweep or vacuum before steaming?
Yes. Remove dust, hair, and grit first so the damp pad does not smear dirt or drag particles across the finish. Follow your vacuum maker’s guidance for the floor surface.
What should I do if the floor is still wet after cleaning?
Keep people and pets away until it dries. On the next pass, use a lower steam setting or move faster if allowed by the mop and flooring instructions. Stop if water enters seams or the floor shows a change.
Fall Picks
fall essentials
As an affiliate, we earn on qualifying purchases.