Cleaning
When To Remove Carpet From A House


When thinking about removing carpets from your home, there are several factors to consider. These factors range from the cost involved to the potential damage that might be done to the subfloor, as well as any residual odors – all vital aspects to keep in mind. However, there are also significant advantages to removing the carpet. It could save you on future maintenance costs and effort. Here are a few reasons why getting rid of your old carpet might be a wise decision: If you’re considering selling your house soon, it could be beneficial to remove the old carpet.
Cost
Costs to remove carpet from a home vary depending on who is doing it, what type of flooring you choose, and how you dispose of it. The cost of hiring a professional to remove the carpet will be lower than if you do it yourself. If you don’t have the time or aren’t willing to spend the time to haul the old carpet away, hiring a professional might be a better option.
If you’re doing the job yourself, you can save money by purchasing specialized tools for the job. A utility knife and a few additional blades can be purchased for $30. A power carpet puller can be rented, which can be used to remove all the carpet in one go. You should know that power carpet pullers can run up to $140 per hour.
The cost of removing carpet from a home depends on its size and the amount of padding. The average cost to remove carpet is $0.50 per square feet. This can increase by $0.50 to $1.50 depending on the size and distance of the home. If you’re removing the carpet yourself, you should be aware that contractors will charge more for corners than they will for rooms without corners.
Labor
There are many reasons to remove carpet from a house. You may want to increase the property’s value by revealing original flooring. However, you should consider the time and effort involved in removing the carpet. Moreover, this process can lead to dust and other messy results. It is best to hire a professional who can properly remove the carpet.

Before removing the carpet, you should first remove the baseboards. They get the most wear. Without them, the carpet won’t sit right. In some cases, the baseboards may be made of plastic. The contractor can then remove the carpet from the baseboards.
If you’re going to pull up a carpet on your own, you should wear a dust mask and safety glasses. You can also use a pry bar to loosen the carpet from the tack strip. Once the carpet is freed from the tack strip you can pull it up along the wall.
It is also important to consider the cost of removing carpet. The average cost to remove carpet is $120 to $200 per square. ft. depending on the size of the room. This covers the cost of removing the carpet and padding. After removing the carpet, a contractor will cut it into smaller pieces and remove all staples and padding. The contractor will also use a scraper tool to scrape the floor and apply hot water for softening the glue. Then, he will use a glue remover to remove any remaining glue.
Odors
One way to get rid of unpleasant smells from a house’s carpet is to use baking soda. This natural substance absorbs odors and is easy to use on carpeting. Sprinkle it on the carpet and let it sit for a few hours or overnight. Once the baking soda has done its job, vacuum the area.
Baking soda can also absorb excess moisture so it is a great way of eliminating odors. It’s inexpensive and can be left on the carpet overnight or several days after its application. It is also not abrasive and will not damage the carpet’s fibers. When used properly, baking soda will remove odors and leave the carpet smelling fresh.
Another way to get rid of odors from a house’s carpet is to use essential oils. Essential oils such as lavender, grapefruit, and lemon can neutralize carpet odors. These oils are great for removing odors from the air and purifying it.
If the odor persists after removing the carpet, it may be a good idea to open the windows to let fresh air in. The fresh air will make the carpet odor go away. However, once you close the windows, the smells will return. It might take several applications if the smell is strong. The key to success is persistence and patience. Fresh air can speed up the process.
Odors can be removed from a house by replacing the old carpet and padding. You can also get rid of any pet odors by replacing the carpet and padding. Make sure you do the job right if you are replacing the carpet or padding. This will keep your floor fresh and free of any lingering odors.
Subfloor damage
When removing the carpet from a house, it is important to take care not to cause damage to the subfloor. A soft spot on the floor under the carpet may indicate a damaged subfloor. A rotten subfloor may also be indicated by squeaking floors. The subfloor may also have been damaged by water.
Subfloor damage is often caused by water. It is important to identify the source and fix it. A leaking roof, a leak in the basement or even a leak from the crawlspace may cause water to soak the subfloor. Once you have located the source of the water, it is time to pull the carpet up to restore the subfloor. If the carpet is tacked down to the subfloor, the contractor will use a flat pry bar to lift the edge of the carpet away from the tack strips.
In some cases, it is necessary to replace the subfloor, which is an expensive process. If the damage is not addressed promptly, it could become more severe over time. It is better to plan for subfloor repairs in advance than to wait until the damage gets worse. If you are unsure about your abilities or aren’t confident with the process, it’s best to hire a professional.
Before removing the carpet, it is important to inspect the subfloor. Any irregularities in the subfloor could affect the new carpet, resulting in a spongy surface underneath. Rusted nails or tack strip damage are another cause of subfloor damage. The rust can cause the new carpet to bleed through it.
Buying a van or truck
A van or truck can be used to remove old carpet. This can save you money and time. These machines are more efficient and require less care. But you’ll have limited vehicle options and they use more gas than portable machines. Many BSCs were concerned about this last year as gas prices rose. However, these trucks can also clean carpet more efficiently than portable machines and don’t need to be emptied as often.
Use a floor scraper
A floor scraper is an excellent tool to remove carpet and padding from a home. You can rent the tool at a local home improvement store. You can also use a flat shovel to pull the carpet up if you don’t own a floor scraper. To remove staples stuck to the wall, you can also use pliers. Then, you can place the carpet at the curb for garbage pickup.
Floor scrapers come in different styles and can be used to remove carpet from different types of floors. They are typically used to remove carpet from subfloors. Some of them are powered and can remove up to 100 square feet of flooring. A floor scraper has a beveled blade that cuts through the staples. This makes the job much easier and can help you save money in the long-term.
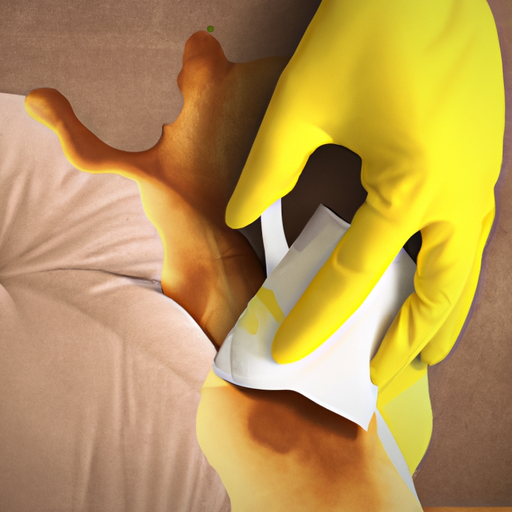
When you use a floor scraper to remove carpet, be sure to wear rubber gloves. The rubber compound sticks to the paint and is similar to water-based paint. Some solvents can be used to break down the latex bond and are safe for all types of floors. Moreover, you can also use a spray lubricant to remove the residue.
Besides a floor scraper, you’ll also need other tools, including a utility knife or claw hammer. This tool is a great way to remove carpet padding and staples from the subfloor. You will also need leather gloves, dust mask, and knee pads for protection from the debris.

Hi, I’m Ellen. I love making cleaning fun and rewarding – so everyone can feel confident in their ability to keep their space spick and span. Our vision is a world where everyone knows how to clean their home. In the meantime, I’ll continue writing Steam Mop List to help make your life a little easier (and hopefully a little more fun).


Hi there! I’m thrilled to share some tips on how to deal with a latte spill on your hardwood floors. As someone who loves coffee and has had my fair share of spills, I totally get how frustrating it can be to clean up. But don’t worry, by taking a few simple steps, you can effectively handle the spill and prevent any lasting damage to your beautiful hardwood floors.
First things first, you’ll want to act quickly to contain the spill. The longer you wait, the more time the liquid has to seep into the wood and potentially cause warping or staining.
So grab some paper towels or a cloth and start blotting up as much of the spill as possible. Once you’ve contained it, it’s time to move onto cleaning up the mess for good.
Let’s get started!
Key Takeaways
- Quick action is crucial in containing a latte spill on hardwood floors. Use a dry cloth or paper towel to blot up as much of the liquid as possible.
- Prepare a cleaning solution with warm water, white vinegar, and dish soap to effectively clean the spill.
- Avoid oversaturating the hardwood floors with too much cleaning solution and use a mixture of warm water and white vinegar to remove stubborn stains without leaving behind any unwanted residue.
- Regularly clean and polish hardwood floors to prevent dirt buildup and have floors professionally cleaned at least once a year.
Act Quickly to Contain the Spill
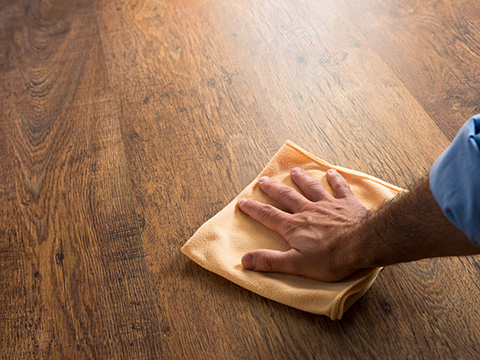
You’ll want to move fast and grab a cloth to prevent the latte from seeping into the hardwood, causing further damage. Preventing spills is always ideal, but accidents happen, and it’s important to act quickly. The longer you wait, the more difficult it will be to clean up.
Start by using a dry cloth or paper towel to blot up as much of the liquid as possible. Be sure to use gentle pressure so that you don’t push the liquid deeper into the hardwood. Once you’ve removed as much of the spill as possible, switch to a damp cloth and continue blotting until there is no more moisture left on the surface.
Importance of quick action cannot be overstated in this situation. A latte spill can cause permanent damage if not cleaned up immediately. If left unattended for too long, it can seep into cracks between planks or even warp them over time.
Clearing the area around the spill is your next step in preventing further damage and ensuring that your hardwood floors stay looking their best for years to come.
Clear the Area
Move everything out of harm’s way and give yourself some breathing room. It’s time to make sure that nothing else gets in the way of tackling this pesky problem. Preventing spills should always be a priority, but accidents happen, so now it’s important to focus on safety during the spill cleanup process.
First, clear the area around the spill. Make sure there are no objects or obstacles that could cause you to slip or trip while cleaning up. Put away any nearby furniture or items that may get in your way. By removing anything that could hinder your ability to clean up properly, you’ll avoid any additional damage from occurring.
In addition to clearing the area, it’s essential to prioritize safety during spills by wearing protective gear such as gloves and non-slip shoes. If the spill is near an electrical outlet or appliance, ensure they’re turned off before starting cleanup. Safety should always come first when dealing with spills on hardwood floors.
With everything cleared and safe, it’s time to prepare for cleaning solution application. Transitioning into preparing for cleaning solution application involves making sure you have all necessary tools at hand and ready for use.
Prepare the Cleaning Solution
Now it’s time to get the necessary tools ready and mix up the cleaning solution. For this task, you’ll need a bucket, warm water, white vinegar, and dish soap.
The mixing ratios are crucial for effective cleaning. In a bucket of warm water, add half a cup of white vinegar and two tablespoons of dish soap.
Before you start mixing the solution, make sure to take all safety precautions. Wear gloves to protect your hands from any harsh chemicals in the cleaning solution. Also, open windows or turn on ventilation fans to allow fresh air into space while working with the solution.
Once you have mixed up the cleaning solution correctly, it’s time to move onto applying it to the spill on your hardwood floor.
Without further ado, let’s discuss how we can apply this mixture effectively!
Apply the Cleaning Solution
As I dip my cloth into the bubbling mixture, it’s as if a warm embrace is enveloping my worries and washing them away.
Applying the cleaning solution to the latte spill on hardwood floors is a crucial step in removing the stain effectively. Here are three tips and tricks for cleaning solution application:
-
Start from the outside: Begin by applying the cleaning solution around the edges of the spill and work your way inwards. This prevents spreading any remaining residue further than necessary.
-
Don’t oversaturate: Using too much cleaning solution can damage your hardwood floors or leave behind streaks after drying, so make sure to use only enough to cover the affected area.
-
Consider alternative cleaning solutions: If you don’t have access to specific hardwood floor cleaners, there are several DIY alternatives that you can use instead, such as vinegar and water or baking soda paste.
By following these tips, you’ll be able to apply your chosen cleaning solution with ease and efficiency. Once done, it’s time to move on to scrubbing out that stubborn stain from your beautiful hardwood floor!
Scrub the Stain
The satisfaction of seeing the stain disappear before my eyes is worth every moment spent scrubbing with the cloth and cleaning solution.
To effectively remove a latte spill on hardwood floors, it’s important to apply enough pressure while scrubbing to ensure that all traces of the stain are gone. It’s also essential to avoid making circular motions when scrubbing as this can spread the stain further.
Preventative measures, such as using a rug or mat under coffee tables or placing coasters under drinks, can help prevent future spills from occurring. However, accidents happen and alternative cleaning methods may be necessary if you don’t have access to a traditional cleaning solution.
For instance, mixing baking soda and water into a paste can work wonders in removing stains from hardwood floors.
To transition into rinsing the area, it’s important to note that after thoroughly scrubbing the stain away with your cloth and cleaning solution, you should rinse the area with clean water to eliminate any remaining residue.
Rinse the Area
Now that I’ve scrubbed the latte stain from my hardwood floor, it’s time to rinse the area.
To do this, I’ll use a damp cloth to remove any remaining cleaning solution.
It’s important to make sure I don’t leave any residue behind, as this can actually attract more dirt and grime over time.
Use a Damp Cloth to Remove the Cleaning Solution
Gently wipe the damp cloth over the hardwood floor, feeling the smooth texture of the wood beneath your fingertips and watching as the cleaning solution lifts away the last traces of latte from its surface. It’s important to use a damp cloth when removing the cleaning solution to ensure that no excess liquid remains on your hardwood floors. This will prevent any potential damage or warping caused by water absorption.
To make sure you’re using an effective cleaning solution for your hardwood floors, consider trying different options until you find one that works best for you. Additionally, to prevent future spills, always use a coaster or place mat under drinks and be careful when carrying liquids around your home. With these tips in mind, you can keep your hardwood floors looking beautiful and free from unsightly stains. And remember – it’s crucial not to leave any residue behind after cleaning up a spill on your hardwood floors to avoid potential damage.
Do Not Leave Any Residue Behind
Make sure not to leave any leftover residue from the cleaning solution when removing it, so as to prevent any potential damage or warping of your beautiful hardwood flooring. To avoid this, you can use useful cleaning tools such as a microfiber cloth or mop to ensure that all excess moisture has been removed from the surface. This will guarantee that your floors are completely dry and free from any remaining cleaning solution.
Effective stain removal techniques also play a crucial role in preventing residue build-up on your hardwood floors. For instance, using a mixture of warm water and white vinegar can be an effective way to remove stubborn stains without leaving behind any unwanted residue. After applying the solution onto the affected area, make sure to wipe it off with a damp cloth and then dry thoroughly with another clean cloth or mop.
By following these simple steps, you can effectively clean up any latte spills on your hardwood floors without causing any damage or leaving behind unwanted residue.
Moving forward, let’s now dive into how to dry the area after removing all traces of moisture and cleaning solution.
Dry the Area
Once you’ve soaked up the excess liquid with a towel, grab a fan or turn on the ceiling fan to help dry out the area quickly. It’s important to get the hardwood floor completely dry to prevent any moisture from seeping into the wood and causing damage.
Using a soft cloth, gently pat any remaining dampness until the area is completely dry. Avoid rubbing vigorously as this can cause further damage to the hardwood surface. Instead, use a soft cloth and apply gentle pressure.
If necessary, repeat this process until all moisture has been removed from the surface of your hardwood floors.
Inspecting the area after it has dried is crucial in ensuring that no residue has been left behind. Take a closer look at where the spill occurred and check for any discoloration or stickiness on your hardwood floors. If you notice any residue, use appropriate cleaning products to remove it thoroughly before moving onto other steps.
Inspect the Area
Now that the area is dry, I need to inspect it for any remaining stains or damage.
Sometimes, even after cleaning up a spill, there can be lingering marks or discoloration on hardwood floors.
If I notice any remaining stains or damage, I’ll need to repeat the cleaning process until the area looks like new again.
It’s important to take the time to thoroughly inspect and clean up any spills to prevent long-term damage to hardwood floors.
Check for Any Remaining Stains or Damage
You’ll want to take a closer look and inspect the area for any stubborn stains or damage that may have been left behind by the latte spill on your hardwood floors. It’s important to assess the color of the wood to see if there are any discolorations caused by the coffee, and also check for scratches or dents that were not visible before. To make this process easier, I suggest creating a table with two columns and four rows. In one column, list down all the areas you need to inspect such as corners, edges, and center of the spill. In another column, note down any observations such as stains or scratches.
Once you’ve completed your inspection and noted everything down in your table, it’s time to check whether there are any remaining stains or damage that require additional cleaning. If you do find something that needs further attention, don’t worry! Simply repeat the cleaning process until all traces of coffee residue are gone. With some patience and diligence, you can restore your hardwood floors back to their original beauty without spending too much money on professional cleaners.
Repeat the Process if Necessary
In the event that any stubborn stains or damage remain on your hardwood floors, there’s no need to panic. Simply repeat the cleaning process until you’re satisfied with the results. Alternatively, if you find that the initial method isn’t working as well as you’d hoped, there are plenty of alternative cleaning methods and products available.
One common mistake people make when attempting to clean up a latte spill is using too much water. While it may seem like adding more liquid will help dilute the stain, it can actually cause further damage to your flooring. Instead, opt for a small amount of cleaning solution and work in small sections at a time. By doing so, you’ll be able to monitor your progress and ensure that you’re not inadvertently causing additional harm to your floors.
To prevent future spills from occurring on your beautiful hardwood floors, there are several preventative measures you can take.
Prevent Future Spills
To avoid spilling your latte again, make sure to handle it like it’s a ticking time bomb about to explode. Prevention is always better than cure, and this holds true for latte spills on hardwood floors as well.
There are several preventative measures you can take to spill proof your coffee cup. First, invest in a good quality spill-proof travel mug with a tight-fitting lid. This will prevent any accidental spills while you’re on the go.
Secondly, try to avoid carrying hot beverages near your hardwood floors. If possible, keep them away from areas where spills are more likely to occur, such as high traffic areas or places where children and pets play.
Finally, be aware of how full your cup is before you start moving around with it. Overfilling your cup increases the chances of a spill occurring.
By taking these preventative measures, you can significantly reduce the chance of future latte spills on your hardwood floors. However, accidents do happen despite our best efforts at preventing them.
In the next section, I’ll discuss how to maintain your hardwood floors after a spill has occurred without causing any further damage or stains that might need professional attention.
Keeping preventive measures in mind can help minimize the risk of another latte spill, but if one does happen, there’s no need to panic because proper cleaning techniques can help maintain the beauty and durability of your hardwood floors.
Maintain Your Hardwood Floors
Maintaining my hardwood floors is crucial to keep them looking their best. Regularly cleaning and polishing them helps to prevent buildup of dirt and grime that can cause damage over time.
Additionally, addressing any damage or staining immediately can help prevent further issues down the line. So, as a responsible homeowner, I make sure to take care of my hardwood floors regularly.
Regularly Clean and Polish Your Floors
Don’t forget to regularly clean and polish your hardwood floors to keep them looking shiny and new. As much as possible, I try to avoid using shoes inside the house and prevent any spills that may cause damage to the floor. However, regular cleaning is still necessary to maintain its beauty.
Here are some tips on how you can properly care for your hardwood floors:
-
It’s important to have your floors professionally cleaned at least once a year. This will help remove dirt buildup in areas that are difficult to reach with regular cleaning methods.
-
Make sure that the products you use are specifically designed for hardwood floors. Avoid using harsh chemicals or abrasive tools that may cause scratches or discoloration.
-
Place furniture pads under heavy furniture to prevent scratches when moving them around.
-
Don’t let any liquid sit on the floor for too long as it may seep through the wood and cause permanent damage.
-
Regular sweeping helps remove dirt particles that may scratch or dull your hardwood floor.
Remember, prevention is key in maintaining your hardwood floors’ beauty. Address any damage or staining immediately before it gets worse.
Address Any Damage or Staining Immediately
If you notice any scratches or discoloration on your beautiful wooden surface, attend to it immediately so that it doesn’t become a bigger issue. Preventive measures are the best way to keep your hardwood floors looking new and fresh, but sometimes accidents happen. In this case, swift action is key to avoiding permanent damage.
One of the most common mistakes people make when addressing damage or staining on their hardwood floors is using harsh chemicals and abrasive tools. This can do more harm than good and cause further damage to the wood. Instead, opt for gentle cleaning solutions and soft cloths or mops to avoid any unnecessary scratching or stripping of the floor’s finish. Below is a table outlining some common cleaning solutions and their effectiveness in removing stains from hardwood floors:
| Cleaning Solution | Effectiveness | Notes |
|---|---|---|
| Vinegar | Good | Mix with water for best results |
| Baking Soda | Fair | Can leave residue if not rinsed thoroughly |
| Hydrogen Peroxide | Excellent | Use only as a last resort as it can bleach the wood |
By properly addressing any damage or staining on your hardwood floors immediately, you can extend the life of your flooring and maintain its beauty for years to come. Remember to always use preventive measures like regular cleaning and polishing, and avoid common mistakes like using harsh chemicals or abrasive tools.
Frequently Asked Questions
Can I use any type of cleaning solution to clean a latte spill on hardwood floors?
When it comes to cleaning up a latte spill on hardwood floors, there are a few cleaning options to consider. It’s important to choose the right solution as certain cleaners can damage the finish of your hardwood floors.
I recommend using a mild soap and warm water solution, or a hardwood floor cleaner that is specifically designed for use on wooden surfaces. Be sure to avoid using any harsh chemicals or abrasive cleaners that could scratch or discolor the wood.
As for prevention tips, it’s always best to be cautious when carrying drinks near your hardwood floors. Consider using spill-proof cups with lids and placing coasters in areas where spills are more likely to occur.
Taking these simple precautions can help prevent future spills and protect your beautiful hardwood floors from damage.
How long should I let the cleaning solution sit on the stain before scrubbing?
When it comes to cleaning stains on hardwood floors, the best techniques involve using a recommended product and allowing it to sit on the stain for a sufficient amount of time.
The duration of time will depend on the type of product being used, as well as the severity of the stain.
In my experience, I’ve found that letting the solution sit for at least 5-10 minutes before scrubbing yields the best results.
It’s important to avoid excessive scrubbing or using abrasive tools that could damage the surface of your hardwood floors.
By following these simple tips and taking care when cleaning up spills, you can keep your hardwood floors looking clean and beautiful for years to come.
Will using a scrub brush damage my hardwood floors?
Scrubbing your hardwood floors with a brush may seem like a good idea, but it can actually cause damage to the surface. Instead, consider using a microfiber cloth for hardwood floor cleaning. Not only does it effectively remove dirt and spills without causing scratches or damage, but it also has the added benefit of being reusable and eco-friendly.
To further prevent scratches on your hardwood floors during cleaning, be sure to avoid using harsh chemicals or abrasive materials. When wiping up spills or messes, gently blot the area rather than rubbing vigorously.
By taking these precautions and using the right tools for the job, you can keep your hardwood floors looking beautiful for years to come.
Is it safe to use a hair dryer to dry the area after cleaning?
When it comes to drying a wet area on hardwood floors, there are several safe alternatives to using a hair dryer.
While a hair dryer may seem like the quickest and most convenient option, it can actually cause more damage to your floors by overheating and warping the wood.
Instead, consider using a fan or opening windows to increase air flow and promote natural evaporation. You can also use clean towels or paper towels to gently blot the area until it is dry.
If you’re dealing with a larger spill, try using a wet/dry vacuum designed for hardwood floors or calling in professional help.
Regardless of which method you choose, always take caution when dealing with water on hardwood floors to prevent long-term damage.
How often should I clean my hardwood floors to prevent future spills?
I believe that regular maintenance is key to preventing future spills on hardwood floors. Cleaning frequency depends on various factors such as the amount of foot traffic and whether or not there are pets in the house.
Generally, it’s a good idea to sweep or vacuum once a week and mop every two weeks. However, if you have kids or pets, you may need to do it more frequently. It’s important to avoid using too much water when cleaning hardwood floors as this can cause warping and damage over time. Instead, use a cleaner specifically designed for hardwood floors and follow the manufacturer’s instructions carefully.
By keeping up with regular maintenance, you can help prevent future spills and keep your hardwood floors looking their best for years to come.
Conclusion
Well folks, that’s how you clean up a latte spill on hardwood floors! It may seem like a daunting task at first, but with the right tools and techniques, it can be done in no time.
Remember to act quickly to contain the spill and clear the area before applying your cleaning solution. Once you’ve scrubbed away the stain and dried the area thoroughly, inspect it carefully to ensure that there are no lingering marks or damage.
And don’t forget to take preventative measures to avoid future spills! With regular maintenance and care, your hardwood floors will continue to shine for years to come. As they say, an ounce of prevention is worth a pound of cure!

Dorothy is the Editor in Chief of Steam Mop List. She’s dedicated to helping people learn how to clean their homes quickly and easily. Dorothy believes cleaning should be fun and rewarding, so everyone can feel confident in their ability to keep their space spick and span. Dorothy enjoys spending time with her family and friends when she’s not writing or editing articles.
Cleaning
Thinking Outside The Box: Finding And Cleaning Latte Stains In Unexpected Nooks And Crannies
I’m sure we’ve all been there – you’re just sitting there, savoring your latte in peace, and suddenly, a rogue splash escapes from your cup and lands somewhere it absolutely shouldn’t. This could be on your attire, such as your shirt or pants, or maybe even on the tabletop or countertop.
But what do you do when that pesky latte stain finds its way into unexpected nooks and crannies?
Fear not, my fellow coffee lovers! As a self-proclaimed stain removal expert (thanks to my not-so-graceful tendencies), I am here to share with you some unconventional methods for finding and cleaning those stubborn latte stains.
So sit back, grab a fresh cup of joe (or tea if that’s more your style), and let’s dive into the science behind stains and how to tackle them head-on!
Key Takeaways
- Latte stains are oil-soluble and require stronger cleaning agents like oil-based detergents.
- Different fabrics require different techniques for stain removal, such as steam cleaning for delicate fabrics and enzymatic cleaners for tougher fabrics.
- Prevention is key to avoiding stubborn stains, like using spill-proof cups or mugs and acting quickly to blot up spills.
- Innovative technologies and products like nanotechnology and enzyme-based cleaners are changing the way we tackle coffee stains, and eco-friendly options should be considered to reduce environmental impact.
Understanding the Science of Stains
Don’t let those pesky latte stains get the best of you – understanding the science behind them will help you conquer those unexpected nooks and crannies with ease! Stains can be classified into two types: water-soluble and oil-soluble.
Latte stains, being a combination of milk and coffee, fall under the latter category. Oil-soluble stains are generally more difficult to remove as they require stronger cleaning agents.
Chemical reactions play a crucial role in stain removal. When a cleaning agent comes in contact with a stain, it breaks down the chemical bonds between the stain molecules, making it easier to lift off from the surface. However, different types of stains require different types of cleaning agents.
For instance, while water-based detergents work well for removing water-soluble stains like juice or soda, oil-based detergents are needed for oil-soluble stains like latte.
Now that we understand the science behind latte stains and how cleaning agents work on them, let’s move on to identifying common places where these stubborn marks may appear.
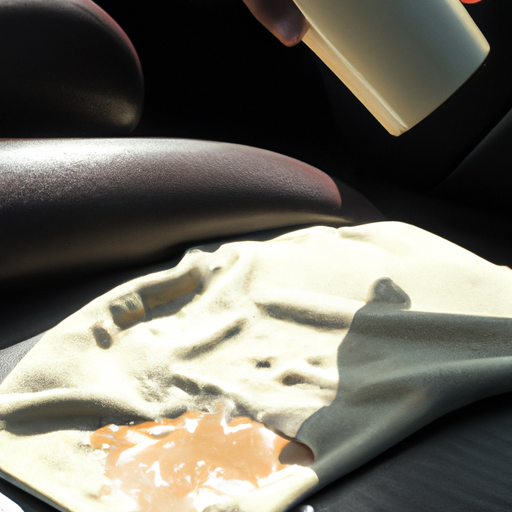
From car seats to office furniture and even clothing items like ties or scarves – latte spills can happen anywhere at any time!
Common Places for Latte Stains
You might be surprised where those foamy, coffee-colored splotches end up – from the depths of your car’s cupholders to the crevices of your favorite backpack. Latte stains have a knack for finding their way onto hidden surfaces and unexpected places. They can sneak into the smallest nooks and crannies, making them difficult to spot and even harder to clean.
Some common areas where latte stains tend to appear include car interiors, purses, laptop bags, and clothing. These are all areas that we use frequently in our daily lives but may not always think to check for staining. It’s important to keep an eye out for any discoloration or stickiness in these areas as it could indicate a stubborn stain has taken hold.
The key is to be diligent when cleaning up spills and stains, taking care to thoroughly inspect all surfaces that may have come into contact with the drink. While some spots may seem obvious, others can be easy to miss at first glance. By being aware of common places for latte stains and giving extra attention to hidden surfaces, you’ll be one step closer to successfully removing those pesky marks without any further damage or frustration.
Speaking of which, let’s move on to discussing tools and supplies for stain removal…
Tools and Supplies for Stain Removal
Equip yourself with the right tools and supplies to tackle those stubborn coffee stains that have taken up residence on your favorite items. Whether you prefer a DIY approach or want to seek professional help, having the proper equipment is essential.
Here are some tools and supplies you’ll need:
- Stain remover: Choose between organic or chemical-based removers depending on your preference. Organic removers are eco-friendly and safe for use around children and pets. Chemical-based ones contain powerful agents that can remove even the most stubborn of stains.
- Cleaning cloths: Microfiber cloths work best as they absorb moisture quickly and don’t leave any lint behind.
- Bristle brush: A soft-bristled brush helps to loosen up dried-on stains without damaging the fabric.
Before starting the stain removal process, it’s important to decide whether to go DIY or seek professional help. If the stain is mild, a DIY approach may suffice; however, complex stains may require expert assistance.
Arming yourself with effective tools and supplies will go a long way in removing latte stains from unexpected nooks and crannies. Once you’ve decided whether to go DIY or hire professionals, gather all necessary equipment before starting the pre-treatment and preparation phase.
Pre-Treatment and Preparation
To effectively remove coffee stains, it’s crucial to begin with pre-treatment and preparation, ensuring the best possible outcome. Before attempting to remove a stain, it’s important to blot up as much of the excess liquid as possible without rubbing or spreading the stain further. This will help prevent the stain from setting in deeper into the fabric.
Next, consider pre-treatment tips that can make a big difference in your success rate. Applying a small amount of dish soap or laundry detergent directly onto the stained area can go a long way in breaking down oils and other substances that make up coffee stains. For stubborn stains, try soaking the item in cold water before washing to help loosen up any remnants of the stain.
Timing is also important when it comes to pre-treatment and preparation. The sooner you can treat a coffee stain, the better chance you have at removing it completely. Waiting too long can cause the stain to set into fibers making it more difficult (if not impossible) to remove later on. By acting quickly and following these simple steps for pre-treatment and preparation, you’ll be well on your way towards successfully removing those pesky latte stains from unexpected nooks and crannies.
Transitioning into our next section about techniques for removing stains, remember that not all fabrics are created equal – some may require specialized care and attention which we’ll cover next.
Techniques for Removing Stains
When it comes to removing coffee stains, using the right technique for each fabric can make all the difference in achieving successful results. For example, when dealing with delicate fabrics like silk or wool, steam cleaning is a gentle yet effective approach. The steam lifts and removes the stain without damaging the fibers. On the other hand, for tougher fabrics like cotton or denim, enzymatic cleaners are more suitable.
Enzymatic cleaners work by breaking down the proteins in coffee stains. These cleaners contain enzymes that target specific types of stains such as coffee or tea. They are particularly useful for removing stubborn stains that have set in over time. Simply apply the cleaner to the stain and let it sit for a few minutes before washing as usual.
To further illustrate which techniques work best on different fabrics, refer to this table:
| Fabric Type | Best Technique |
|---|---|
| Silk | Steam Cleaning |
| Wool | Steam Cleaning |
| Cotton | Enzymatic Cleaners |
| Denim | Enzymatic Cleaners |
Choosing the right technique based on fabric type is crucial in effectively removing latte stains from unexpected nooks and crannies. While steam cleaning works wonders on delicate fabrics like silk and wool, enzymatic cleaners are better suited for tougher materials like cotton and denim. However, if these techniques don’t work on stubborn stains, it’s time to move on to more advanced methods which will be discussed next.
Dealing with Stubborn Stains
Got a stubborn stain that won’t budge? Don’t worry, there are still some tricks up your sleeve!
When it comes to dealing with latte stains in unexpected nooks and crannies, using vinegar is one of the best DIY stain removal hacks you can try. Simply mix equal parts water and white vinegar, apply the solution onto the stained area, and let it sit for a few minutes before wiping it away with a clean cloth. This method works wonders on most surfaces, including upholstery and carpets.
If you’re dealing with an especially tough stain that just won’t come out, consider steam cleaning as another option. Steam cleaning machines use high-pressure steam to penetrate deep into fabrics or surfaces to loosen dirt and stains. While this method may require more effort than using vinegar alone, it’s an effective way to remove even the most stubborn of stains from your home or office.
While these DIY stain removal hacks can work wonders on even the toughest of stains, prevention is always key. To prevent future coffee or latte spills from becoming stubborn stains, consider investing in spill-proof cups or mugs. Additionally, always act quickly when spills occur by blotting them up immediately with a clean cloth or paper towel.
With these tips in mind, you’ll be able to keep your home looking spotless no matter how many lattes you spill!
Preventing Future Stains
You can easily keep your home or office stain-free by investing in spill-proof cups and mugs, which will save you from any unnecessary spills and messes. Not only are spill-proof cups and mugs effective in preventing future stains, but they also promote sustainable solutions and mindful consumption. By choosing to use these products instead of disposable ones, you’re reducing waste and contributing to a more eco-friendly lifestyle.
Another way to prevent future stains is by being mindful of what you consume. Dark-colored beverages like coffee or tea are notorious for leaving unsightly stains on furniture, carpets, and clothing. Opting for lighter-colored beverages like herbal tea or clear juice reduces the likelihood of staining while still providing hydration. Additionally, using coasters or placemats under drinks provides an extra layer of protection against accidental spills.
By implementing these simple yet effective strategies, you’ll be able to maintain a clean and stain-free environment without sacrificing convenience or style. However, accidents happen even with the best preventative measures in place. In the next section, we’ll discuss alternative approaches to stain removal that can help salvage your most cherished possessions when disaster strikes.
Alternative Approaches to Stain Removal
When it comes to removing stubborn stains, I’ve found that there are three main options:
-
Natural and homemade remedies: These include using items like vinegar or lemon juice to break down the stain. Homemade remedies could involve making a paste with baking soda or using hydrogen peroxide.
-
Professional cleaning services: While they can be costly, they may be necessary for particularly tough stains.
-
Innovative technologies and products: New technologies such as enzyme-based cleaners or UV light wands are emerging as innovative ways to remove stains.
Remember to group complete sentences on their own lines, with a double new line after.
Natural and Homemade Remedies
Try using natural and homemade remedies to remove latte stains from unexpected nooks and crannies around your home. Not only are these remedies often more affordable than professional cleaning services, but they can also be gentler on delicate surfaces and better for the environment.
Here are three herbal remedies and DIY solutions to try:
-
Vinegar: Mix equal parts white vinegar and water, then apply the solution to the stained area with a cloth or sponge. Let it sit for 5-10 minutes before rinsing with water.
-
Baking soda: Sprinkle baking soda onto the stain, then add enough water to form a paste. Gently scrub the area with a brush or cloth before wiping away the residue with a damp cloth.
-
Lemon juice: Squeeze fresh lemon juice onto the stain, then let it sit in direct sunlight for several hours. Rinse with cold water.
While natural remedies can be effective, there may be situations where professional cleaning services are necessary. If you’ve tried multiple methods without success or if you’re dealing with an especially stubborn stain, consider seeking help from a professional cleaner who has experience removing coffee and tea stains specifically.
Professional Cleaning Services
If you’re at your wit’s end trying to remove those pesky latte stains, it might be time to call in the professionals. Professional cleaning services offer cost-effective options for removing tough stains and ensuring that your surfaces are thoroughly cleaned.
They have the experience and expertise needed to tackle even the most stubborn of coffee stains, using eco-friendly solutions whenever possible. These services can save you time and effort, allowing you to focus on other important tasks while they work their magic.
Plus, by choosing eco-friendly options, you can rest easy knowing that you’re doing your part to protect the environment. So if you’re tired of struggling with those annoying latte stains, consider reaching out to a professional cleaning service for help.
Looking for more innovative technologies and products? Look no further than our next section where we’ll explore some cutting-edge solutions for removing coffee stains from unexpected nooks and crannies.
Innovative Technologies and Products
By exploring cutting-edge solutions, I’ve discovered a range of emerging innovations that are changing the way we tackle coffee stains. Sustainable solutions are at the forefront of many new products and technologies, which not only benefit the environment but also provide effective cleaning results.
Here are four key examples:
-
Nanotechnology: This innovative approach uses microscopic particles to break down dirt and grime on a molecular level, making it easier to remove stains without harsh chemicals.
-
UV-C light technology: This sustainable solution kills bacteria and viruses by emitting ultraviolet light, providing a chemical-free way to sanitize surfaces.
-
Enzyme-based cleaners: These cleaners use natural enzymes to break down organic matter, such as coffee stains, leaving surfaces clean and fresh.
-
Electrolyzed water: This eco-friendly solution uses water and salt to create a powerful cleaning agent that can effectively remove even tough stains.
By incorporating these cutting-edge solutions into your cleaning routine, you can achieve impressive results while minimizing your environmental impact. However, it’s important to keep in mind safety precautions and best practices when using any new product or technology for cleaning purposes.
Safety Precautions and Best Practices
To ensure your safety while cleaning latte stains from unexpected nooks and crannies, it’s important to follow these best practices and take necessary precautions.
First and foremost, effective ventilation is crucial when working with cleaning products. Make sure the area you’re working in is well-ventilated, either by opening windows or using a fan.
Protective gear should also be worn when handling cleaning products. Gloves and goggles can protect your skin and eyes from harmful chemicals. Additionally, make sure to read the labels on all cleaning products before use to understand any potential hazards.
Proper disposal of used cleaning materials is also important for safety reasons. Make sure to dispose of all materials according to local regulations, which may include using designated hazardous waste bins or taking them to a recycling center. Consider using eco-friendly options when possible to reduce environmental impact as well.
By following these safety precautions and best practices, you can ensure a safe and effective cleanup of latte stains in unexpected places.
Frequently Asked Questions
Can these techniques be used for other types of stains besides latte stains?
When it comes to alternative stain removal methods, there are certainly a variety of options available beyond just tackling latte stains.
While the techniques used for cleaning up coffee spills may not always be applicable to other types of stains, there are still plenty of natural solutions that can help remove stubborn marks from clothing or upholstery.
From using baking soda and vinegar to eliminate tough odors and discoloration to trying out eco-friendly detergents and homemade cleaning solutions, there are pros and cons to each approach.
Of course, commercial stain removers can also be effective in many cases, but they often contain harsh chemicals that may not be ideal for everyone’s needs.
Ultimately, the best method will depend on the type of stain you’re dealing with and your personal preferences when it comes to cleaning products.
What should I do if the stain has already set in?
If a stain has already set in, it can be more difficult to remove. However, there are still options for removing tough stains. You can use vinegar, baking soda, and other home remedies, which can be effective for lighter stains that haven’t fully set in yet. For more stubborn stains that won’t budge, seeking professional cleaning services may be necessary.
Professional cleaners have access to stronger chemicals and specialized equipment that can effectively remove even the toughest of stains without causing damage to the surface being cleaned. It’s always best to act quickly when dealing with a stain to prevent it from setting in too deeply, but if it’s already set in, don’t give up hope – try some at-home remedies first before turning to the professionals.
Are there any natural or eco-friendly stain removal options?
When it comes to removing stains, there are definitely eco-friendly alternatives available. In fact, many DIY stain removers can be made from common household items like baking soda, vinegar, and lemon juice.
For example, a mixture of equal parts white vinegar and water can be used to remove coffee stains on clothing or upholstery. Another option is to mix baking soda with water to form a paste that can be applied directly to the stain before washing as normal.
Additionally, using natural laundry detergents and spot removers can help reduce your environmental impact while still effectively tackling tough stains. It’s important to always do a patch test before applying any new stain remover to ensure it won’t damage the material you’re working with.
How long does the pre-treatment process take?
When it comes to pre-treating stains, the process can vary depending on the type of stain and fabric. However, for latte stains specifically, I’ve found that a fast pre-treatment is key to effective removal.
I typically start by blotting up as much of the spill as possible with a clean cloth or paper towel. Then, I apply a small amount of pre-treatment solution directly onto the stain and let it sit for about 5-10 minutes before washing as usual.
This process usually takes me no more than 15 minutes from start to finish, but it can make all the difference in ensuring that the stain is fully removed without damaging the fabric.
Will these techniques work on delicate fabrics or materials?
When it comes to delicate fabrics, stain removal alternatives are a must. Harsh chemicals and vigorous scrubbing can damage these materials beyond repair. However, there are techniques that can effectively remove stains without causing harm.
For example, using a mixture of vinegar and water to gently blot the stain can be effective on many types of delicate fabrics. Another alternative is using enzyme-based cleaners that break down the stain without damaging the fabric fibers. It’s important to always test any cleaning solution on an inconspicuous area before applying it to the stained area.
With these methods, even delicate fabrics can be treated for stubborn stains with care and effectiveness.
Conclusion
Well, folks, that’s all for now on the topic of removing latte stains from unexpected places. I hope this article’s been informative and helpful in your quest to keep your surroundings clean.
Remember, accidents happen, but with a little bit of knowledge and elbow grease, those pesky stains can be a thing of the past.
In conclusion, it’s essential to understand the science behind stains and common places for latte spills. Proper tools and supplies are necessary for effective stain removal, as well as pre-treatment and preparation techniques.
Stubborn stains may require alternative approaches or professional help. And don’t forget about preventative measures to avoid future spills altogether!
With these tips in mind, you’ll be able to tackle any coffee-related mess with ease and confidence.
Happy cleaning!
Dorothy is the Editor in Chief of Steam Mop List. She’s dedicated to helping people learn how to clean their homes quickly and easily. Dorothy believes cleaning should be fun and rewarding, so everyone can feel confident in their ability to keep their space spick and span. Dorothy enjoys spending time with her family and friends when she’s not writing or editing articles.
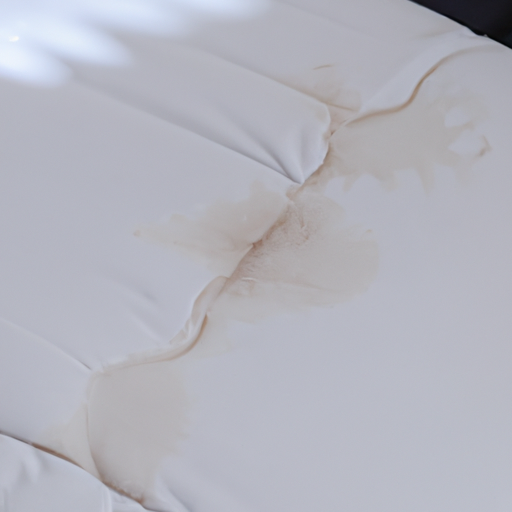
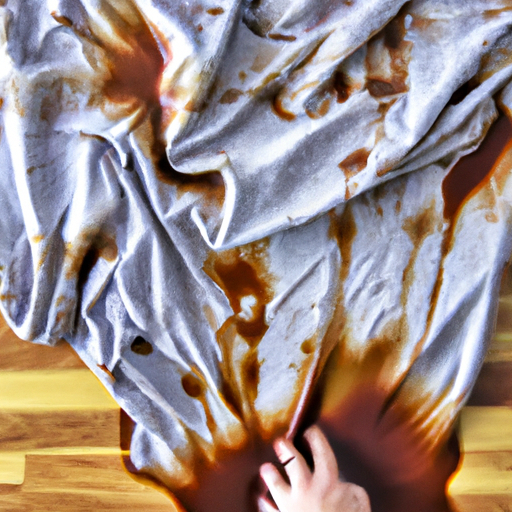
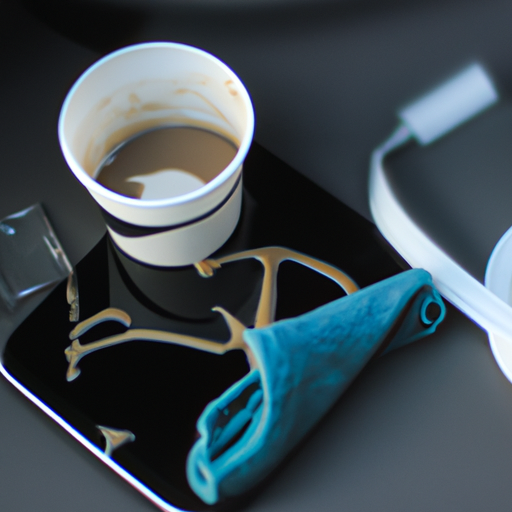
The sensation of being roused from sleep by the enticing aroma of **fresh coffee** felt like living a dream, until that very dream morphed into a nightmare abruptly. Snug and warm in my bed, I was indulging in that initial wonderful sip when, suddenly, my latte chose to plummet directly onto the bed. My heart sank witnessing the feared coffee spill infiltrate the pristine, white linens.
But don’t worry! With a little bit of elbow grease and some professional cleaning products, you can easily remove that stubborn latte spill from your mattress. In this article, I’ll guide you through step-by-step instructions on how to clean a latte spill on a mattress so you can sleep soundly once again without any stains or odors lingering around.
So let’s get started!
Key Takeaways
- Act fast and blot the area with a clean towel.
- Mix 1 tbsp dish soap with 2 cups cold water and dab with a clean cloth.
- Apply enzyme cleaner or vinegar solution and test on inconspicuous area.
- Use baking soda to neutralize any unwanted smells.
Act Fast
You gotta act fast if you spill a latte on your mattress! A quick response is key to preventing the stain from setting in.
Start by blotting the area with a clean towel or paper towel, being careful not to rub it in further. The quicker you can remove as much of the liquid as possible, the better.
Next, try some effective techniques to remove any remaining residue. Mix one tablespoon of dish soap with two cups of cold water and stir until suds form. Dip a clean cloth into the solution and wring it out well before gently dabbing at the stained area. Avoid using too much pressure as this can push the stain deeper into the fibers of your mattress.
Before moving onto other materials, be sure to let any cleaned spots air dry completely. This will prevent mold or mildew from forming inside your mattress due to trapped moisture.
Once dry, gather your materials for a more thorough cleaning process.
Gather Your Materials
Now, don’t go getting your panties in a twist, but it’s time to gather up the things you’ll need for this little mishap. When it comes to cleaning up a latte spill on your mattress, having the right materials is essential. Here are some of the items that you should gather before you get started:
| Materials | Tips |
|---|---|
| Clean towels or paper towels | Blot the spill as soon as possible to prevent it from setting in. |
| Enzyme cleaner or vinegar solution | Use an enzyme cleaner or vinegar solution to break down and neutralize any odors left behind by the spill. |
| Baking soda | Sprinkle baking soda over the affected area to absorb any remaining moisture and deodorize your mattress. |
| Vacuum cleaner | Use a vacuum cleaner with an upholstery attachment to remove any remaining baking soda residue from your mattress. |
Once you have all of your materials gathered, it’s time to start cleaning up that pesky latte spill on your mattress. First, use clean towels or paper towels to blot up as much of the spill as possible. Be sure not to rub or scrub at the stain, as this can cause it to spread and become even more difficult to remove.
Next, mix together an enzyme cleaner or vinegar solution according to the instructions on the label and apply it generously over the stained area using a clean cloth. Allow the solution to sit for 10-15 minutes before blotting it dry with another clean towel.
With these tips in mind, you can effectively clean up a latte spill on your mattress without causing further damage or leaving behind any unpleasant odors. Now that we’ve gathered our materials and prepped our cleaning solution, let’s move onto testing it out before applying it fully onto our mattress surface!
Test the Cleaning Solution
Before diving in, it’s important to make sure the cleaning solution won’t cause any damage by testing it on a small, inconspicuous area of your bedding. Testing effectiveness is crucial to avoid further damage or discoloration.
Here are some tips on how to test the cleaning solution:
- Apply a small amount of the cleaning solution onto an inconspicuous area.
- Gently rub with a white cloth and observe if there are any changes in color or texture.
- Wait for a few minutes before rinsing with water and drying with a clean towel.
- If there are no adverse reactions, you may proceed with applying the cleaning solution to the latte spill.
If you find that the cleaning solution doesn’t work effectively, there are alternative solutions you can try. You may opt for natural cleaners such as vinegar and baking soda, which are effective in removing stains without causing any damage.
Mix equal parts of vinegar and water and spray onto the affected area. Blot gently until all traces of stain are removed. Alternatively, mix baking soda with water until it forms a paste-like consistency then apply onto the stain. Let it sit for 30 minutes before wiping off with a damp cloth.
Now that you have tested your chosen cleaning solution and have alternative options available if needed, it’s time to proceed with applying it onto the latte spill.
Remember to always follow instructions carefully and use professional-grade products when necessary to ensure that your mattress stays clean and fresh-smelling for longer periods of time.
Apply the Cleaning Solution
Now that I’ve tested my cleaning solution, it’s time to apply it to the stain.
I’ll use a spray bottle to evenly distribute the solution onto the affected area of the mattress.
It’s important to make sure that the entire stain is covered with the cleaning solution for best results.
Use a spray bottle
Simply grab a spray bottle and spritz the affected area to effectively clean up the latte spill on your mattress. This method is quick and easy, making it perfect for those who want to get rid of stains without any hassle.
If you don’t have a spray bottle handy, there are other alternatives such as using eco-friendly sprays or even just pouring the cleaning solution onto the stain.
To use a spray bottle, fill it with your preferred cleaning solution and adjust the nozzle setting to ‘spray.’ Hold the bottle about 6 inches away from the stain and spritz until the area is damp but not soaked. Make sure to cover all areas of the stain, including any surrounding spots that may have been affected by spillage.
Once you’ve finished applying the cleaning solution with a spray bottle, move on to applying it directly onto the stain itself. This will ensure that all parts of the mattress are treated evenly for maximum effectiveness in removing stubborn stains.
Apply the solution to the stain
To effectively tackle the stubborn latte stain on your mattress, you’ll want to apply the solution directly onto the affected area with a sense of determination and purpose. Dip a clean cloth or sponge into the cleaning solution and gently dab it onto the stained area. Avoid rubbing too hard as this may cause damage to your mattress.
If you don’t have access to professional cleaning products, there are alternative solutions that you can use instead. For example, mix equal parts of white vinegar and water in a spray bottle and spritz it onto the stain. Then, use a clean cloth or sponge to blot away any excess moisture.
To prevent future spills from ruining your mattress, consider investing in spill-proof bedding or placing a waterproof cover over your mattress.
Now that you have applied the solution to the stain, it’s time to move on to scrubbing it out completely.
Scrub the Stain
Don’t be afraid to put a little elbow grease into scrubbing the stain out of your mattress, it’s easier than you think!
Stain removal techniques vary, but I recommend using a mixture of equal parts water and hydrogen peroxide. To apply, use a soft-bristled brush or sponge to gently scrub the stained area. Be sure not to saturate the mattress with too much liquid.
When scrubbing the stain, it’s important to work from the outside inwards. This prevents the stain from spreading further across your mattress. Additionally, avoid using harsh chemicals or bleach which can damage your mattress and leave behind an unpleasant odor. Instead, opt for gentle cleaning products that are safe for mattresses.
Once you’ve finished scrubbing the stain thoroughly and allowed it to dry completely, move on to rinsing it with cold water as outlined in the next section. Remember that this process may need to be repeated several times before achieving optimal results.
Rinse the Stain
Now it’s time to rinse the stain on your mattress. Grab a clean, damp cloth and gently blot the area to remove any excess moisture.
Be sure not to rub or scrub, as this can further set in the stain.
Use a clean, damp cloth
Start by grabbing a clean, damp cloth and gently blotting the latte spill on your mattress. This will help absorb as much of the liquid as possible before it sets in. Using a back-and-forth motion, press down firmly on the stained area to lift any excess liquid from the fabric. Avoid rubbing or scrubbing too hard, as this can damage the fibers of your mattress and make the stain harder to remove.
If you’re dealing with a particularly stubborn stain, try using a vinegar solution to help break down any remaining residue. Mix one part white vinegar with two parts water in a spray bottle and lightly mist over the affected area. Allow it to sit for 5-10 minutes before blotting again with your damp cloth. This should help neutralize any lingering odors and prevent future stains from setting in. Once you’ve removed as much moisture as possible, move onto the next step of blotting the area to remove excess moisture for best results.
Blot the area to remove excess moisture
You can easily remove excess moisture by gently pressing a dry cloth onto the affected area, allowing it to absorb any remaining liquid. Blotting techniques are crucial at this stage, so make sure you avoid rubbing or scrubbing the spill as this may spread the stain further.
Keep blotting until there’s no more moisture left on the surface of your mattress. To speed up the drying process, try using a fan or opening windows to allow air circulation in the room. Alternatively, you can use a hairdryer set on low heat, but be careful not to get too close to your mattress as excessive heat can damage it.
Remember that drying methods are just as important as blotting techniques in preventing mold and mildew growth.
Now that excess moisture has been removed, let’s move on to how to dry the mattress thoroughly.
Dry the Mattress
First, grab a clean towel and press it firmly onto the wet area of the mattress to absorb as much liquid as possible. Once you’ve removed all the excess moisture, it’s time to dry out the mattress.
The best way to do this is by airing out your mattress in a well-ventilated area or using a fan to speed up the process. If you’re unable to air out your mattress or use a fan, then vacuuming can also work wonders for drying out any remaining moisture.
Simply attach an upholstery attachment onto your vacuum cleaner and gently go over the affected area until it’s completely dry. If there’s still some lingering odor after drying out your mattress, then using baking soda can help neutralize any unwanted smells.
Sprinkle a generous amount of baking soda over the affected area and let it sit for several hours before vacuuming it off. After following these steps, check if there are any residual stains or odors left on your mattress. If necessary, repeat these steps until your mattress is completely clean and fresh-smelling again.
Repeat if Necessary
If any lingering stains or odors persist, don’t worry – simply repeat the steps until your sleeping surface is as fresh and clean as a newly laundered set of sheets. It’s important to thoroughly dry the mattress after each cleaning cycle before moving on to the next one. This will prevent mold and mildew from forming and eliminate any remaining moisture that might attract dust mites.
To ensure maximum effectiveness, consider using professional cleaning products and techniques. A steam cleaner can help remove tough stains and sanitize your mattress without leaving behind any harmful chemicals or residues. Alternatively, you can use an enzymatic cleaner specifically designed for pet urine or other organic spills.
In addition to these repeat tips, it’s important to take preventative measures to avoid future spills and stains on your mattress. Invest in a waterproof mattress protector or pad to shield against accidents caused by sweat, spills, or bodily fluids. Encourage family members or guests to refrain from eating or drinking in bed, especially when consuming hot beverages like coffee or tea. By following these prevention techniques, you can prolong the life of your mattress and enjoy a clean sleeping surface for years to come.
Prevent Future Stains
To prevent any future spills and stains on your mattress, it’s important to take preventive measures. One of the best ways to do this is by investing in a waterproof mattress protector or pad.
This will help protect the mattress from spills, sweat, and other accidents that can cause damage. When choosing a mattress protector or pad, be sure to select one that fits your bed size properly and is made from high-quality materials.
Look for products that are breathable and comfortable while still offering protection against liquids. Additionally, make sure you wash your mattress protector regularly according to the manufacturer’s instructions.
If you do happen to have an accident despite using a mattress protector, be sure to clean it up as soon as possible using professional cleaning products and techniques. Remember: prevention is key when it comes to maintaining the longevity and cleanliness of your mattress.
Taking preventative measures like investing in a quality mattress protector or pad can save you time and money in the long run by avoiding stubborn stains and odors on your bed. However, accidents may still happen so it’s always important to have professional cleaning products on hand just in case.
Final Thoughts
Now that we’ve discussed how to prevent future stains on your mattress, let’s talk about some final thoughts on keeping your mattress in tip-top shape.
One important thing to keep in mind is preventing spills from happening in the first place. This means being mindful of where you place drinks and avoiding eating or drinking in bed altogether. If you do need to have a drink near your bed, consider using spill-proof containers or placing a tray underneath to catch any potential spills.
In addition to preventing spills, it’s also important to practice regular mattress maintenance. This includes rotating and flipping your mattress every few months to ensure even wear and tear, as well as vacuuming it regularly to remove any dust or debris that may accumulate over time. You can also invest in a protective cover for your mattress to help prevent stains and extend its lifespan.
Overall, taking care of your mattress is essential for ensuring a good night’s sleep and prolonging its longevity. By following these simple tips for preventing spills and practicing regular maintenance, you can keep your mattress looking and feeling like new for years to come.
Frequently Asked Questions
What should I do if the stain has already set in?
If the stain has already set in on your mattress, don’t panic. There are still steps you can take to try and remove it.
Prevention tips are always the best course of action, but accidents happen. First, try blotting the stain with a clean cloth to remove as much liquid as possible. Then, mix a solution of equal parts water and vinegar and apply it to the stain using another clean cloth.
Blot the area again and let it dry completely before vacuuming any residue. If this doesn’t work, consider seeking professional cleaning services or investing in specialized cleaning products specifically designed for mattress stains.
Remember to always follow instructions carefully and pay close attention to detail when attempting to remove stains from your mattress.
Can I use bleach to clean the stain?
When it comes to using bleach for cleaning, there are pros and cons to consider. On the one hand, bleach is a powerful disinfectant that can effectively kill germs and bacteria. It’s also great for removing tough stains like coffee or wine.
However, bleach can be harmful if not used properly and can damage certain types of fabrics or surfaces. If you do decide to use bleach, make sure to follow the instructions carefully and use protective gear like gloves and goggles. Additionally, test a small area first before applying it to the entire stain.
Overall, while bleach can be an effective cleaning solution, it’s important to weigh the potential risks before using it on your mattress or other surfaces in your home.
Will the cleaning solution damage my mattress?
When it comes to cleaning a mattress, you want to be cautious about the type of solutions you use. Preventive measures are the best way to avoid any potential damage to your mattress.
Using a protective cover can help prevent spills and stains from seeping into the mattress material. However, if you do end up with a spill, there are alternative cleaning solutions that won’t damage your mattress.
For example, using a mixture of water and vinegar or mild dish soap can effectively clean the stain without causing harm to the mattress fibers. It’s important to follow instructions carefully and avoid using excessive amounts of solution, as this could lead to mold growth inside the mattress.
Overall, taking care when choosing cleaning products and techniques will ensure that your mattress stays in good condition for years to come.
How long will it take for the mattress to dry after cleaning?
When it comes to drying a mattress after cleaning, there are a few things that can help speed up the process.
First, make sure the room is well-ventilated and that you have a fan or dehumidifier running.
You can also use towels to soak up any excess moisture before allowing the mattress to air dry.
If you’re in a hurry, using a hair dryer on low heat can also be effective.
Another way to protect your mattress from spills and stains is by using a mattress protector.
These covers are designed to keep your mattress clean and dry, so you don’t have to worry about accidents causing long-term damage.
Overall, taking care of your mattress requires attention to detail and professional cleaning products and techniques, but with these tips in mind, you can keep your bed looking and feeling its best for years to come.
What if the stain is on a memory foam mattress?
Cleaning memory foam can be a bit tricky, but it’s not impossible. If you’re dealing with a stain on your memory foam mattress, the first thing you should do is blot up as much of the spill as possible with a clean cloth.
Then, mix together equal parts water and white vinegar to create a solution. Dip another clean cloth into the solution and gently dab at the stain until it begins to lift. Be sure not to saturate the memory foam with too much liquid, as this could damage it.
Once you’ve treated the stain with the vinegar solution, allow it to air dry completely before using any additional cleaning products or techniques. Remember that professional cleaning products and techniques may also be helpful in treating stubborn stains on memory foam mattresses.
Conclusion
Well folks, it looks like we’ve reached the end of our journey on how to clean a latte spill on a mattress. I hope you’ve all learned something today because let’s face it, spills happen to the best of us.
Remember, if you want to avoid sleeping in a puddle of your own making, act fast and gather those materials! And don’t forget to test that cleaning solution before applying it willy-nilly.
With these tips and tricks, you’ll be able to scrub away that pesky stain and dry your mattress with ease. Just make sure to prevent future stains by not bringing coffee into bed (or just invest in a sippy cup).
Happy cleaning!
Dorothy is the Editor in Chief of Steam Mop List. She’s dedicated to helping people learn how to clean their homes quickly and easily. Dorothy believes cleaning should be fun and rewarding, so everyone can feel confident in their ability to keep their space spick and span. Dorothy enjoys spending time with her family and friends when she’s not writing or editing articles.
-
 Cleaning5 days ago
How Do You Get Orange Juice Stains Out of Carpet?
-
 Cleaning4 days ago
How To Expertly Clean And Maintain Hardwood Or Wooden Floors After A Latte Spill
-
 Cleaning4 days ago
How To Detect And Effectively Clean Latte Stains In Unconventional Spots
-
 Cleaning4 days ago
How To Safely And Efficiently Remove Latte Stains From Delicate Suede Materials
-
 Beginners Guides6 days ago
Your Easy Starter Guide to Using Natural Cleaning Products
-
 Steam Mop6 days ago
Can You Use a Steam Mop on Vinyl Plank Flooring?
-
 Cleaning4 days ago
Exploring Uncommon Areas Where Latte Spills May Occur And How To Clean Them
-
 Beginners Guides6 days ago
How to Use a Steam Mop to Clean the Floor